Ga door naar hoofdinhoud

Triace A310 Brake Pad Replacement

Wat je nodig hebt

  1. Triace A310 Brake Pad Replacement, Brake Pad: stap 1, afbeelding 1 van 2 Triace A310 Brake Pad Replacement, Brake Pad: stap 1, afbeelding 2 van 2
    • Note: In this repair guide the pictures are taken with the tire removed so that it is easier to follow our steps. However, removing the tire is not necessary to replace the brake pads.

    • Unscrew the brake pad cap with a T25 screwdriver bit.

  2. Triace A310 Brake Pad Replacement: stap 2, afbeelding 1 van 3 Triace A310 Brake Pad Replacement: stap 2, afbeelding 2 van 3 Triace A310 Brake Pad Replacement: stap 2, afbeelding 3 van 3
    • Grab and pull out the spring between the brake pads.

  3. Triace A310 Brake Pad Replacement: stap 3, afbeelding 1 van 3 Triace A310 Brake Pad Replacement: stap 3, afbeelding 2 van 3 Triace A310 Brake Pad Replacement: stap 3, afbeelding 3 van 3
    • Slide out the back brake pad first. Then slide out the front brake pad.

  4. Triace A310 Brake Pad Replacement: stap 4, afbeelding 1 van 2 Triace A310 Brake Pad Replacement: stap 4, afbeelding 2 van 2
    • Slide in the new brake pads with the first going in the front.

  5. Triace A310 Brake Pad Replacement: stap 5, afbeelding 1 van 3 Triace A310 Brake Pad Replacement: stap 5, afbeelding 2 van 3 Triace A310 Brake Pad Replacement: stap 5, afbeelding 3 van 3
    • Then slide in the other pad in the back.

    • Make sure each brake pad is facing the right way.

  6. Triace A310 Brake Pad Replacement: stap 6, afbeelding 1 van 3 Triace A310 Brake Pad Replacement: stap 6, afbeelding 2 van 3 Triace A310 Brake Pad Replacement: stap 6, afbeelding 3 van 3
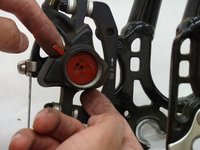
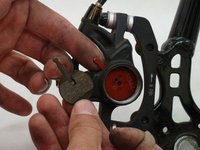
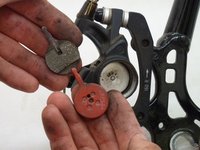
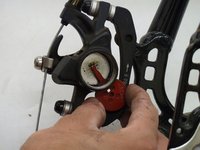
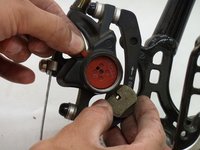
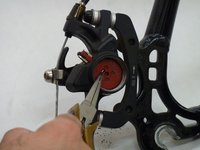
    • Push the spring back into place between the two brake pads so the spring is visible in the hole shown here.

  7. Triace A310 Brake Pad Replacement: stap 7, afbeelding 1 van 2 Triace A310 Brake Pad Replacement: stap 7, afbeelding 2 van 2
    • Screw the brake pad cap back on.

  8. Triace A310 Brake Pad Replacement: stap 8, afbeelding 1 van 1
    • Adjust the red knob as necessary (directions are noted on the knob).

    • Be sure to test your brakes thoroughly in a safe, low-speed environment.

Conclusie

Now your bike should actually be able to stop.

Ben Hartinger

Lid sinds: 01/27/14

340 Reputatie

3 handleidingen geschreven

Team

Cal Poly, Team 1-37, Maness Winter 2014 Lid van Cal Poly, Team 1-37, Maness Winter 2014

CPSU-MANESS-W14S1G37

4 Leden

10 handleidingen geschreven

0 opmerkingen

Voeg opmerking toe

Weergavestatistieken:

Afgelopen 24 uren: 0

Afgelopen 7 dagen: 0

Afgelopen 30 dagen: 1

Altijd: 388