Ga door naar hoofdinhoud

SuperSonic Matrix Mid SC-999 Battery Replacement

Wat je nodig hebt

  1. SuperSonic Matrix Mid SC-999 Battery Replacement, Back Cover: stap 1, afbeelding 1 van 1
    • Wedge the plastic opening tool between the back cover of the device and the front panel.

    • You will hear a snapping sound as the cover is separated from the body of the device.
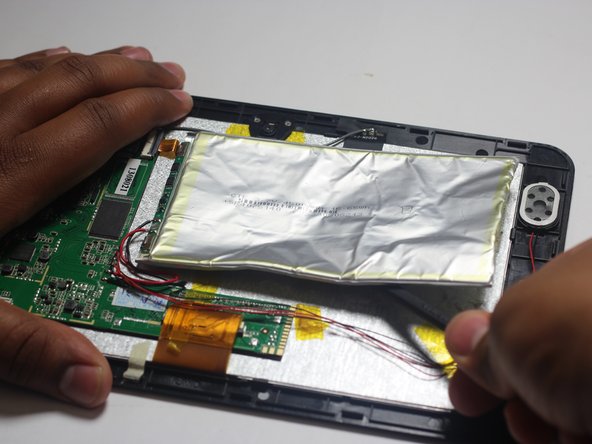
  2. SuperSonic Matrix Mid SC-999 Battery Replacement: stap 2, afbeelding 1 van 1
    • Slide the opening tool along the seam between the front panel and the back cover to un-clip the remaining connections around the device.

    • Again, you will hear a snapping sound as the cover is separated from the body of the device.

  3. SuperSonic Matrix Mid SC-999 Battery Replacement: stap 3, afbeelding 1 van 2 SuperSonic Matrix Mid SC-999 Battery Replacement: stap 3, afbeelding 2 van 2
    • Lift the back cover from the body of the device to expose the internal components.

  4. SuperSonic Matrix Mid SC-999 Battery Replacement, Battery: stap 4, afbeelding 1 van 3 SuperSonic Matrix Mid SC-999 Battery Replacement, Battery: stap 4, afbeelding 2 van 3 SuperSonic Matrix Mid SC-999 Battery Replacement, Battery: stap 4, afbeelding 3 van 3
    • Remove the Battery

    • The battery is secured to the back panel with tape and glue.

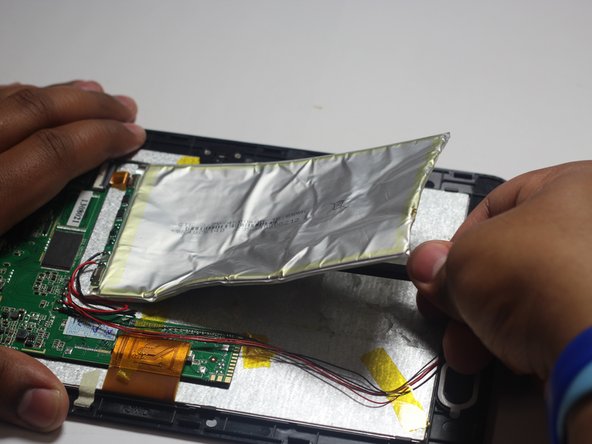
    • Peel back the tape around the battery and discard it.

    • Tear through the adhesive holding the battery by using the spudger tool.

  5. SuperSonic Matrix Mid SC-999 Battery Replacement: stap 5, afbeelding 1 van 3 SuperSonic Matrix Mid SC-999 Battery Replacement: stap 5, afbeelding 2 van 3 SuperSonic Matrix Mid SC-999 Battery Replacement: stap 5, afbeelding 3 van 3
    • Desolder the 2 Battery Wires

    • The Battery has two wires connected to the motherboard (one black and one red).

    • If you're unfamiliar with soldering or desoldering check out this guide.

    • Be sure to wear protective eye wear. The soldering iron will become extremely hot and a potential danger, so make sure you are aware of your surroundings.

Conclusie

To reassemble your device, follow these instructions in reverse order.

2 andere personen hebben deze handleiding voltooid.

Collin Ferguson

Lid sinds: 03/24/15

176 Reputatie

1 Handleiding geschreven

Team

Baylor, Team 6-1, Shaver Spring 2015 Lid van Baylor, Team 6-1, Shaver Spring 2015

BU-SHAVER-S15S6G1

4 Leden

18 handleidingen geschreven

Één opmerking

Link to the soldering technique guide!

Josh Lewis - Antwoord

Voeg opmerking toe

Weergavestatistieken:

Afgelopen 24 uren: 0

Afgelopen 7 dagen: 3

Afgelopen 30 dagen: 8

Altijd: 2,332