Inleiding
If you need to replace the LCD screen on your Sony Xperia XZ2 use this guide. The LCD screen is the most important method of communication between you and your phone. If the screen is damaged or is not working, a screen replacement may be required. For this guide you will need a hair dryer, opening picks, angled tweezers, and a spudger. Opening the phone can be moderately difficult because you need to carefully remove the glue under the phone screen and remove the open the connectors.
Wat je nodig hebt
-
-
-
Weaken the glue that is keeping the screen in place by heating up the edges of the phone with a hair dryer or heat gun.
 Vraag FixBot
-
-
-
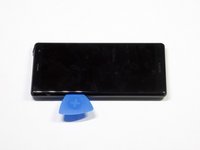
Scrape all the glue from the inside edges by inserting opening picks into the bottom edge of the phone and working your way around the edges.
-
-
-
-
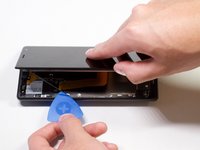
Pry open the phone by inserting an opening pick under one of the edges and removing the screen.
-
-
Gereedschap gebruikt in deze stap:Tweezers$3.99
-
Remove the bracket covering the connector by grabbing one side of the bracket with angled tweezers and gently pulling it off.
-
-




To reassemble your device, follow these instructions in reverse order.
Annuleren: ik heb deze handleiding niet afgemaakt.
9 andere personen hebben deze handleiding voltooid.

Team

Cal Poly, Team S19-G5, White Winter 2019 Lid van Cal Poly, Team S19-G5, White Winter 2019
CPSU-WHITE-W19S19G5
4 Leden
35 handleidingen geschreven
4Gids Commentaar
Worked perfectly fine for my xz2 compact
Hi, someone knows how to glue it back. I read that if I use B-6000 glue it will damage my screen.
Double-sided adhesive should do the trick. For example 2mm Universal 3M Adhesive Tape should be preferred to glue.
The XZ2 Compact has the same screen connector+clip.
My screen came without the upper speaker grille (plastic+fabric). When I tried to remove the glue from the old one the fabric got delaminated from the plastic. Tip: Check if the grille is in place before gluing back!
