Ga door naar hoofdinhoud
Word lid van de reparatiegemeenschap - Account aanmaken

Shop-Vac MC150A Power Cable Replacement

Alleen vereisten
Deze gids is alleen bedoeld voor beginners! Deze gids maakt deel uit van een andere procedure en is niet bedoeld om alleen te worden gebruikt.

Wat je nodig hebt

  1. Shop-Vac MC150A Power Cable Replacement, Unlatch the power unit assembly: stap 1, afbeelding 1 van 1
    • Before you begin, make sure to switch off the device and unplug it from the outlet.

    • Unlatch the two side clips securing the power unit assembly to the tank.

    • Remove the power unit assembly from the tank assembly.

  2. Shop-Vac MC150A Power Cable Replacement, Remove the top cover: stap 2, afbeelding 1 van 2 Shop-Vac MC150A Power Cable Replacement, Remove the top cover: stap 2, afbeelding 2 van 2
    • Use a 3.5 mm hex key to remove the three screws securing the top cover.

    • Remove the top cover.

  3. Shop-Vac MC150A Power Cable Replacement: stap 3, afbeelding 1 van 1
    • Use a 3.5 mm hex key to remove the four screws securing the power unit assembly.

  4. Shop-Vac MC150A Power Cable Replacement: stap 4, afbeelding 1 van 1
    • Separate the power unit assembly from the cover.

  5. Shop-Vac MC150A Power Cable Replacement, Disconnect the switch: stap 5, afbeelding 1 van 3 Shop-Vac MC150A Power Cable Replacement, Disconnect the switch: stap 5, afbeelding 2 van 3 Shop-Vac MC150A Power Cable Replacement, Disconnect the switch: stap 5, afbeelding 3 van 3
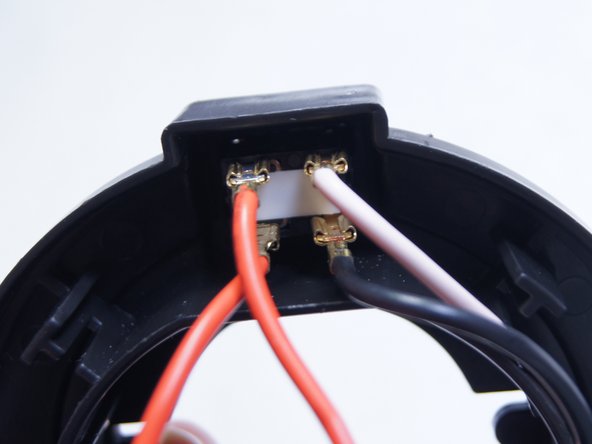
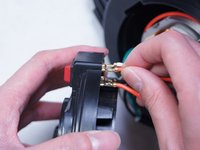
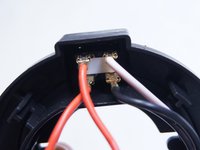
    • Pull out and disconnect the four spade connectors from the switch module.

    • During reassembly, use the last image as a reference for how to connect the wires.

  6. Shop-Vac MC150A Power Cable Replacement, Unscrew the motor bracket: stap 6, afbeelding 1 van 2 Shop-Vac MC150A Power Cable Replacement, Unscrew the motor bracket: stap 6, afbeelding 2 van 2
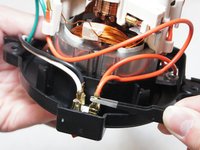
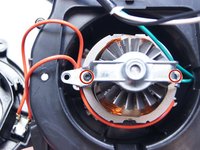
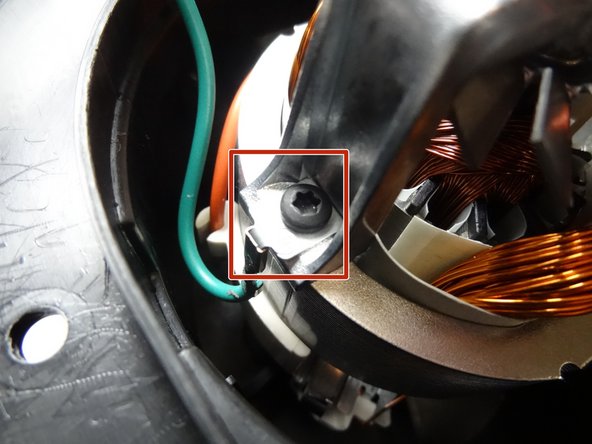
    • Use a Torx T15 driver to unscrew the two screws securing the metal motor bracket.

  7. Shop-Vac MC150A Power Cable Replacement: stap 7, afbeelding 1 van 2 Shop-Vac MC150A Power Cable Replacement: stap 7, afbeelding 2 van 2
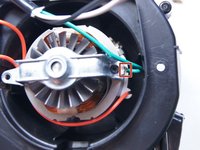
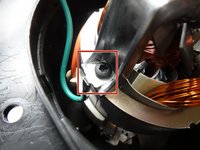
    • During reassembly, be sure to reattach the green ground wire clip to the bracket.

  8. Shop-Vac MC150A Power Cable Replacement: stap 8, afbeelding 1 van 1
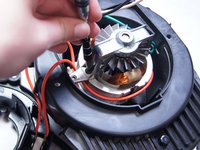
    • Separate the clip from the green wire and transfer it to the replacement motor.

Conclusie

To reassemble your device, follow these instructions in reverse order.

3 andere personen hebben deze handleiding voltooid.

Ngunlian

Lid sinds: 02/08/16

756 Reputatie

5 handleidingen geschreven

Team

IUPUI, Team 1-2, Baechle Spring 2016 Lid van IUPUI, Team 1-2, Baechle Spring 2016

IUPUI-BAECHLE-S16S1G2

5 Leden

13 handleidingen geschreven

1Gids Commentaar

How and where do I order a power cord? Just any power? Or a specific for shop vac.

Jenny Sellman - Antwoord Deel

Voeg opmerking toe

Weergavestatistieken:

Afgelopen 24 uren: 2

Afgelopen 7 dagen: 5

Afgelopen 30 dagen: 19

Altijd: 5,139