Ga door naar hoofdinhoud
Word lid van de reparatiegemeenschap - Account aanmaken

Samsung Galaxy Note 4 Micro-USB Port Daughterboard Replacement

Wat je nodig hebt

  1. Samsung Galaxy Note 4 Micro-USB Port Daughterboard Replacement, Micro-USB Port Daughterboard: stap 1, afbeelding 1 van 3 Samsung Galaxy Note 4 Micro-USB Port Daughterboard Replacement, Micro-USB Port Daughterboard: stap 1, afbeelding 2 van 3 Samsung Galaxy Note 4 Micro-USB Port Daughterboard Replacement, Micro-USB Port Daughterboard: stap 1, afbeelding 3 van 3
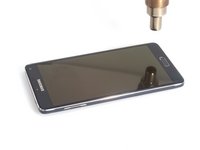
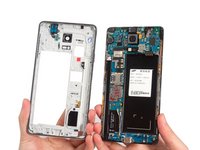
    • Use a fingernail or vinyl spudger to easily remove the back cover of the device. Remove the S-Pen, battery, SIM card and MicroSD card (if present).

  2. Samsung Galaxy Note 4 Micro-USB Port Daughterboard Replacement: stap 2, afbeelding 1 van 3 Samsung Galaxy Note 4 Micro-USB Port Daughterboard Replacement: stap 2, afbeelding 2 van 3 Samsung Galaxy Note 4 Micro-USB Port Daughterboard Replacement: stap 2, afbeelding 3 van 3
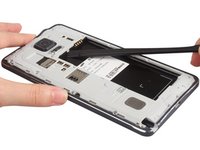
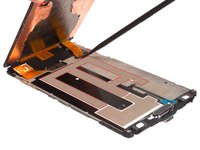
    • Remove the sixteen 4.0 mm Phillips #00 screws securing the midframe to the display assembly.

  3. Samsung Galaxy Note 4 Micro-USB Port Daughterboard Replacement: stap 3, afbeelding 1 van 2 Samsung Galaxy Note 4 Micro-USB Port Daughterboard Replacement: stap 3, afbeelding 2 van 2
    • Heat with a low degree and cut the sticker along the side of touch panel.

  4. Samsung Galaxy Note 4 Micro-USB Port Daughterboard Replacement: stap 4, afbeelding 1 van 3 Samsung Galaxy Note 4 Micro-USB Port Daughterboard Replacement: stap 4, afbeelding 2 van 3 Samsung Galaxy Note 4 Micro-USB Port Daughterboard Replacement: stap 4, afbeelding 3 van 3
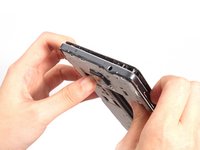
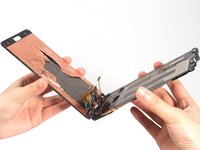
    • Free the clasps along the battery slot. And the push the front assembly out from middle housing with effort.

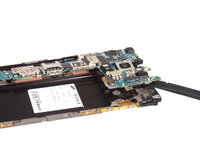
    • We can see the USB board but we can't tear it down directly. Because 1. The USB board flex connector is connecting on the back of the motherboard. 2. If want to remove motherboard, the LCD screen need to be removed at first. 3. The USB board assembly comes with two touch keys together but they are placed under the touch panel.

    • So we have to remove the motherboard and LCD screen at first next.
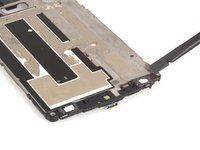
  5. Samsung Galaxy Note 4 Micro-USB Port Daughterboard Replacement: stap 5, afbeelding 1 van 3 Samsung Galaxy Note 4 Micro-USB Port Daughterboard Replacement: stap 5, afbeelding 2 van 3 Samsung Galaxy Note 4 Micro-USB Port Daughterboard Replacement: stap 5, afbeelding 3 van 3
  6. Samsung Galaxy Note 4 Micro-USB Port Daughterboard Replacement: stap 6, afbeelding 1 van 2 Samsung Galaxy Note 4 Micro-USB Port Daughterboard Replacement: stap 6, afbeelding 2 van 2
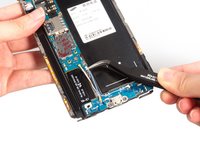
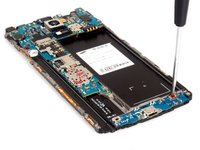
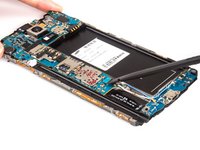
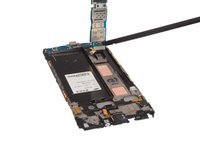
    • Remove two pcs of signal flex cable and two screws which securing USB board and motherboard.

  7. Samsung Galaxy Note 4 Micro-USB Port Daughterboard Replacement: stap 7, afbeelding 1 van 2 Samsung Galaxy Note 4 Micro-USB Port Daughterboard Replacement: stap 7, afbeelding 2 van 2
    • Release all the connectors connecting with motherboard.

  8. Samsung Galaxy Note 4 Micro-USB Port Daughterboard Replacement: stap 8, afbeelding 1 van 2 Samsung Galaxy Note 4 Micro-USB Port Daughterboard Replacement: stap 8, afbeelding 2 van 2
    • Pry up the motherboard and release USB board connector from back.

  9. Samsung Galaxy Note 4 Micro-USB Port Daughterboard Replacement: stap 9, afbeelding 1 van 2 Samsung Galaxy Note 4 Micro-USB Port Daughterboard Replacement: stap 9, afbeelding 2 van 2
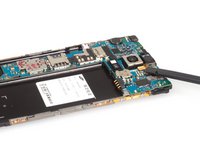
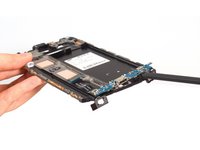
    • Loosen the touch keys from adhesive at first. And then pry up and remove the USB board finally.

    • It's complicated to do Samsung Galaxy Note 4 USB board assembly replacement. We have to replace the LCD screen and motherboard at first, please be careful.

Conclusie

To reassemble your device, follow these instructions in reverse order.

55 andere personen hebben deze handleiding voltooid.

Sophia

Lid sinds: 03/25/14

43.911 Reputatie

62 handleidingen geschreven

9Gids Commentaar

why do you need to take the full LCD off risking it braking. You could just heat the bottom and separate the touch buttons and home button.

Subzero - Antwoord Deel

Does the daughter board handle the touch fuction of the key or the light only?

George - Antwoord Deel

charging port from 910C will be suitable to 910F model? Pls answer

Artsiom Tratsiak - Antwoord Deel

After replacing USB ass'y, my AT&T phone does not recognize the Sim being installed.

Any suggestions?

Dan

Daniel Cameron - Antwoord Deel

I advice anyone going to attempt this to not take the full LCD off or you will be paying out another £140 for a new screen.

Also save your self time don't take the motherboard out.

ICanFixIt - Antwoord Deel

Voeg opmerking toe

Weergavestatistieken:

Afgelopen 24 uren: 5

Afgelopen 7 dagen: 36

Afgelopen 30 dagen: 100

Altijd: 75,109