Ga door naar hoofdinhoud

Rug Doctor Pump Replacement

Wat je nodig hebt

  1. Rug Doctor Pump Replacement, Diagnosis: stap 1, afbeelding 1 van 1
    • Before you begin, determine if the pump(s) require replacement. Fill the reservoir with some water, turn the Rug Doctor on to the carpet mode and press the spray button.

    • For single-pump models (Mighty Pro, X3), if the Rug Doctor does not spray at all, the pump requires replacement.

    • If it sprays inconsistently, check the spray nozzles for clogs first.

    • For the Wide Track model, if the Rug Doctor does not spray at all, both pumps require replacement.

    • If water splashes out of the nozzles for the Wide Track model but does not spray adequately, check the spray nozzles for clogs first.

    • If the nozzles are clear, one of the two pumps may be defective, not supplying sufficient pressure to the nozzles. If possible, replace both pumps.

    • If you need to determine which of the two pumps requires replacement, switch the Rug Doctor on to the upholstery mode. Do not disconnect the quick-connect for accessories. If water splashes out of the nozzles like the carpet mode, replace the front pump.

    • If water does not splash out of the nozzles in accessory mode, replace the rear pump.

  2. Rug Doctor Pump Replacement, Pump: stap 2, afbeelding 1 van 3 Rug Doctor Pump Replacement, Pump: stap 2, afbeelding 2 van 3 Rug Doctor Pump Replacement, Pump: stap 2, afbeelding 3 van 3
    • Before you begin disassembly, make sure that the Rug Doctor is not plugged in and that all reservoirs are empty of liquids.

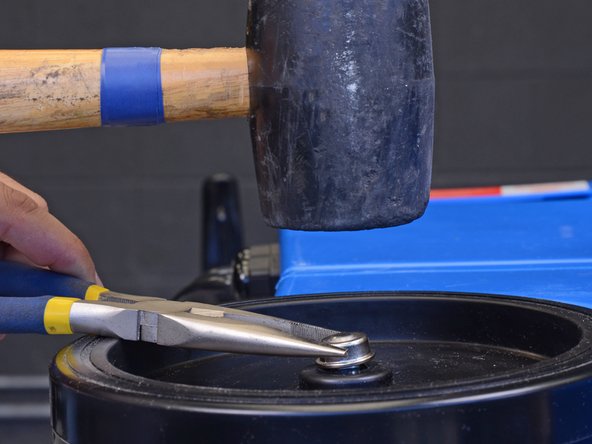
    • Use pliers to grip and wiggle the axle hub cap to loosen it.

    • Pull the axle cap off.

    • If you are having trouble, pry under the cap to loosen it from the axle.

  3. Rug Doctor Pump Replacement: stap 3, afbeelding 1 van 3 Rug Doctor Pump Replacement: stap 3, afbeelding 2 van 3 Rug Doctor Pump Replacement: stap 3, afbeelding 3 van 3
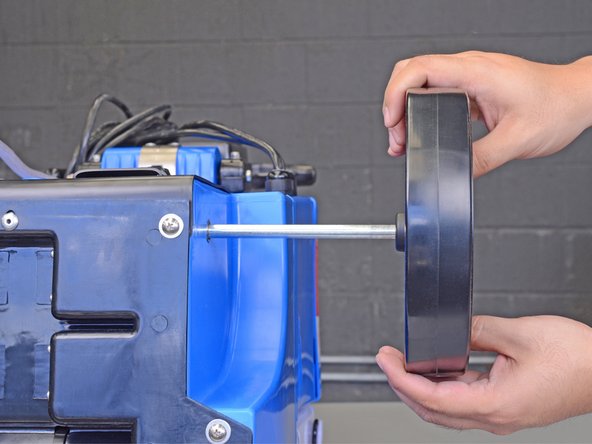
    • Pull the wheel off of the axle.

    • Pull the other wheel with the attached axle out of the body.

    • Re-assembly tip—to reinstall the wheels and axle:

    • Slide the axle and wheels back onto the Rug Doctor.

    • Center a replacement axle hub cap over the exposed axle end.

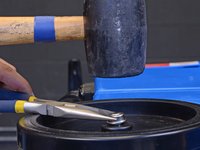
    • Use a mallet to tap the hub cap in place. It should not feel loose on the axle.

  4. Rug Doctor Pump Replacement: stap 4, afbeelding 1 van 1
    • Unclip the clear hose from the back of the Rug Doctor.

  5. Rug Doctor Pump Replacement: stap 5, afbeelding 1 van 1
    • Remove the eight 15.1 mm long Phillips machine screws securing the bottom pan.

  6. Rug Doctor Pump Replacement: stap 6, afbeelding 1 van 1
    • Remove the five 15.1 mm long Phillips machine screws securing the back plate.

    • During re-assembly, over-tightening these screws may crack the plastic plate.

  7. Rug Doctor Pump Replacement: stap 7, afbeelding 1 van 2 Rug Doctor Pump Replacement: stap 7, afbeelding 2 van 2
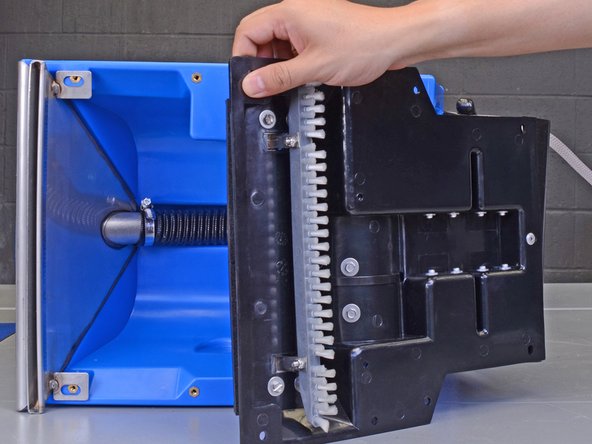
    • Beginning from the bristle end, carefully pull the bottom pan away from the body, to gain access to the pumps.

    • This will loosen the front metal blade. It may be helpful to temporarily reinstall a screw to hold it in place while you work.

  8. Rug Doctor Pump Replacement: stap 8, afbeelding 1 van 2 Rug Doctor Pump Replacement: stap 8, afbeelding 2 van 2
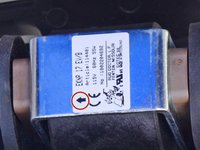
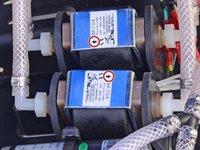
    • Carefully note the pump direction indicated by the arrow on its label. The replacement pump must be installed in the same direction as the original.

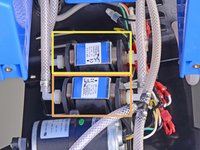
    • If you are working on the Wide Track model, determine which pump(s) you are replacing as well as their direction:

    • The front pump

    • The rear pump

  9. Rug Doctor Pump Replacement: stap 9, afbeelding 1 van 3 Rug Doctor Pump Replacement: stap 9, afbeelding 2 van 3 Rug Doctor Pump Replacement: stap 9, afbeelding 3 van 3
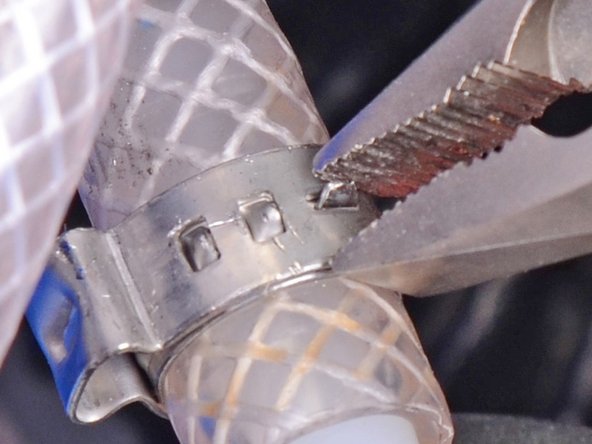
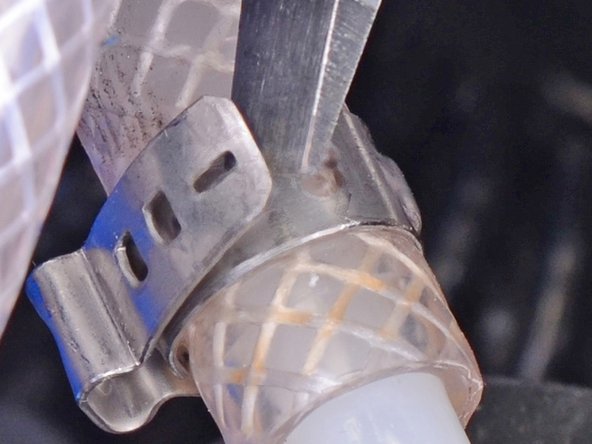
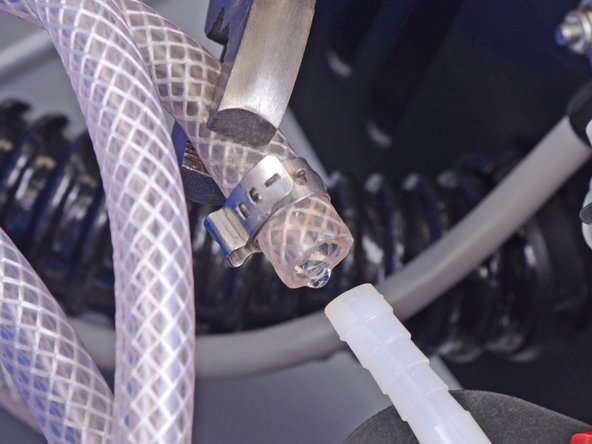
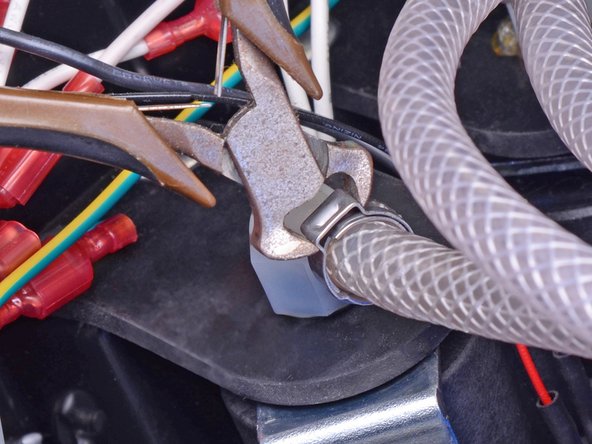
    • Remove the crimped hose clamps securing from each end of the pump you are replacing.

    • You can use a clamp removal tool to cut the clamps.

    • Alternatively, use pliers to unlatch the small retaining tab on the clamp.

    • Pry the clamp apart to loosen it.

    • Use your fingers or pliers to pull the hoses off of the pump nozzles.

    • The hoses will leak liquids when pulled out.

    • This will take significant force. If you are having trouble, heat the hose ends with a hair dryer or heat gun, and try again.

  10. Rug Doctor Pump Replacement: stap 10, afbeelding 1 van 2 Rug Doctor Pump Replacement: stap 10, afbeelding 2 van 2
    • Re-assembly tip—to reinstall the crimp-style hose clamps:

    • Slide the clamp onto the hose, leaving 1/2" of hose at the end.

    • Use hose clamp pliers or straight edge cutters to squeeze and crimp the clamp ears.

  11. Rug Doctor Pump Replacement: stap 11, afbeelding 1 van 3 Rug Doctor Pump Replacement: stap 11, afbeelding 2 van 3 Rug Doctor Pump Replacement: stap 11, afbeelding 3 van 3
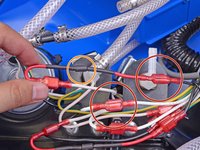
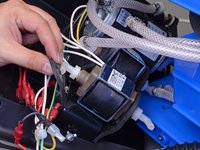
    • Cut the zip ties holding the bundle of wires together.

    • Carefully trace the two wires coming out of the pump you are replacing.

    • The pump wires should connect to a black wire and a white wire.

    • There may be a diode attached in-line on the red wire.

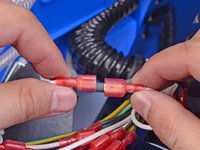
    • Disconnect the pump by pulling the wire terminals apart. This may take significant force. Pull at the terminals, not the wires.

    • If there is an in-line diode, disconnect and remove it. Do not use it with the replacement part.

  12. Rug Doctor Pump Replacement: stap 12, afbeelding 1 van 1
    • Re-assembly tip—when you re-wire the replacement pump, attach the included fusible link to the longer, thicker black wire.

    • Do not use the previous pump's in-line diode.

    • Re-connect the pump's wires to the Rug Doctor's black and white wires.

    • The fusible link should connect to the Rug Doctor's black wire.

  13. Rug Doctor Pump Replacement: stap 13, afbeelding 1 van 3 Rug Doctor Pump Replacement: stap 13, afbeelding 2 van 3 Rug Doctor Pump Replacement: stap 13, afbeelding 3 van 3
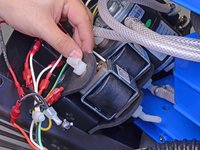
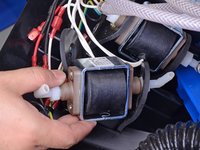
    • Pull the rubber mount away from the pump and slide it over the pump nozzle.

  14. Rug Doctor Pump Replacement: stap 14, afbeelding 1 van 2 Rug Doctor Pump Replacement: stap 14, afbeelding 2 van 2
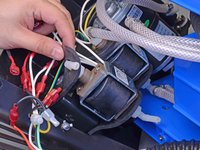
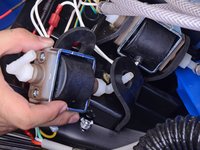
    • Slide the pump out of the rubber mount.

  15. Rug Doctor Pump Replacement: stap 15, afbeelding 1 van 2 Rug Doctor Pump Replacement: stap 15, afbeelding 2 van 2
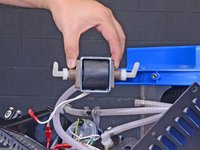
    • Remove the pump.

    • When installing the replacement pump:

    • Remove the orange caps from the nozzles.

    • Make sure that the pump is installed in the correct direction.

    • Check that the nozzles are pointed towards the back of the machine.

    • The replacement pump may not sit as snugly in the rubber mount as the original. This is normal.

Conclusie

To reassemble your device, follow these instructions in reverse order while noting the re-assembly tips.

28 andere personen hebben deze handleiding voltooid.

Arthur Shi

Lid sinds: 01/03/18

247.909 Reputatie

503 handleidingen geschreven

Team

iFixit Lid van iFixit

Staff

135 Leden

16.476 handleidingen geschreven

15 opmerkingen

Fantastic. info!!! Thanks for this. Took me while to find it. Some helpful tips. But the biggest was the fact I had two pumps. I wasn’t 100% sure and I was positive I spotted two with just the back cover off. But needed to be sure before ordering. Thanks !

Robert - Antwoord

I would like to view how to open the housing & replace the pump on the Rug Doctor model DC 1.

Ben Lavadia - Antwoord

My X3 model rug doctor continuously sprays Until it runs out of water doesn't matter if the red button is pressed or not when you turn on the machine, it starts sprain. Any thoughts?

Mike - Antwoord

Hi Mike,

Does it full-on spray, or just leak? It could be that the red button is broken. Look through this guide. You may be able to disconnect the spray button wires through the black cutout. If the Rug Doctor still sprays with the button disconnected, then the problem is elsewhere.

Arthur Shi -

We replaced our pump but still does spray. We have the doctor deep carpet cleaner model with single pump.

Do you know which way for sure the pump nozzles should be facing on our model? Maybe they’re in wrong though we are hundred percent sure it’s in how old one came out.

Jerri Estep - Antwoord

Voeg opmerking toe

Weergavestatistieken:

Afgelopen 24 uren: 11

Afgelopen 7 dagen: 60

Afgelopen 30 dagen: 306

Altijd: 35,150