Inleiding
Als het apparaat helemaal niet aanzet en niet reageert, volg dan deze handleiding om het moederbord (printplaat) van je Retroid Pocket 3 te vervangen. Dit proces duurt ongeveer 20-25 minuten en de benodigde gereedschappen voor dit project staan vermeld in de handleiding.
Wat je nodig hebt
-
-
-
Koppel alle kabels los die verbonden zijn met de Retroid Pocket 3+.
-
Zorg ervoor dat je apparaat voor 5% of minder is opgeladen, aangezien een opgeladen batterij gevaarlijk kan zijn als deze wordt doorboord.
 Vraag FixBot
-
-
-
Verwijder de vier 6 mm schroeven van de achterplaat van het apparaat met een T5 Torx-schroevendraaier.
-
Gebruik een plastic openingsgereedschap of spudger om de achterplaat voorzichtig van het apparaat te wrikken.
-
-
-
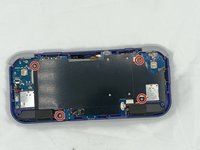
Verwijder de vier 4,5 mm schroeven met een Phillips #00-schroevendraaier.
-
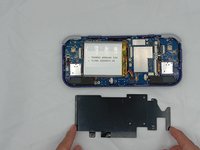
Til de metalen plaat eraf.
-
-
-
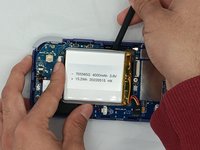
Gebruik een openingsgereedschap van kunststof of een spudger om de (kabel)aansluiting van de accu los te klikken.
-
Til de accu voorzichtig uit de behuizing.
-
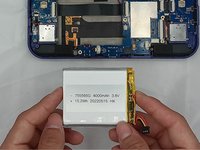
Til de accu op en verwijder deze.
-
-
-
-
-
-
Verwijder de drie 4,5 mm schroeven op het moederbord met een kruiskopschroevendraaier (Phillips #00).
-
-
-
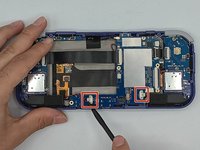
Plaats de punt van de spudger onder de antenneconnector en draai omhoog om de stekker los te klikken.
-
-
-
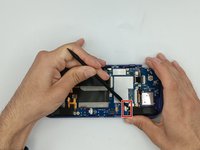
Gebruik een spudger om de twee lintkabels aan de rechterkant los te klikken en te verwijderen.
-
-
-
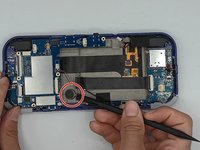
Gebruik een spudger om de twee luidsprekerkabels aan de onderkant van het bord los te koppelen.
-
-
-
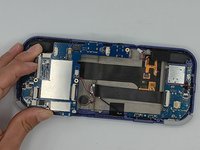
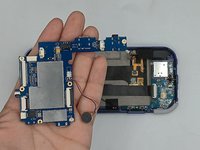
Begin met het optillen van het moederbord om toegang te krijgen tot de trilmotor op de metalen behuizing.
-
Gebruik een spudger om de motor voorzichtig los te wrikken; deze zit vast met dubbelzijdige tape.
-
Til het moederbord voorzichtig uit het apparaat.
-
-


Volg deze instructies in omgekeerde volgorde om je apparaat weer in elkaar te zetten.
Annuleren: ik heb deze handleiding niet afgemaakt.
Één andere persoon heeft deze handleiding voltooid.
Met dank aan deze vertalers:
100%

Translation Bot helpt ons de wereld te repareren! Doe je mee?
Begin met vertalen ›

Team

University of North Texas, Team 4-7, Harold Spring 2024 Lid van University of North Texas, Team 4-7, Harold Spring 2024
UNT-HAROLD-S24S4G7
4 Leden
55 handleidingen geschreven