Inleiding
How to take apart your 2013 Chromebook Pixel to remove the Write Protect Screw. This will allow you to install other operating systems natively.
Wat je nodig hebt
-
-
Flip your Chromebook Pixel over onto its back
-
Using a flat edge screwdriver, gently pull up to remove the rubber pads from the laptop to reveal the screws
 Vraag FixBot
-
-
-
Using a small Philips screwdriver, remove the four screws under the pads
-
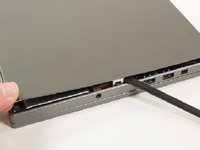
Using a spudger (or another flat but slightly blunt object), gently pry the laptop open
-
You may find it helpful to start with a smaller (skinnier) head and work your way up to a larger size
-
-
-
-
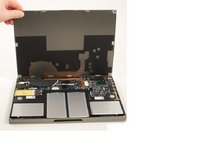
Gently pull up from the front of the laptop and open it up like a clamshell
-
-
-
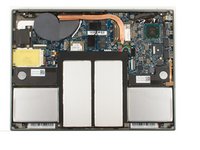
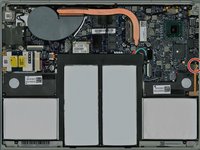
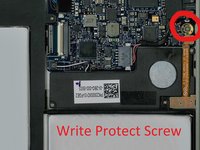
Locate the write protect screw
-
Remove it and you can begin flashing your BIOS!
-


To reassemble your device, follow these instructions in reverse order.
Annuleren: ik heb deze handleiding niet afgemaakt.
16 andere personen hebben deze handleiding voltooid.
4Gids Commentaar
removing this will allow me to boot and install windows?
It will allow you to install Windows to the main hard drive and boot to it, but! As of yet, there’s no way that I’ve found to get the trackpad working in Windows with the Chromebook Pixel.
You will find more information here:
Acer R752TN write protect screw location?