Wat je nodig hebt
-
-
Remove the screws from the bottom, right, and left side of camera.
 Vraag FixBot
-
-
-
Unscrew the right metal bracket of the viewing lens
-
-
-
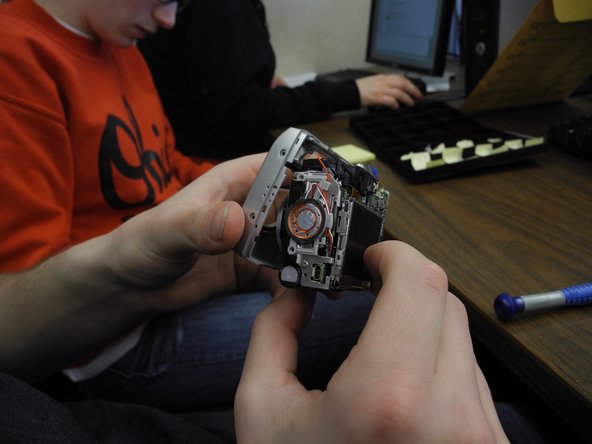
Hello! Today you are going to be learning how to disassemble the front camera of a Nikon Coolpix 5600. You will need a Nikon Coolpix, Ifixit opening tool and a Phillips Screwdriver #00. The first step is to pull the front of the camera off of the mother board. To do this you must pull at each side of front and back on the camera.
-
-
-
-
Next, pull the grey circular facet that sits on the bottom outside of the camera off by using blue Ifixit opening tool. It is okay to use force if needed.
-
-
-
Now take your Phillips #00 screwdriver and unscrew the bottom right corner screw. Once the screw is out just place it on the table.
-
-
-
Finally, take the same Phillips screwdriver and unscrew the top right corner screw. Place the top screw on the table as well. Now you have accurately disassembled the front camera of a Nikon Coolpix 5600.
-
-
-
Unhinge the outer case of the screen from the back of the camera. The screen should still be hanging by wires.
-
-
-
Remove outer case/rim of screen from the back of the camera. The screen should still be hanging by the red wire and white wire.
-
-
-
Pull out the red wire and white wire attaching the screen to the motherboard.
-
-
-
Flip up black lever holding data cable to motherboard, and remove data cable from motherboard.
-


To reassemble your device, follow these instructions in reverse order.
Annuleren: ik heb deze handleiding niet afgemaakt.
Één andere persoon heeft deze handleiding voltooid.
Team

Ohio State, Team 1-2, Buehl Spring 2013 Lid van Ohio State, Team 1-2, Buehl Spring 2013
OSU-BUEHL-S13S1G2
2 Leden
7 handleidingen geschreven