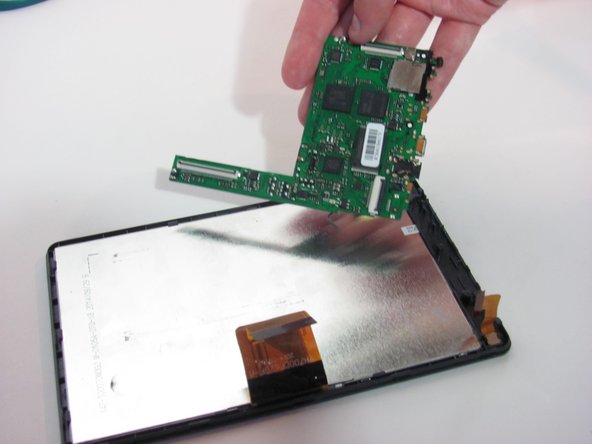
Ga door naar hoofdinhoud

RCA RCT6773W22 Motherboard Replacement

Wat je nodig hebt

  1. RCA RCT6773W22 Motherboard Replacement, Battery: stap 1, afbeelding 1 van 2 RCA RCT6773W22 Motherboard Replacement, Battery: stap 1, afbeelding 2 van 2
    • Remove the two 5mm screws from the bottom of the device using a Phillips #000 screwdriver.

  2. RCA RCT6773W22 Motherboard Replacement: stap 2, afbeelding 1 van 3 RCA RCT6773W22 Motherboard Replacement: stap 2, afbeelding 2 van 3 RCA RCT6773W22 Motherboard Replacement: stap 2, afbeelding 3 van 3
    • Place the plastic opening tool between the case and the screen.

    • Slide the tool clockwise around the case until all the clips are removed.

    • Do not completely separate the case from the screen because there is a wire connecting the motherboard to the speaker.

  3. RCA RCT6773W22 Motherboard Replacement: stap 3, afbeelding 1 van 3 RCA RCT6773W22 Motherboard Replacement: stap 3, afbeelding 2 van 3 RCA RCT6773W22 Motherboard Replacement: stap 3, afbeelding 3 van 3
    • Desolder the two wires that connect the battery to the motherboard.

    • Learn more about soldering with this soldering technique guide.

    • Using the blue plastic opening tool, lift the battery away from the device.

  4. RCA RCT6773W22 Motherboard Replacement, Speaker: stap 4, afbeelding 1 van 3 RCA RCT6773W22 Motherboard Replacement, Speaker: stap 4, afbeelding 2 van 3 RCA RCT6773W22 Motherboard Replacement, Speaker: stap 4, afbeelding 3 van 3
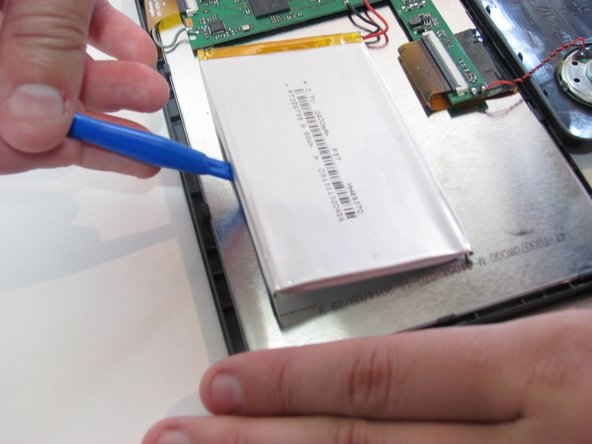
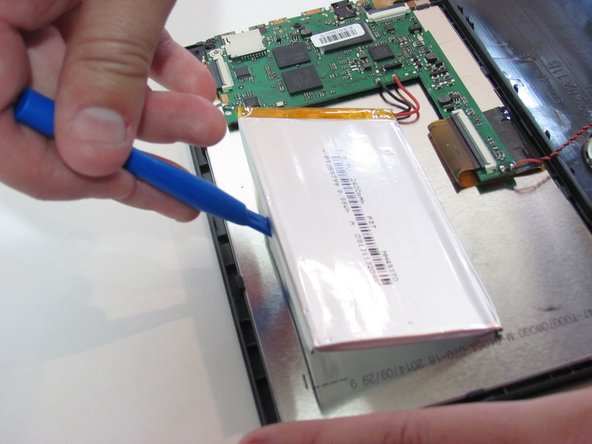
    • Desolder the wire connected from the speaker to the motherboard.

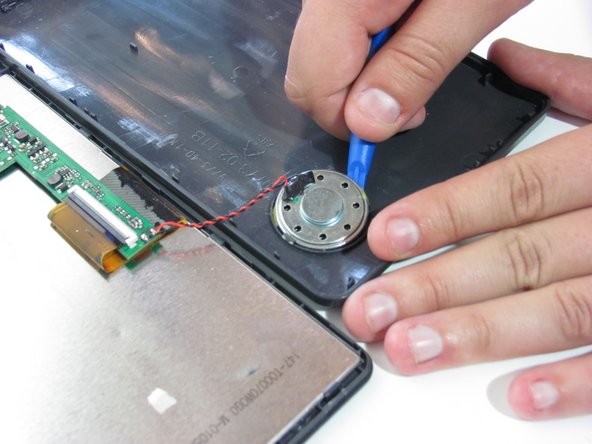
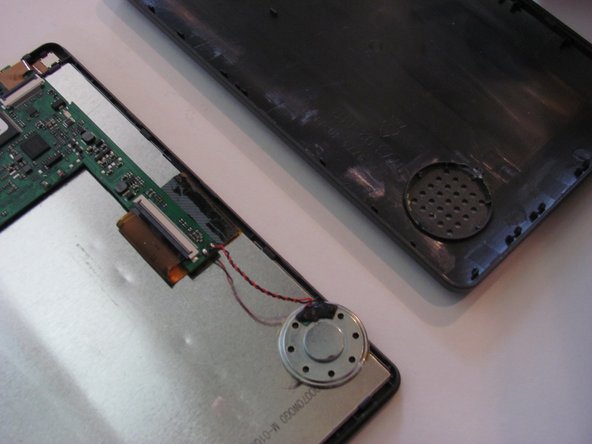
    • Pry the speaker from the casing with a plastic opening tool.

  5. RCA RCT6773W22 Motherboard Replacement, Motherboard: stap 5, afbeelding 1 van 3 RCA RCT6773W22 Motherboard Replacement, Motherboard: stap 5, afbeelding 2 van 3 RCA RCT6773W22 Motherboard Replacement, Motherboard: stap 5, afbeelding 3 van 3
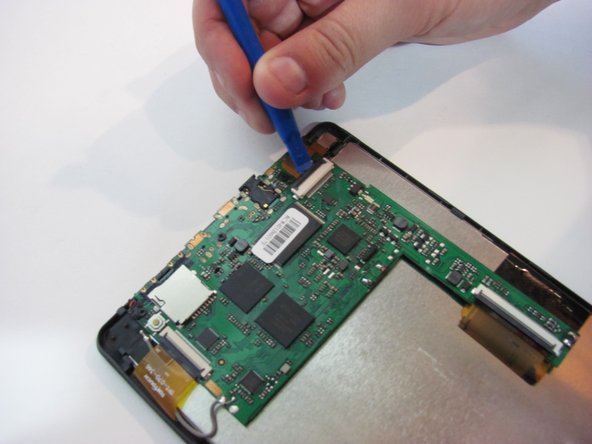
    • Use the spudger to lift up the black tab on all three ZIF connectors.

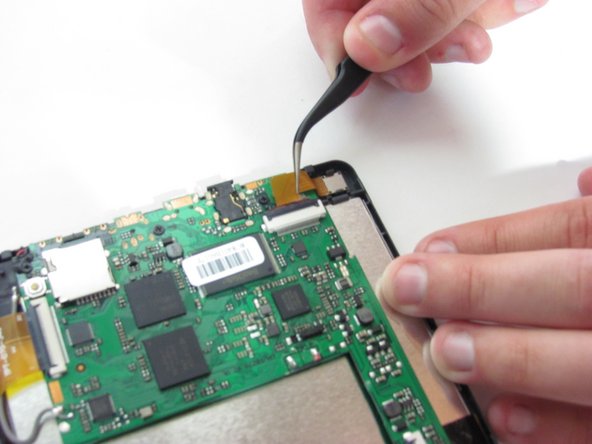
    • Use tweezers to remove the ribbon cables from the zift connectors.

  6. RCA RCT6773W22 Motherboard Replacement: stap 6, afbeelding 1 van 1
    • Use Phillips #000 screwdriver to remove the three 3mm screws on the motherboard.

  7. RCA RCT6773W22 Motherboard Replacement: stap 7, afbeelding 1 van 2 RCA RCT6773W22 Motherboard Replacement: stap 7, afbeelding 2 van 2
    • Use a spudger or plastic opening tool to lift up the motherboard.

Conclusie

To reassemble your device, follow these instructions in reverse order.

6 andere personen hebben deze handleiding voltooid.

Kelsea Weber

Lid sinds: 11/12/15

19.857 Reputatie

32 handleidingen geschreven

Team

iFixit Lid van iFixit

Staff

135 Leden

16.731 handleidingen geschreven

0 opmerkingen

Voeg opmerking toe

Weergavestatistieken:

Afgelopen 24 uren: 1

Afgelopen 7 dagen: 2

Afgelopen 30 dagen: 13

Altijd: 2,964