Ga door naar hoofdinhoud

RAM memory replacement for why! W253EU

Wat je nodig hebt

  1. RAM memory replacement for why! W253EU, Battery from why! Remove W253EU: stap 1, afbeelding 1 van 3 RAM memory replacement for why! W253EU, Battery from why! Remove W253EU: stap 1, afbeelding 2 van 3 RAM memory replacement for why! W253EU, Battery from why! Remove W253EU: stap 1, afbeelding 3 van 3
    • Turn off the computer.

    • Before each operation it is important to start with the removal of the accumulator.

    • Take the slide unlocked into position, remove the battery.

  2. RAM memory replacement for why! W253EU, Access to RAM and CPU from why! W253EU: stap 2, afbeelding 1 van 2 RAM memory replacement for why! W253EU, Access to RAM and CPU from why! W253EU: stap 2, afbeelding 2 van 2
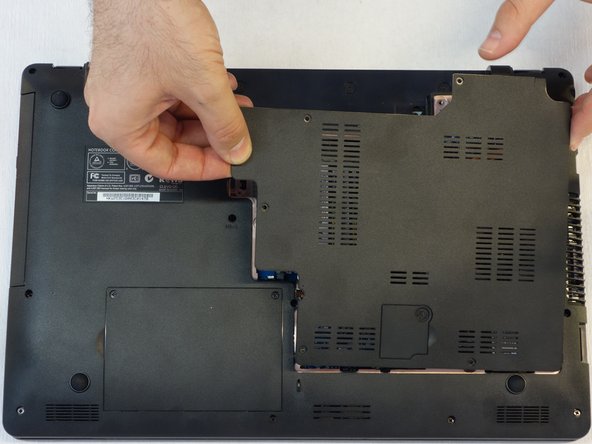
    • Using a Philips #1 screwdriver, unscrew the 5 screws securing the cover.

  3. RAM memory replacement for why! W253EU: stap 3, afbeelding 1 van 3 RAM memory replacement for why! W253EU: stap 3, afbeelding 2 van 3 RAM memory replacement for why! W253EU: stap 3, afbeelding 3 van 3
    • Push the screwdriver a few millimeters under the cover so that it can be touched with your fingers.

    • Now lift the cover carefully.

    • Attention! Disconnect the ventillator cable so that the cover can be completely removed (see next step).

  4. RAM memory replacement for why! W253EU: stap 4, afbeelding 1 van 1
    • Since the ventillator is mounted under the cover, its power supply cable must first be disconnected so that the cover can then be completely removed.

  5. RAM memory replacement for why! W253EU, RAM memory: stap 5, afbeelding 1 van 3 RAM memory replacement for why! W253EU, RAM memory: stap 5, afbeelding 2 van 3 RAM memory replacement for why! W253EU, RAM memory: stap 5, afbeelding 3 van 3
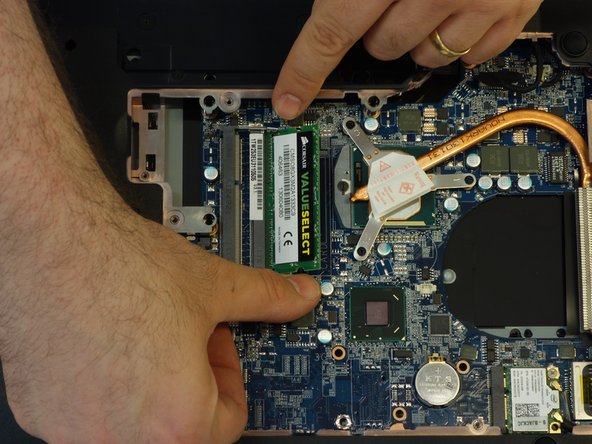
    • Locate the two memory modules.

    • Release the locking spring on both sides of the module.

    • Now lift the module with its connector slightly.

  6. RAM memory replacement for why! W253EU: stap 6, afbeelding 1 van 1
    • Now remove the module from its connector by pulling it out symmetrically to its axis.

    • If necessary, repeat the procedure from the previous step with the second module.

    • Attention: the two memory modules must be identical, mainly in terms of their memory capacity!

Conclusie

To reassemble, follow the instructions in reverse order.

Met dank aan deze vertalers:

de en

100%

oldturkey03 helpt ons de wereld te herstellen! Wil je bijdragen?
Begin met vertalen ›

Felice Suglia

Lid sinds: 06/15/13

30.908 Reputatie

264 handleidingen geschreven

0 opmerkingen

Voeg opmerking toe

Weergavestatistieken:

Afgelopen 24 uren: 3

Afgelopen 7 dagen: 5

Afgelopen 30 dagen: 9

Altijd: 284