Inleiding
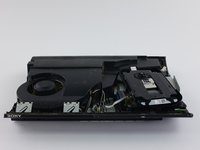
If you are replacing the power supply unit, that means that the device is not reliably receiving power and therefore is not operating properly. Before you begin this guide, make sure that you have the proper tools (as listed below), some free time, and a clean and clutter-free space to work. When following the steps to this guide, be sure to be gentle when applying pressure to different panels or components as they may bend or break easily. Otherwise, take your time and make sure to read the steps carefully as you work through your power supply replacement!
Wat je nodig hebt
-
-
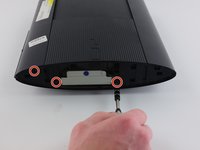
Remove the side HDD bay cover by sliding the panel towards the back of the device.
-
-
-
-
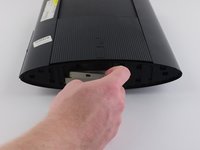
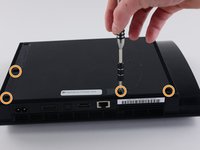
On the top of the device, unlatch the hook on the furthest right beneath the front panel, lift the panel slightly and apply pressure.
-
Unlatch the second right-side hook by sliding a plastic opening tool in the marked area.
-
Slide the panel to the left to unlatch the rest of the hooks.
-
-
-
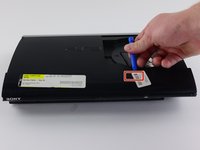
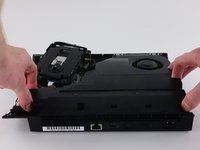
Remove the back panel by pressing down the tab on the right side of the device, and sliding the panel to the left.
This tip and photo made me break this panel lmao there's a button top right of the disk tray you're supposed to push that not a "tab on the right side of the device" the mechanism to unlock the panel safely is in the top right of the inside of the disk tray
You cannot really even see the bottom in this photograph but it is clearly visible in step seven please before trying to remove this panel look at step seven to see the button I have described lol
-
-
-
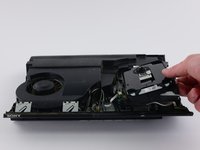
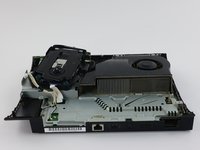
Move the optical drive to the side to reveal one of the silver 8.8mm long screws.
-
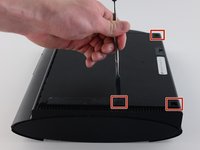
Remove the two silver 8.8mm long screws on either side with a Phillips #1 screwdriver.
be careful, the fiber-optic cables come out easily and are a pain to put back in
-
-
-
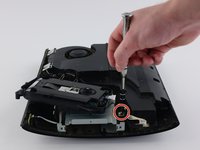
Remove the cable from the plug and remove the wires from the two plastic hooks.
-
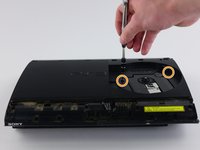
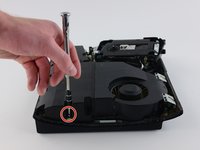
Remove the power supply unit.
The left side of the PSU sits on two long metal prongs so you may need to pull a little to get it lose but you should be able to pull the whole unit in an upward motion
-


Install the replacement power supply unit. To reassemble your device, follow these instructions in reverse order.
Install the replacement power supply unit. To reassemble your device, follow these instructions in reverse order.
Annuleren: ik heb deze handleiding niet afgemaakt.
30 andere personen hebben deze handleiding voltooid.
Team

Cal Poly, Team 34-13, Maness Spring 2016 Lid van Cal Poly, Team 34-13, Maness Spring 2016
CPSU-MANESS-S16S34G13
4 Leden
24 handleidingen geschreven
8 opmerkingen
Perfect how to guide. Fixed my PS3 easily. Thanks
Great guide. However, still no power on PS3. Any suggestions as to what else may be the problem?
Peter Maher, I am in the same boat. I have no idea what the problem is. Red light in standby, but as soon as I try to power on, nothing. Same as before I did this power supply replacement. Obviously, something else is the problem. Anyone who has some insight into this please help!
Did you guys get word on the red light with no power on fix mine has the same issue.
i have the same problem as Peter Maher, the red light is in standby neither turning green on pressing nor it sounds beep on long press. dont know whats wrong. anyone has any solution to this?
thanks for guide - had a blown power unit and this was a useful guide to getting at it so it could be replaced. I couldn’t see a guide for taking the power unit apart so with nothing to lose I opened that up to see what was going on, and could see the charred remains of what I guess was a capacitor. New power unit in there now and working great. thanks
Just wanted to add: the HDD bay cover isn't on the right all the time, it varies with each unit. The side without the rubber PS logo is the bay cover.
Yash - Antwoord
I just wanted to add that the above is not correct either
My PS3 Super Slim Mdel No. CECH-4004A has the removable PS logo rubber seal on the left side while the HDD is housed behind the right side (with no rubber PS logo seal)
Eoin - Antwoord
My p3 just went off it goes on but then it just shut down
Chadley Abrahams - Antwoord