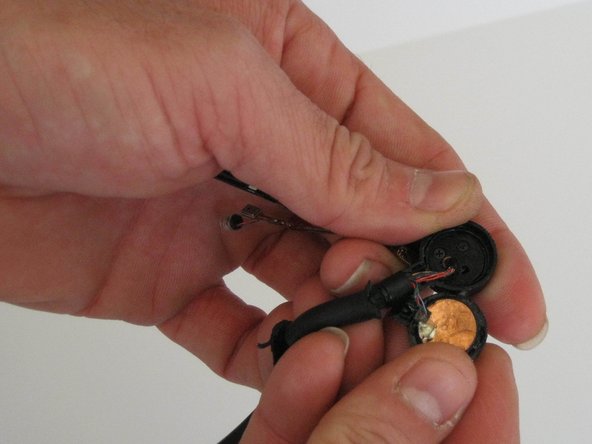
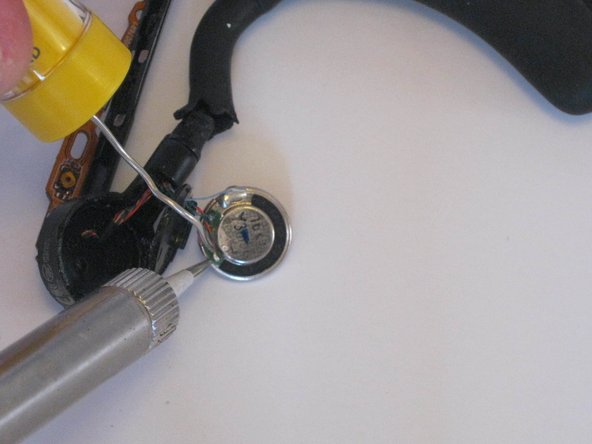
Ga door naar hoofdinhoud

Plantronics Voyager Legend Earpiece Replacement

Wat je nodig hebt

  1. Plantronics Voyager Legend Earpiece Replacement, Earpiece: stap 1, afbeelding 1 van 3 Plantronics Voyager Legend Earpiece Replacement, Earpiece: stap 1, afbeelding 2 van 3 Plantronics Voyager Legend Earpiece Replacement, Earpiece: stap 1, afbeelding 3 van 3
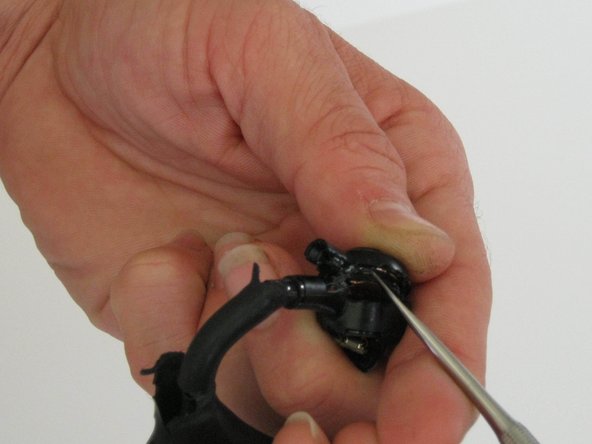
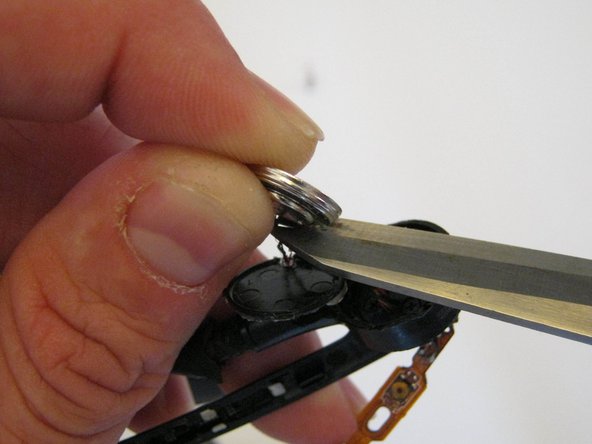
    • Remove the soft, plastic earpiece.

    • Depress the soft, plastic earpiece. While depressed, rotate the earpiece counterclockwise ninety degrees.

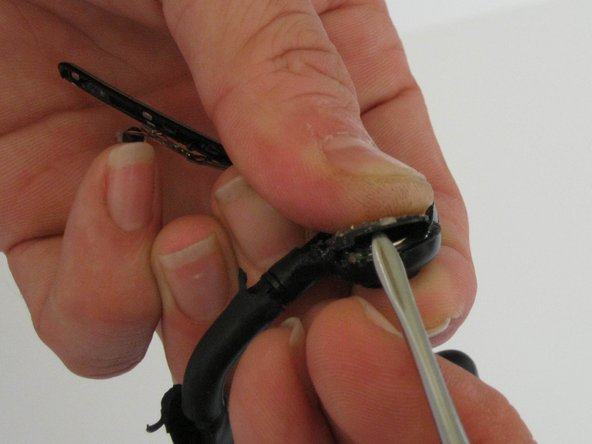
    • List the soft, plastic earpiece out of its position.

  2. Plantronics Voyager Legend Earpiece Replacement: stap 2, afbeelding 1 van 1
    • Heat the earpiece assembly with a heat gun (a hair dryer will work if a heat gun is not available).

    • The heating softens the adhesive that holds the assembly together, and the assembly may need to be reheated to complete the dis-assembly process.

  3. Plantronics Voyager Legend Earpiece Replacement: stap 3, afbeelding 1 van 2 Plantronics Voyager Legend Earpiece Replacement: stap 3, afbeelding 2 van 2
    • The two snaps that combine with the adhesive to hold the assembly together are located in the neck of the earpiece unit.

  4. Plantronics Voyager Legend Earpiece Replacement: stap 4, afbeelding 1 van 2 Plantronics Voyager Legend Earpiece Replacement: stap 4, afbeelding 2 van 2
    • Remove the top half of the earpiece assembly.

    • Use the pointed end of a small, metal Spudger to loosen the two tabs that hold the earpiece assembly together.

    • While glue is soft and snaps are loosened, remove the entire top half of the earpiece housing.

  5. Plantronics Voyager Legend Earpiece Replacement: stap 5, afbeelding 1 van 3 Plantronics Voyager Legend Earpiece Replacement: stap 5, afbeelding 2 van 3 Plantronics Voyager Legend Earpiece Replacement: stap 5, afbeelding 3 van 3
    • Remove the speaker housing.

    • With the copper backing plate displayed, use the pointed end of a small, metal Spudger to disassemble the speaker housing.

    • Using the pointed end of the small, metal Spudger, lift the copper, backing plate away from the speaker unit.

  6. Plantronics Voyager Legend Earpiece Replacement: stap 6, afbeelding 1 van 2 Plantronics Voyager Legend Earpiece Replacement: stap 6, afbeelding 2 van 2
    • Use Precision Tweezers to remove the protective screen from the front of the speaker unit.

  7. Plantronics Voyager Legend Earpiece Replacement: stap 7, afbeelding 1 van 3 Plantronics Voyager Legend Earpiece Replacement: stap 7, afbeelding 2 van 3 Plantronics Voyager Legend Earpiece Replacement: stap 7, afbeelding 3 van 3
    • Remove the speaker unit and solder a new unit in place.

    • When disconnecting leads, always disconnect as near as possible to the component being replaced, to allow room for reattachment.

    • Locate the leads that connect to the back of the speaker unit.

    • Disconnect the leads from the back of the speaker unit.

    • Remove the speaker unit, and replace by soldering the leads back into their correct locations.

    • Refer to the iFixit soldering guide for assistance with soldering.

Conclusie

To reassemble your device, follow these instructions in reverse order.

7 andere personen hebben deze handleiding voltooid.

Lewis Certain

Lid sinds: 09/10/15

2.287 Reputatie

3 handleidingen geschreven

Team

Één opmerking

Thank you for the Guide.

One further Question is open for me: How do you replace the broken rubber near the earpiece?

albert einstein - Antwoord

Voeg opmerking toe

Weergavestatistieken:

Afgelopen 24 uren: 2

Afgelopen 7 dagen: 26

Afgelopen 30 dagen: 102

Altijd: 15,982