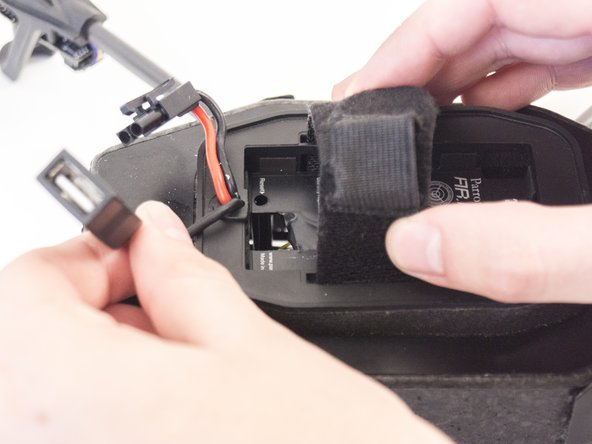
Ga door naar hoofdinhoud

Parrot AR.Drone 2.0 Mainboard and Navigation Board Replacement

Wat je nodig hebt

Video overzicht

  1. Parrot AR.Drone 2.0 Mainboard and Navigation Board Replacement, Mainboard and Navigation Board: stap 1, afbeelding 1 van 1
    • Remove the foam body.

  2. Parrot AR.Drone 2.0 Mainboard and Navigation Board Replacement: stap 2, afbeelding 1 van 2 Parrot AR.Drone 2.0 Mainboard and Navigation Board Replacement: stap 2, afbeelding 2 van 2
    • Disconnect the battery by pulling the two red wires apart.

    • Remove the battery by releasing the battery retaining straps.

  3. Parrot AR.Drone 2.0 Mainboard and Navigation Board Replacement: stap 3, afbeelding 1 van 2 Parrot AR.Drone 2.0 Mainboard and Navigation Board Replacement: stap 3, afbeelding 2 van 2
    • Turn the drone upside down.

    • The cover is held on by plastic tape. Peel off the tape and use a spudger to remove the back cover.

  4. Parrot AR.Drone 2.0 Mainboard and Navigation Board Replacement: stap 4, afbeelding 1 van 3 Parrot AR.Drone 2.0 Mainboard and Navigation Board Replacement: stap 4, afbeelding 2 van 3 Parrot AR.Drone 2.0 Mainboard and Navigation Board Replacement: stap 4, afbeelding 3 van 3
    • Using a spudger, separate the connector for the downward camera.

    • Remove the camera from the body by pulling it off the foam body.

  5. Parrot AR.Drone 2.0 Mainboard and Navigation Board Replacement: stap 5, afbeelding 1 van 2 Parrot AR.Drone 2.0 Mainboard and Navigation Board Replacement: stap 5, afbeelding 2 van 2
    • Use a spudger to release the black retaining clip. Then disconnect the connector to the sensors.

    • Use tweezers to carefully remove the ribbon from the connector.

  6. Parrot AR.Drone 2.0 Mainboard and Navigation Board Replacement: stap 6, afbeelding 1 van 1
    • Remove the four 8mm torx screws with a T6 bit.

    • Remove the four 8mm philips head screws with a PH00 bit.

  7. Parrot AR.Drone 2.0 Mainboard and Navigation Board Replacement: stap 7, afbeelding 1 van 2 Parrot AR.Drone 2.0 Mainboard and Navigation Board Replacement: stap 7, afbeelding 2 van 2
    • Carefully pull the secondary board from the mainboard.

  8. Parrot AR.Drone 2.0 Mainboard and Navigation Board Replacement: stap 8, afbeelding 1 van 3 Parrot AR.Drone 2.0 Mainboard and Navigation Board Replacement: stap 8, afbeelding 2 van 3 Parrot AR.Drone 2.0 Mainboard and Navigation Board Replacement: stap 8, afbeelding 3 van 3
    • Turn the drone right side up

    • Remove the USB connector from the battery retaining straps.

  9. Parrot AR.Drone 2.0 Mainboard and Navigation Board Replacement: stap 9, afbeelding 1 van 1
    • Release the rubber clip holding the USB and battery power cable to the body.

  10. Parrot AR.Drone 2.0 Mainboard and Navigation Board Replacement: stap 10, afbeelding 1 van 2 Parrot AR.Drone 2.0 Mainboard and Navigation Board Replacement: stap 10, afbeelding 2 van 2
    • Avoid using sharp tools near the battery.

    • Push the USB and power cable through the battery panel.

  11. Parrot AR.Drone 2.0 Mainboard and Navigation Board Replacement: stap 11, afbeelding 1 van 2 Parrot AR.Drone 2.0 Mainboard and Navigation Board Replacement: stap 11, afbeelding 2 van 2
    • Turn the drone upside down again.

    • Use a spudger to release the connector and carefully remove the ribbon.

  12. Parrot AR.Drone 2.0 Mainboard and Navigation Board Replacement: stap 12, afbeelding 1 van 2 Parrot AR.Drone 2.0 Mainboard and Navigation Board Replacement: stap 12, afbeelding 2 van 2
    • Lift the mainboard up so that you can access the back.

    • Disconnect the first connector with the white wires using a nylon spudger.

    • Disconnect the second connector with the red and black wires using a spudger.

  13. Parrot AR.Drone 2.0 Mainboard and Navigation Board Replacement: stap 13, afbeelding 1 van 1
    • The mainboard is now fully detached and can be removed.

Conclusie

To reassemble your device, follow these instructions in reverse order.

4 andere personen hebben deze handleiding voltooid.

David Hoyt

Lid sinds: 04/09/10

4.023 Reputatie

43 handleidingen geschreven

Team

Cal Poly, Team 25-89, Amido Spring 2010 Lid van Cal Poly, Team 25-89, Amido Spring 2010

CPSU-AMIDO-S10S25G89

4 Leden

63 handleidingen geschreven

3 opmerkingen

hey man, you make it too easy

ydebancangancity - Antwoord

Hi i am in need of the mainboard. I dnt know where i can buy 1. Any advice

Fugee Maoza - Antwoord

I WISH I knew if this would solve my drone issues. I am a disabled teacher & biologist. I was bought the AR drone 2.0 to help keep me in good spirit as I no longer had the strength 2 hold a dslr steady. My father set everything up and he had 1 successful flight. The second flight my dad again just wanted 2 do a simple flight and it just dropped out of the air from 5 feet into grass. IT HAS NEVER WORKED SINCE :( We tried the local hobby store where

I purchased got no help only wanting 2 sell new drones. We get a message saying "UNKNOWN ERROR" since 2013 or 14 I think i have tried everything that you tube says 2 check. : No broken crossbars, blades,gears etc. Resetting will get rid of warning then will not get more that 1ft off the ground and then goes where it wants once it even held its altitude.

So any help is gr8t. Don't have $ to waist with all medical care

Brett Cihlar - Antwoord

Voeg opmerking toe

Weergavestatistieken:

Afgelopen 24 uren: 1

Afgelopen 7 dagen: 3

Afgelopen 30 dagen: 21

Altijd: 6,699