Wat je nodig hebt
-
-
With the front display of the device facing you, rotate the device 90 degrees counter clockwise.
-
Now rotate the device 180 degrees and remove the second screw.
-
Remove the screw that is on the right side of the panel facing you.
-
Remove all screws with a phillips head screwdriver.
 Vraag FixBot
-
-
-
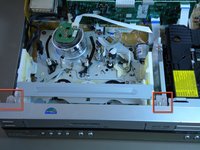
Rotate the device so that the back faces you.
-
Using a phillips head screw driver, locate and remove the two screws highlighted by the red circles in image one.
-
-
-
Before removing cover make sure that the back of the device is facing you.
-
Remove the top cover by bending out on the sides, and pulling the cover towards you while applying upward pressure.
-
-
-
-
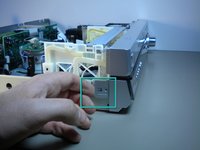
Pull up the two tabs on top
-
Pull the the three tabs on the side. One is on the left, and two are on the right side of the device when it is facing you.
-
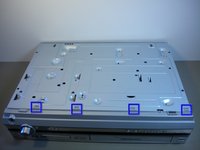
Depress the four tabs on the bottom of the device with a flat head screwdriver.
-
-
-
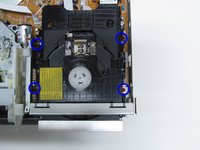
Remove the four screws around the DVD drive with a phillips head screwdriver.
-
-
-
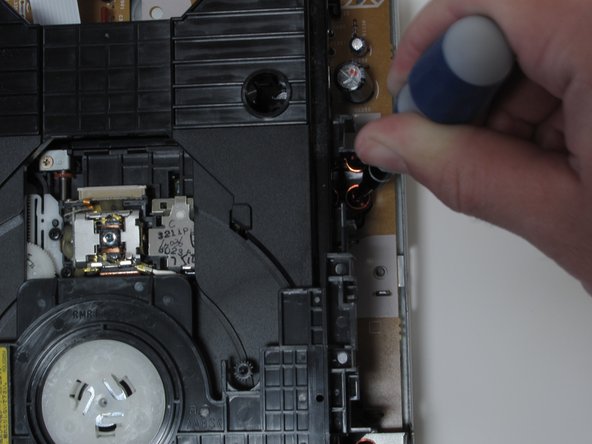
The DVD player is attached to the power supply.
-
Remove the wire attaching it by firmly pulling on the wire until it releases.
-
-
-
Flip the DVD drive so that the bottom is facing you.
-
Pull on the blue ribbon cable until it releases.
-
To place the new DVD drive in just follow these steps in reverse.
-


To reassemble your device, follow these instructions in reverse order.
Annuleren: ik heb deze handleiding niet afgemaakt.
2 andere personen hebben deze handleiding voltooid.

Team

Cal Poly, Team 16-5, Maness Spring 2010 Lid van Cal Poly, Team 16-5, Maness Spring 2010
CPSU-MANESS-S10S16G5
4 Leden
8 handleidingen geschreven