Inleiding
This guide requires careful handling of the inner parts of the camera. One needs a screw driver and spudger tool to open the camera and remove its parts.
Wat je nodig hebt
-
-
-
On the bottom of the camera, use your finger to push the lock button to the open position which will cause the hinged door to swing open.
 Vraag FixBot
-
-
-
Push the small black tab that holds the battery with your finger to release the battery.
-
Use your fingers to pull the battery out of the camera.
-
-
-
-
-
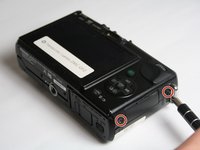
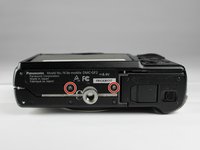
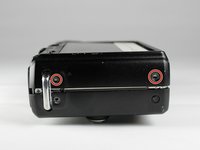
Using a Phillips #00 screwdriver, remove six 2.69mm, silver screws located on the two short sides of the camera and the bottom side.
-
-
-
Gently lift up the back cover to access the ZIF connectors for the blue and yellow ribbons.
-
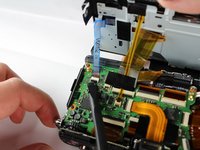
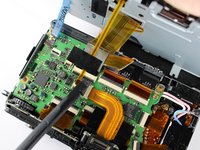
To unlock the ZIF connectors, gently push the black portion of the lock from a flat position to an upright position using a spudger.
-
-
-
-
Gently push the blue and yellow ribbons out of the unlocked ZIF connectors using your fingers.
-
-
-
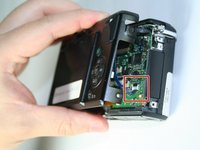
Using a Phillips #00 screwdriver, remove the 3.5 mm silver screw from the upper left hand corner of the back cover.
-
-
-
Using a spudger, lift up and remove the plastic cover piece from the back cover.
-
-
-
Using a Phillips #00 screwdriver, remove the 2.69 mm silver screw located beneath the plastic piece that was previously removed.
-
-
-
Using a spudger, lift up and separate the heavier metal cover from the light, plastic back cover.
-
-
-
-
-
Using your fingers, push down on the small, metal hooks that are a part of the metal cover and attach on top of the LCD screen.
-
-
-
Using your fingers, remove the LCD screen from the metal cover. This may require some back and forth movements of the LCD screen until it detaches completely from the bottom hooks.
-
-






To reassemble your device, follow these instructions in reverse order.
Annuleren: ik heb deze handleiding niet afgemaakt.
6 andere personen hebben deze handleiding voltooid.

Team

Baylor, Team 5-9, Williams Fall 2016 Lid van Baylor, Team 5-9, Williams Fall 2016
BU-WILLIAMS-F16S5G9
3 Leden
11 handleidingen geschreven
3Gids Commentaar
In Step 3 above, you definitely need to remove the hot shoe cover, and the 4 screws underneath that in order to remove the back of the camera safely! If you don’t, the back cover only comes off with excessive force and then causes damage to the portion of the bracket holding it in place beneath the hot shoe - trust me, I know from experience.
after removing the hot shoe cover i cannot see the screws you are talking about. I have undone the 6 screws mentioned in the guide, but the back of the camera still does not want to come off. I don't want to force it, but i can't see any more screws holding it in. can anyone help?
i found the screws, they are hidden under a small metal spring/plate in the hot shoe. this plate need to be levered out with a small screwdriver, it then slides back from the body revealing the four screws. to undo the back cover remove the back two screws, the other two hold on the front cover. service manual for this camera can be found here - https://www.manualslib.com/download/2482... procedure is pictured on page 34
