Wat je nodig hebt
-
-
-
Remove the SIM tray.
-
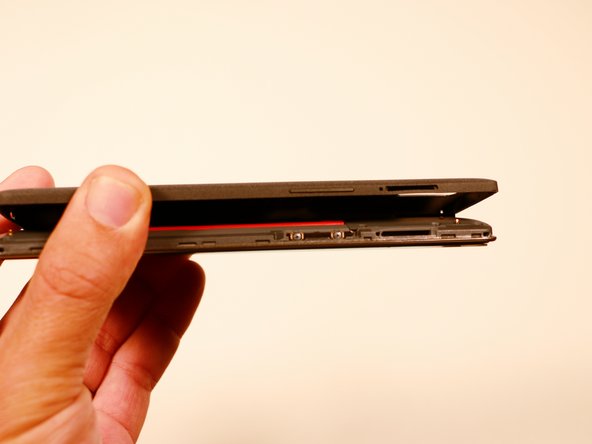
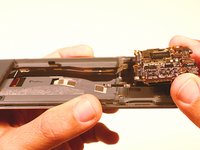
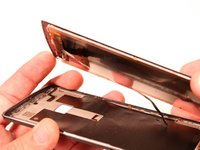
Using a plastic opening tool, carefully separate the back panel from the main body assembly of the phone. Be extra careful around the SIM slot or other weak areas.
-
You may encounter some resistance due to hidden locking clips around the inside edge of the phone. Not to worry; just move in one consistent direction around the phone as opposed to jumping from spot to spot!
-
Top to bottom, left to right, clockwise or counter clockwise, once we make it about half way around the device, the panel is easily removable by hand.
 Vraag FixBot
-
-
Gereedschap gebruikt in deze stap:Tweezers$4.99
-
Using a pair of tweezers, remove the plastic plugs.
-
Once the hidden screws are revealed, use a PH #00 screwdriver to remove the three 3.175mm screws.
-
Use the PH #00 screwdriver to remove the remaining six 3.175 screws.
-
-
-
Using a plastic opening tool, gently pry up the black plastic cover and remove it from the device.
-
-
-
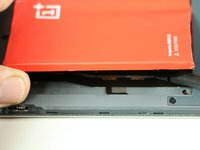
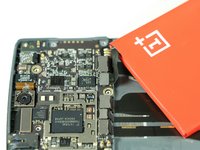
After we have removed the motherboard cover, we notice that the battery is intact and has a black ribbon attached to it, which is mounted on the logic board.
-
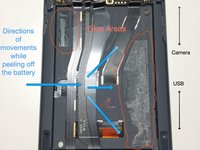
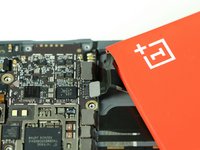
Using the spudger, carefully begin to lift the the battery up from the side opposite the ribbon. Be aware that there is high-grade adhesive holding the battery in its bay, so proceed with caution.
-
-
-
-
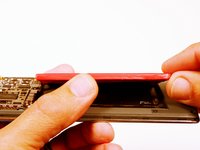
Once the battery has been freed, we use the ever handy black spudger to pry up and free the battery ribbon from its dock.
-
-
-
-
-
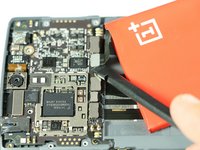
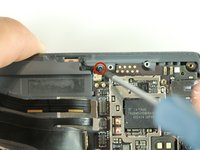
After the battery has been removed, use the spudger to disconnect the remaining ribbons.
-
Notice that there are two side ribbons, one on each side (volume up/down and power), and a top ribbon as well as those from the battery compartment.
-
-
-
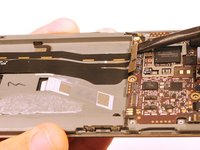
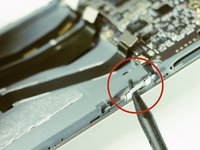
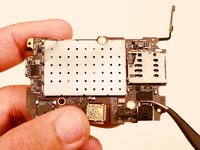
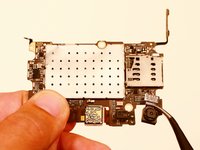
After removal of the ribbons, there is one final screw. Once you have removed this, the motherboard easily pries out with spudger.
-
This is the only screw that differs in size. This screw is a philips 00, 3.00 mm. in length.
-
-
Gereedschap gebruikt in deze stap:Tweezers$3.99
-
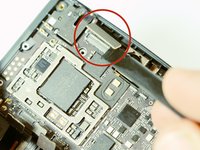
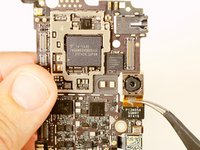
Once the motherboard has been removed simply pry off the rear facing camera with a spudger or angled tweezers.
-
-
-
-
Gereedschap gebruikt in deze stap:Tweezers$3.99
-
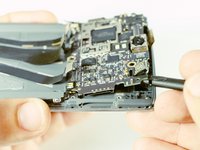
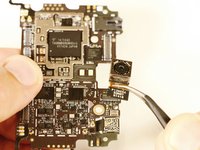
Once the motherboard has been removed simply pry the front facing camera off of its connector with a spudger or angled tweezers.
-
-
-
-
Gereedschap gebruikt in deze stap:iOpener$24.95
-
After the motherboard and and other connected parts have been disconnected, apply heat to the screen/panel of the phone
-
We used an iOpener for this guide, but you can also use a heat gun or hairdryer for this step.
-
-
-
After heat has been applied use an opening pick to pry the screen away from the frame. Although a blue opening tool is preferred, you can use a guitar pick as well or similar hard plastic tool.
-
Now simply lift the screen away from the body of the phone and separate.
-
Watch it! There is i tiny frame to position the display. It is located on roundabout half the thickness of the display you see. Place the tool there to pry open or you will have to glue the positioning frame onto the phone first and then glue the display to the frame.
-
-


To reassemble your device, follow these instructions in reverse order.
Annuleren: ik heb deze handleiding niet afgemaakt.
102 andere personen hebben deze handleiding voltooid.
Team

USF Tampa, Team 3-3, Brown Fall 2014 Lid van USF Tampa, Team 3-3, Brown Fall 2014
USFT-BROWN-F14S3G3
3 Leden
40 handleidingen geschreven
22Gids Commentaar
This was actually a lot easier than the guide makes it sound. I would suggest adding that you will need 1mm two sided foam tape to hold the screen in place.
0.o i did not know i'll need foam tape too. thanks a ton for suggestion.. i wld have just startef without tape to end up with a loose phone
Hello
Thanks a lot for this guide.
I bought the lcd assembly from ebay and tried replacing it. But there is very thin plastic ring around the assembly which on removal is bent and seems non reusable. Now the new assembly I have bought doesnot have the plastic ring around it. How to make sure that this ring is not bent or damaged ..? I hope you are able to understand my point..:) The new replacement assembly doesnot have that thin plastic copper type ring. While removing old assembly, it comes along. Am I missing on anything ..? Thanks in advance for help
I encountered the same issue. I actually removed the entire plastic frame with the old LCD. I had to gently remove it from the lcd, clean out the glue on it from both sides and on the phone body where it sits. try to straighten it out by bending it. After that I added dual sided tape on the phone body and added the frame on to it. and then only did I manage to put more dual sided tape on the upper side in order to glue the LCD onto it. I don't feel 100% comofortable with this solution so I recommend getting a case that will cover the sides of the lcd to prevent it from falling out in case the phone falls.
If you are wondering why the phone keeps dropping your cellular network connection, check if you forgot to reconnect either or both ends of the antenna cable. One is on the bottom side of the motherboard, lower right corner and the other is on the lower right corner of the phone casing.