Deze versie kan foutieve bewerkingen bevatten. Schakel over naar de recentste gecontroleerde momentopname.
Wat je nodig hebt
-
Deze stap is niet vertaald. Help het te vertalen
-
Remove all the screws using your Phillips #00 holding the back plate in place. This includes:
-
On the Back: Unscrew the 4mm screw to the right of the viewfinder.
-
On the Bottom:
-
Unscrew the 3mm screw in the top left corner.
-
Unscrew the four 3mm screws under the battery cover.
-
On the Right Side: Unscrew the one 3mm screw holding the right-side panel.
-
On the Left Side: Unscrew the two 2mm screws holding the left-side panel.
-
-
-
Deze stap is niet vertaald. Help het te vertalen
-
After you remove the back cover:
-
Gently pull the two ribbon cables out of their sockets.
-
Gently disconnect the white cable.
-
-
Deze stap is niet vertaald. Help het te vertalen
-
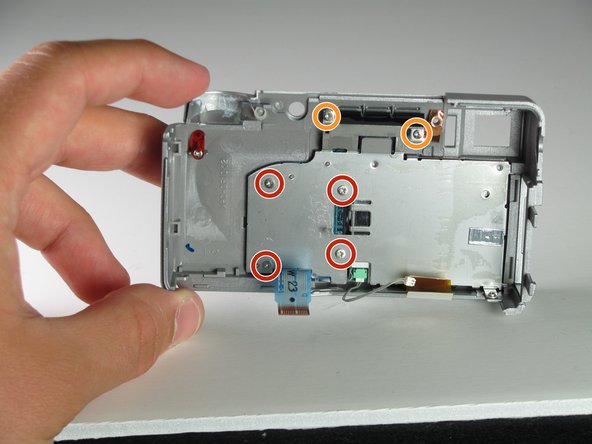
Peel the black tape off the back of the LCD.
-
Using the Phillips #00 remove the four 3mm screws on the LCD bracket.
-
Remove the two 2mm screws from the top of the bracket.
-
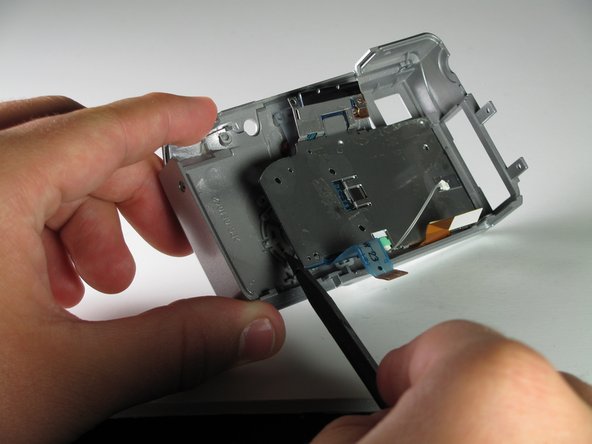
Use a spudger to pop the LCD screen out of the camera’s backplate.
-


Annuleren: ik heb deze handleiding niet afgemaakt.
2 andere personen hebben deze handleiding voltooid.
Team

Cal Poly, Team 12-33, Maness Spring 2011 Lid van Cal Poly, Team 12-33, Maness Spring 2011
CPSU-MANESS-S11S12G33
3 Leden
7 handleidingen geschreven