Inleiding
This guide shows how to replace the Nook HD+ volume and power button housings in 4 easy to understand steps. The tools needed to replace this piece of the Nook HD+ are the plastic opening tool, a T5 screwdriver, and tweezers.
No hazards are present in this guide, but be mindful of how rough the motherboard and ribbons are treated.
Wat je nodig hebt
-
-
Open the plastic frame by wedging the plastic iFixit opening tool under the plastic frame to remove adhesive.
-
Pop up all plastic tabs that secure the frame to the chassis.
 Vraag FixBot
-
-
-
Remove twenty 5.0 mm Torx T5 screws that hold the chassis to the back casing.
-
Disconnect battery from motherboard.
-
Remove back casing.
-
-
-
Gereedschap gebruikt in deze stap:Tweezers$4.99
-
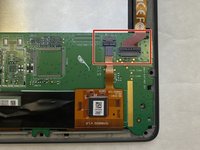
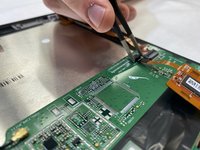
Disconnect both ribbons from the motherboard by pulling up on the dark grey flaps and pulling out the ribbons.
-
Use tweezers to lift the flaps.
-
-
-
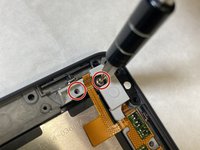
Remove three 5.0 mm Torx T5 screws that secure buttons to chassis.
-
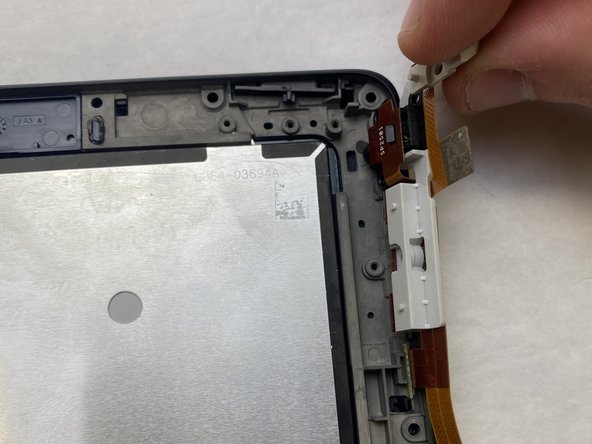
Slide button assembly up and out of the chassis.
-


To reassemble your device, follow these instructions in reverse order.

Team

IUPUI, Team 3-3, Harley Spring 2022 Lid van IUPUI, Team 3-3, Harley Spring 2022
IUPUI-HARLEY-S22S3G3
3 Leden
3 handleidingen geschreven