Ga door naar hoofdinhoud
Word lid van de reparatiegemeenschap - Account aanmaken

Nintendo Wii Bluetooth Board Replacement

Wat je nodig hebt

  1. Nintendo Wii Bluetooth Board Replacement, Faceplate: stap 1, afbeelding 1 van 2 Nintendo Wii Bluetooth Board Replacement, Faceplate: stap 1, afbeelding 2 van 2
    • Use a metal spudger to remove the white plastic screw covers stuck to the lower case near the front of the Wii.

    Vraag FixBot
  2. Nintendo Wii Bluetooth Board Replacement: stap 2, afbeelding 1 van 1
    • Remove the two 8.3 mm Tri-Point screws hidden under the covers you just removed.

    Vraag FixBot
  3. Nintendo Wii Bluetooth Board Replacement: stap 3, afbeelding 1 van 1
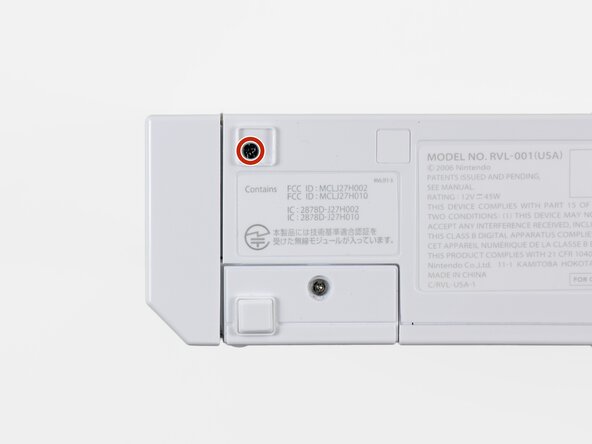
    • Remove the single 5.9 mm Phillips screw under the controller port door nearest the faceplate.

    Vraag FixBot
  4. Nintendo Wii Bluetooth Board Replacement: stap 4, afbeelding 1 van 1
    • Use a metal spudger to remove the rubber foot stuck to the side of the Wii near the DVD drive opening.

    Vraag FixBot
  5. Nintendo Wii Bluetooth Board Replacement: stap 5, afbeelding 1 van 1
    • Remove the single 5.9 mm Phillips screw hidden under the foot you just removed.

    Vraag FixBot
  6. Nintendo Wii Bluetooth Board Replacement: stap 6, afbeelding 1 van 2 Nintendo Wii Bluetooth Board Replacement: stap 6, afbeelding 2 van 2
    Gereedschap gebruikt in deze stap:
    Tweezers
    $4.99
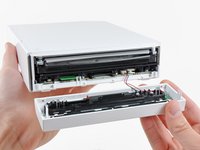
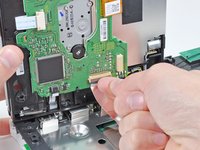
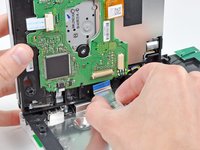
    • Carefully pull the faceplate away from the front of the Wii.

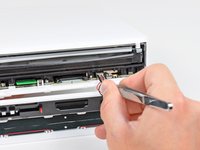
    • Use a pair of tweezers to disconnect the LED cable's plastic connector from the motherboard.

    • Remove the faceplate.

    Vraag FixBot
  7. Nintendo Wii Bluetooth Board Replacement, Outer Case: stap 7, afbeelding 1 van 3 Nintendo Wii Bluetooth Board Replacement, Outer Case: stap 7, afbeelding 2 van 3 Nintendo Wii Bluetooth Board Replacement, Outer Case: stap 7, afbeelding 3 van 3
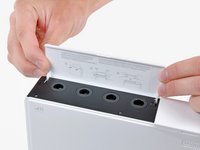
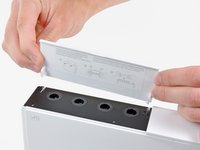
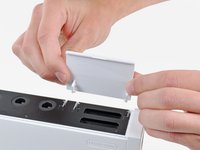
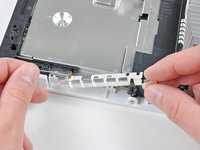
    • Open the controller port cover until it is perpendicular to the black controller port bezel.

    • Pull the controller port cover straight up to release it from the outer case.

    • Repeat this procedure for the memory card port cover.

    Vraag FixBot
  8. Nintendo Wii Bluetooth Board Replacement: stap 8, afbeelding 1 van 2 Nintendo Wii Bluetooth Board Replacement: stap 8, afbeelding 2 van 2
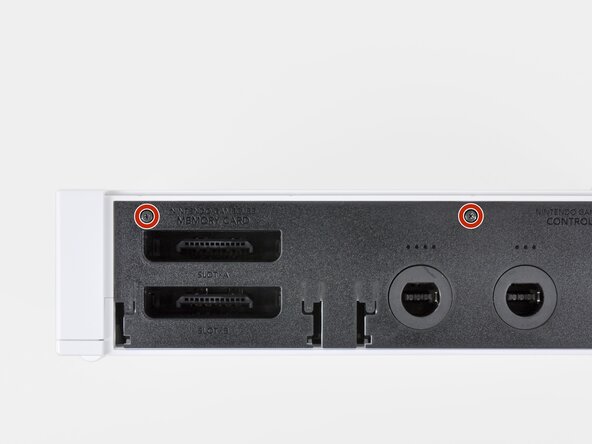
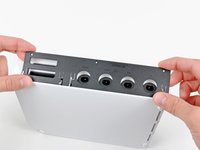
    • Remove the two remaining 4.1 mm Phillips screws along the top edge of the black plastic controller port bezel.

    • Lift the bezel from the long edge furthest away from the controller ports and remove it from the Wii.

    Vraag FixBot
  9. Nintendo Wii Bluetooth Board Replacement: stap 9, afbeelding 1 van 1
    • Remove the two 5 mm Phillips screws above the controller ports.

    Vraag FixBot
  10. Nintendo Wii Bluetooth Board Replacement: stap 10, afbeelding 1 van 1
    • Use a metal spudger to remove the three highlighted screw covers stuck to the side of the Wii.

    Vraag FixBot
  11. Nintendo Wii Bluetooth Board Replacement: stap 11, afbeelding 1 van 1
    • Remove the following screws:

    • Two 5 mm Phillips screws

    • One 8.2 mm Tri-Point screw

    Vraag FixBot
  12. Nintendo Wii Bluetooth Board Replacement: stap 12, afbeelding 1 van 1
    • Use a metal spudger to remove the two rubber feet stuck to the bottom face of the Wii near the rear ports.

    Vraag FixBot
  13. Nintendo Wii Bluetooth Board Replacement: stap 13, afbeelding 1 van 1
    Gereedschap gebruikt in deze stap:
    iFixit Precision 4 mm Screwdriver Bit
    $2.99
    • Remove the two 8.2 mm Tri-Point screws hidden under the feet you just removed.

    • You may use a 4 mm hex nut driver to extend your bit into the recesses and reach the screws.

    Vraag FixBot
  14. Nintendo Wii Bluetooth Board Replacement: stap 14, afbeelding 1 van 1
    • Lift the outer case straight up off the body of the Wii.

    Vraag FixBot
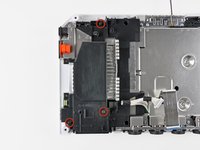
  15. Nintendo Wii Bluetooth Board Replacement, DVD Drive: stap 15, afbeelding 1 van 2 Nintendo Wii Bluetooth Board Replacement, DVD Drive: stap 15, afbeelding 2 van 2
    • Remove the small Phillips screw securing the battery door to the bottom panel.

    • This screw is captive to the battery door.

    • Pull the battery door out of the Wii.

    • The system time will be reset once you remove the battery door.

    • This is a good time to change the CR2032 battery if it hasn't been changed recently.

    Vraag FixBot
  16. Nintendo Wii Bluetooth Board Replacement: stap 16, afbeelding 1 van 1
    • Remove the 8.2 mm Tri-Point screw that was hidden beneath the battery door.

    Vraag FixBot
  17. Nintendo Wii Bluetooth Board Replacement: stap 17, afbeelding 1 van 1
    • Remove the two 8.2 mm Tri-Point screws securing the DVD drive shield near the controller ports.

    Vraag FixBot
  18. Nintendo Wii Bluetooth Board Replacement: stap 18, afbeelding 1 van 1
    • Be cautious as you remove the DVD shield, the edges are sharp and could cut you

    • Lift the DVD drive shield upward and remove it from the Wii.

    Vraag FixBot
  19. Nintendo Wii Bluetooth Board Replacement: stap 19, afbeelding 1 van 1
    • Remove the four 9 mm Phillips screws securing the DVD drive to the bottom panel.

    Vraag FixBot
  20. Nintendo Wii Bluetooth Board Replacement: stap 20, afbeelding 1 van 1
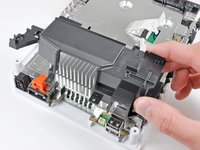
    • Lift the side of the DVD drive opposite the controller ports enough to access the cables on its bottom face.

    • Carefully pull the DVD drive power cable out from under the plastic shroud near the heat sink.

    Vraag FixBot
  21. Nintendo Wii Bluetooth Board Replacement: stap 21, afbeelding 1 van 1
    • Pull the DVD drive power cable away from its socket on the DVD drive.

    Vraag FixBot
  22. Nintendo Wii Bluetooth Board Replacement: stap 22, afbeelding 1 van 2 Nintendo Wii Bluetooth Board Replacement: stap 22, afbeelding 2 van 2
    • Use your fingernail to flip up the retaining flap on the DVD drive ribbon cable socket.

    • Be sure you are prying up on the retaining flap, not the socket itself.

    • Pull the DVD drive ribbon cable out of its socket.

    • Remove the DVD drive from the Wii.

    Vraag FixBot
  23. Nintendo Wii Bluetooth Board Replacement, Motherboard Cover: stap 23, afbeelding 1 van 1
    Gereedschap gebruikt in deze stap:
    Tweezers
    $4.99
    • Use a pair of tweezers to lift the fan connector up and out of its socket on the logic board.

    • Be sure your tweezers are clamped down on the fan connector, not the socket on the motherboard.

    Vraag FixBot
  24. Nintendo Wii Bluetooth Board Replacement: stap 24, afbeelding 1 van 2 Nintendo Wii Bluetooth Board Replacement: stap 24, afbeelding 2 van 2
    • Remove the two 10 mm Phillips screws securing the fan to the fan shroud.

    • Remove the fan from the Wii.

    Vraag FixBot
  25. Nintendo Wii Bluetooth Board Replacement: stap 25, afbeelding 1 van 2 Nintendo Wii Bluetooth Board Replacement: stap 25, afbeelding 2 van 2
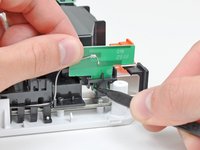
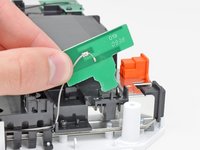
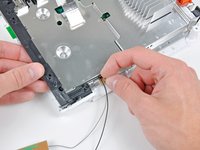
    • Use the tip of a spudger or another fine-pointed tool to carefully pry one of the black plastic retaining fingers attached to the fan shroud away from the Wi-Fi antenna board.

    • Lift the Wi-Fi antenna out of the fan shroud.

    Vraag FixBot
  26. Nintendo Wii Bluetooth Board Replacement: stap 26, afbeelding 1 van 1
    • Remove the single 10 mm Phillips screw securing the second Wi-Fi antenna to the top of the fan shroud.

    Vraag FixBot
  27. Nintendo Wii Bluetooth Board Replacement: stap 27, afbeelding 1 van 1
    • Remove the two pieces of tape securing the second Wi-Fi antenna cable to the plastic bracket near the heat sink.

    Vraag FixBot
  28. Nintendo Wii Bluetooth Board Replacement: stap 28, afbeelding 1 van 1
    • Carefully de-route both antennas from the frame of the Wii and lay them aside.

    Vraag FixBot
  29. Nintendo Wii Bluetooth Board Replacement: stap 29, afbeelding 1 van 2 Nintendo Wii Bluetooth Board Replacement: stap 29, afbeelding 2 van 2
    • Remove the three 10 mm Phillips screws securing the fan shroud to the Wii.

    • Lift the fan shroud off the heat sink and remove it from the Wii.

    Vraag FixBot
  30. Nintendo Wii Bluetooth Board Replacement: stap 30, afbeelding 1 van 3 Nintendo Wii Bluetooth Board Replacement: stap 30, afbeelding 2 van 3 Nintendo Wii Bluetooth Board Replacement: stap 30, afbeelding 3 van 3
    • Remove the following six screws securing the EMI fingers to the bottom panel:

    • Four 7 mm Phillips screws

    • Two 11.3 mm Phillips screws

    • Remove both sets of EMI fingers from the Wii.

    Vraag FixBot
  31. Nintendo Wii Bluetooth Board Replacement: stap 31, afbeelding 1 van 2 Nintendo Wii Bluetooth Board Replacement: stap 31, afbeelding 2 van 2
    • Remove the following three screws:

    • One 7 mm Phillips screw

    • Two 10 mm Phillips screws

    • Lift the bracket out of the Wii.

    Vraag FixBot
  32. Nintendo Wii Bluetooth Board Replacement: stap 32, afbeelding 1 van 3 Nintendo Wii Bluetooth Board Replacement: stap 32, afbeelding 2 van 3 Nintendo Wii Bluetooth Board Replacement: stap 32, afbeelding 3 van 3
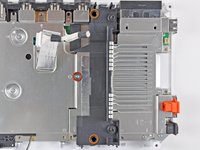
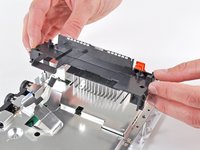
    • Remove the three 10 mm Phillips screws securing the black bracket to the bottom panel near the front of the Wii.

    • Slightly lift the bracket and use your other hand to pull the retaining clip away from where the Wi-Fi antennas enter the motherboard sheild.

    • Remove the bracket from the Wii.

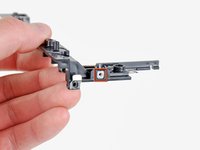
    • Be sure not to lose the small square nut loosely held by the black plastic bracket.

    Vraag FixBot
  33. Nintendo Wii Bluetooth Board Replacement: stap 33, afbeelding 1 van 1
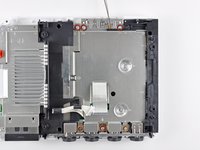
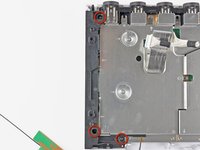
    • Remove the nine remaining 7 mm Phillips screws securing the motherboard cover to the bottom panel.

    Vraag FixBot
  34. Nintendo Wii Bluetooth Board Replacement: stap 34, afbeelding 1 van 1
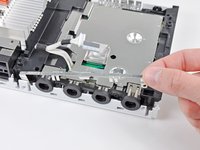
    • Carefully lift the motherboard cover off the motherboard, minding any cables that may get caught.

    • On some models, a thermal pad for the wireless chip is attached to the underside of the motherboard cover. Be sure to replace it when reassembling.

    Vraag FixBot
  35. Nintendo Wii Bluetooth Board Replacement, Bluetooth Board: stap 35, afbeelding 1 van 3 Nintendo Wii Bluetooth Board Replacement, Bluetooth Board: stap 35, afbeelding 2 van 3 Nintendo Wii Bluetooth Board Replacement, Bluetooth Board: stap 35, afbeelding 3 van 3
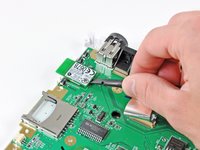
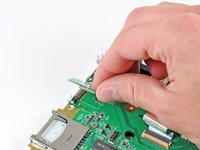
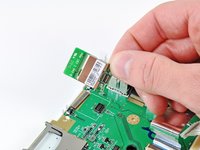
    • Use the flat end of a spudger or your fingertips to lift up the end of the Bluetooth board nearest the center of the motherboard.

    • Carefully peel the front edge of the Bluetooth board off the EMI foam attached to the motherboard.

    • Remove the Bluetooth board.

    Vraag FixBot
Conclusie

To reassemble your device, follow these instructions in reverse order.

52 andere personen hebben deze handleiding voltooid.

10Gids Commentaar

I just used this guide to fix my Wii's bluetooth. Fantastic step by step guide, Wii responds to wiimote now. Thanks for this awesome repair guide. It took full 2 hours to complete the job.

Mitr - Antwoord Deel

I was terrified about trying to fix the Wii myself. These instructions were marvelously accurate and easy to follow. In two hours and for about $15 I was able to repair the Wii and go back to my favorite games. Thanks! :)

Danielle - Antwoord Deel

Fantastic write up. My wiimote sync'd right up.

Charlie Kilo - Antwoord Deel

A flawless guide. All worked well. I replugged the bluetooth unit and then my Nintendo worked again perfectly.

Marc - Antwoord Deel

Wow, what an amazing guide. Thank you very, very much. I just used this guide to refit my loose Bluetooth board. Now my Wii is working perfectly again. Thank you, thank you, thank you.

Elzanne - Antwoord Deel

Voeg opmerking toe

Weergavestatistieken:

Afgelopen 24 uren: 22

Afgelopen 7 dagen: 192

Afgelopen 30 dagen: 687

Altijd: 85,535