Ga door naar hoofdinhoud
Motorola Moto 360 LCD Display Replacement

Motorola Moto 360 LCD Display Replacement

Cole Twitchell

Cole Twitchell en 2 andere bijdragers

Voor het laatst geüpdatet op November 11, 2017

15 - 30 minuten
Gemiddeld

The entirety of the Moto 360 is very fragile. Take extreme caution when using tools.

Wat je nodig hebt

Gereedschap

  1. Motorola Moto 360 LCD Display Replacement, Rear Cover: stap 1, afbeelding 1 van 1
    • Set the watch face down on a flat surface.

    • Place the heated iOpener on the face of the rear cover to loosen the adhesive underneath.

  2. Motorola Moto 360 LCD Display Replacement: stap 3, afbeelding 1 van 2 Motorola Moto 360 LCD Display Replacement: stap 3, afbeelding 2 van 2
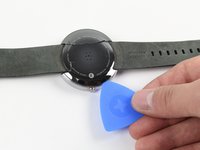
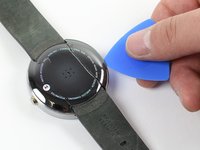
    • Gently slide the blue opening pick between the rear cover and the metal casing.

    • The rear cover is extremely fragile. Be very delicate when using the opening pick.

    • Work your way entirely around the rear cover.

    • It may take several attempts of reheating the adhesive to get the rear cover loose enough to pull off.

  3. Motorola Moto 360 LCD Display Replacement: stap 4, afbeelding 1 van 1
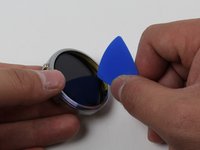
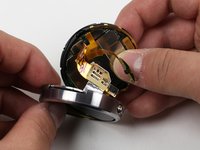
    • Once the adhesive has been successfully loosened, gently pull the rear cover off.

  4. Motorola Moto 360 LCD Display Replacement, O-Ring: stap 5, afbeelding 1 van 2 Motorola Moto 360 LCD Display Replacement, O-Ring: stap 5, afbeelding 2 van 2
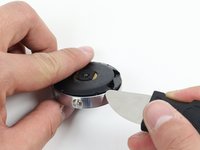
    • To get to the O-Ring, use the Jimmy to gently pry off the rear housing.

  5. Motorola Moto 360 LCD Display Replacement: stap 6, afbeelding 1 van 1
    • Pinch the green rubber O-Ring and slide it off of the watch.

    • The O-Ring is delicate and is easily severed. Use care around sharp objects.

  6. Motorola Moto 360 LCD Display Replacement, LCD Display: stap 7, afbeelding 1 van 1
    • Set the Moto 360 face up on a flat surface.

    • Place the iOpener on the face of the device screen.

  7. Motorola Moto 360 LCD Display Replacement: stap 8, afbeelding 1 van 2 Motorola Moto 360 LCD Display Replacement: stap 8, afbeelding 2 van 2
    • Gently slide the opening pick between the screen and the metal casing.

    • Work your way around the face of the screen, loosening the adhesive.

  8. Motorola Moto 360 LCD Display Replacement: stap 9, afbeelding 1 van 2 Motorola Moto 360 LCD Display Replacement: stap 9, afbeelding 2 van 2
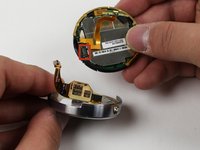
    • Detach the copper ribbon connecting the motherboard to the display.

    • For reassembly, attach copper ribbon where it is marked.

    • The copper ribbon is fragile and easily disconnects. Remember where it goes so as to reconnect it properly.

  9. Motorola Moto 360 LCD Display Replacement: stap 10, afbeelding 1 van 1
    • Slide the display out of the metal casing.

Conclusie

To reassemble your device, follow these instructions in reverse order.

15 andere personen hebben deze handleiding voltooid.

Cole Twitchell

Lid sinds: 01/30/15

1.688 Reputatie

2 handleidingen geschreven

Team

Cal Poly, Team 17-32, Amido Winter 2015 Lid van Cal Poly, Team 17-32, Amido Winter 2015

CPSU-AMIDO-W15S17G32

4 Leden

18 handleidingen geschreven

7 opmerkingen

Good morning,

It is possible to replace the display unit for the Moto 360 2nd with 1.56" display?

Thanks in advance and best regards,

Stephan

Stephan Müller - Antwoord

Were could i buy a new lcd screen for the moto 360 1st gen??

Sebastian Galvan - Antwoord

hey mate you can buy one from aliexpress aliexpress moto 360 screen see link below

https://goo.gl/ZSMTVW

Faddy Oraha -

Where can I get a LCD display for a Moto 360 2 gen 42mm. Thanks hope you can help

Glenn Patoska - Antwoord

Bonjour,

Où est-il possible de trouver des pièces détachées ?

Le fond du boitier.

Merci de votre réponse.

DOGUE - Antwoord

Voeg opmerking toe

Weergavestatistieken:

Afgelopen 24 uren: 0

Afgelopen 7 dagen: 7

Afgelopen 30 dagen: 19

Altijd: 21,665