Inleiding
This guide has been created to help replace the full screen (not just the glass) on a Droid Maxx.
Wat je nodig hebt
-
-
Find the volume buttons located on the side of the Droid Maxx.
-
Take the plastic opening tool and insert it into the gap between the volume buttons and the case.
-
Using the flat tip of the plastic opening tool, press firmly against the case until you hear a “snap” sound.
-
Remove the buttons carefully. Do not bend or force the part since it also serves as a tray for placing a SIM Card.
-
-
-
-
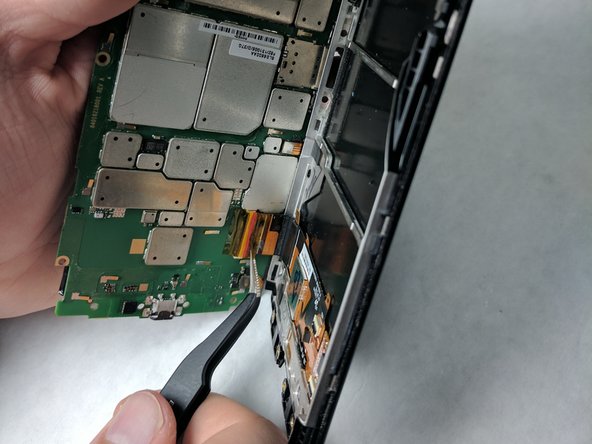
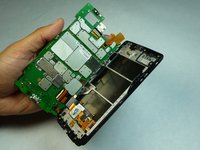
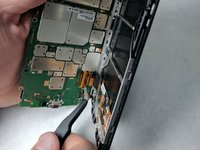
Using the Torx T5 Screwdriver, carefully remove all of the screws in the motherboard.
-
There are 8 black screws: 4 at the top and 4 at the bottom of the motherboard.
-
There are 2 silver screws on the side: 1 at the bottom and 1 in the middle.
-
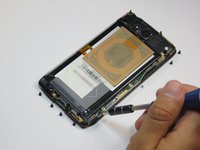
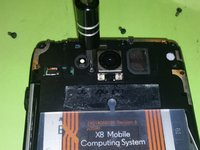
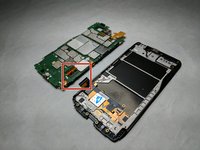
Use either a T3 (Ultra) or T4 (MAXX) to remove the single screw securing the camera housing.
-
Using the plastic opening tool, gently lift the two tabs in the upper plastic cover that surrounds the camera to release the cover.
-


To reassemble your device, follow these instructions in reverse order.
To reassemble your device, follow these instructions in reverse order.
Annuleren: ik heb deze handleiding niet afgemaakt.
6 andere personen hebben deze handleiding voltooid.
Team

IUPUI, Team S2-G4, Harley Spring 2017 Lid van IUPUI, Team S2-G4, Harley Spring 2017
IUPUI-HARLEY-S17S2G4
4 Leden
1 handleiding geschreven
2 opmerkingen
Where can I purchase the screen replacement for the droid maxx
That 3mm screw is a ##&&%. BE VERY CAREFUL WITH IT! I haven’t figured out how to best loosen it yet; maybe small turn bursts so you don’t break the tines?