Inleiding
Demontage van de Mini Maglite LED AA zaklamp. Lengte: 146 mm, Gewicht: 107,16 g, Gebruikstijd: 5u 15min, 14 Lumen, 96 meter bundelafstand.
-
-
-
Draai de eindkap tegen de klok in totdat deze volledig loszit.
-
Verwijder langzaam de eindkap om de batterijen uit de behuizing van de zaklamp te halen.
 Vraag FixBot
-
-
-
Trek de batterijveer voorzichtig uit de eindkap door langzaam heen en weer te trekken aan de basis van de veer totdat deze over de rand van de eindkap komt.
-
-
-
-
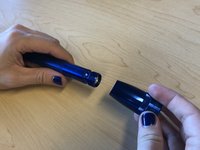
Draai de kopdop tegen de klok in totdat deze volledig loskomt van de behuizing van de zaklamp.
-
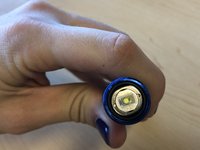
Trek de kopdop van de behuizing van de zaklamp om de lamp bloot te leggen.
-
-
-
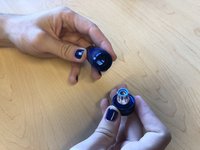
Draai de frontkap tegen de klok in totdat deze volledig los is van de kopkap.
-
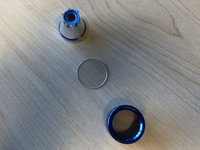
Zodra de frontkap van de kopkap is verwijderd, kunnen de reflector en lens uit de kopkap worden gehaald.
-
-





10Gids Commentaar
Dear Brandon,
I received my mini maglite from a vendor quite a few years ago, while I was a technology coordinator for a school district. After my mother became legally blind, it was one of the things I gave to her for assistance.
Long story short, it has been in my home again for a few years. I got it out yesterday, when I needed a flashlight. Alas, it wouldn’t light up. Today I was ready to replace the bulbs, but they wouldn’t budge. I found your instructions helpful in affirming my experience in disassembling the light. Unfortunately, nothing I could do would remove the batteries.
I was thinking you might include instructions for the process of removing corroded batteries and bringing the light back to life. It is presently soaking in a glass of hot water with a little soap.
Thanks for your help,
Elizabeth
Same situation for me. Read online that white vinegar might help dislodge the battery - I'm going to try that. If you do try that, do so with proper safety precautions. I'm not sure what the resulting chemical reactions will entail.
I found this btw: https://manjoseman.typepad.com/unconvent...
Me too. Same issue with batteries that I cannot remove. They're there for 6 or more years! I could remove wverything insiste the battwries, but there arw still parte do them I could not remove.
I’ve solved this twice . Drill a screw into the bottom of the battery. Then pull it out. I used a variation on this technique:
https://www.youtube.com/watch?v=3aZCns5y...
There was a lot of corrosion. You can remove the cap that says “DO NOT REMOVE” located under the headcap. Your breakdown instructions stop before that point. The flashlight wouldn’t work again until I did remove that DO NOT REMOVE cap and cleaned away all the corrosion using a q-tip soaked in vinegar. Use a small flathead screwdriver to gently pry off the DO NOT REMOVE cap. Underneath, you’ll see another black round piece that the bulb fits into plus the electrical connections. I shook it gently out the bottom of the flashlight for complete cleaning. Be sure to check the orientation of the silver connector tab. It can fall out and needs to be put back into the slot. To put back, it helps to use the batteries to push it back up the tube so it doesn’t tilt and get stuck. Once reassembled, it all worked 100% fine again.
