Ga door naar hoofdinhoud
Word lid van de reparatiegemeenschap - Account aanmaken

MacBook Pro 13" Retina Display Mid 2014 MagSafe DC-In Board Replacement

Wat je nodig hebt

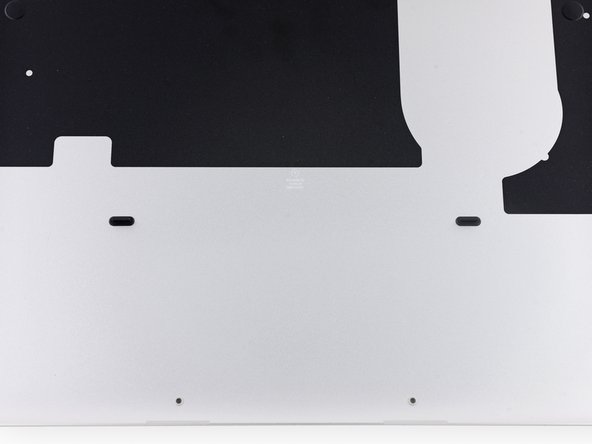
  1. MacBook Pro 13" Retina Display Mid 2014 MagSafe DC-In Board Replacement, Lower Case: stap 1, afbeelding 1 van 1
    Gereedschap gebruikt in deze stap:
    Magnetic Project Mat
    $19.95
    • Remove the following ten screws securing the lower case to the upper case:

    • Two 2.3 mm P5 Pentalobe screws

    • Eight 3.0 mm P5 Pentalobe screws

    • Throughout this repair, keep track of each screw and make sure it goes back exactly where it came from to avoid damaging your device.

    Vraag FixBot

    Voeg opmerking toe

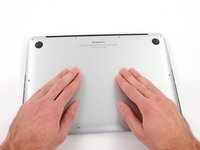
  2. MacBook Pro 13" Retina Display Mid 2014 MagSafe DC-In Board Replacement: stap 2, afbeelding 1 van 1
    • Wedge your fingers between the upper case and the lower case.

    • Gently pull the lower case away from the upper case to remove it.

    Vraag FixBot

    Voeg opmerking toe

  3. MacBook Pro 13" Retina Display Mid 2014 MagSafe DC-In Board Replacement: stap 3, afbeelding 1 van 2 MacBook Pro 13" Retina Display Mid 2014 MagSafe DC-In Board Replacement: stap 3, afbeelding 2 van 2
    • The lower case is connected to the upper case with two plastic clips near its center.

    • During reassembly, gently push down the center of the lower case to reattach the two plastic clips.

    Vraag FixBot

    Voeg opmerking toe

  4. MacBook Pro 13" Retina Display Mid 2014 MagSafe DC-In Board Replacement, Battery Connector: stap 4, afbeelding 1 van 1
    • If necessary, remove the plastic cover adhered to the battery contact board.

    Vraag FixBot

    Voeg opmerking toe

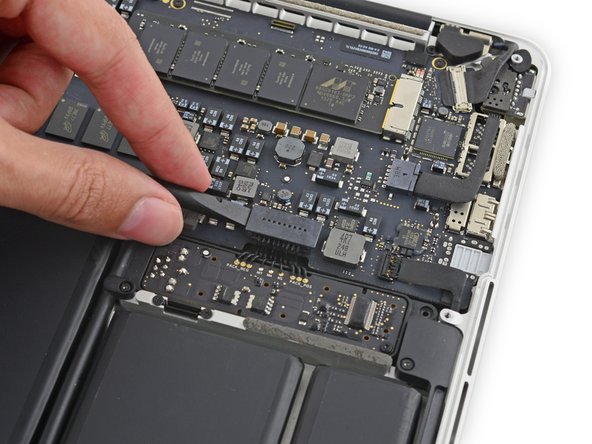
  5. MacBook Pro 13" Retina Display Mid 2014 MagSafe DC-In Board Replacement: stap 5, afbeelding 1 van 2 MacBook Pro 13" Retina Display Mid 2014 MagSafe DC-In Board Replacement: stap 5, afbeelding 2 van 2
    • Use the flat end of a spudger to lift the battery connector straight up out of its socket on the logic board.

    • Be sure you lift up only on the connector itself, not the socket, or you risk permanent damage to the logic board.

    Vraag FixBot

    Voeg opmerking toe

  6. MacBook Pro 13" Retina Display Mid 2014 MagSafe DC-In Board Replacement: stap 6, afbeelding 1 van 1
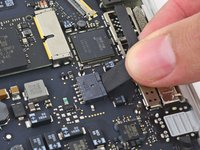
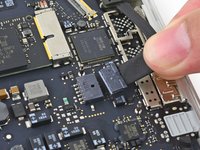
    • Bend the battery connector up out of the way to prevent accidental contact with its socket during your repair.

    Vraag FixBot

    Voeg opmerking toe

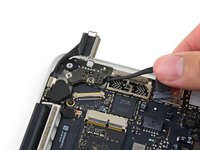
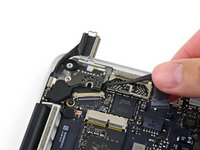
  7. MacBook Pro 13" Retina Display Mid 2014 MagSafe DC-In Board Replacement, MagSafe DC-In Board: stap 7, afbeelding 1 van 3 MacBook Pro 13" Retina Display Mid 2014 MagSafe DC-In Board Replacement, MagSafe DC-In Board: stap 7, afbeelding 2 van 3 MacBook Pro 13" Retina Display Mid 2014 MagSafe DC-In Board Replacement, MagSafe DC-In Board: stap 7, afbeelding 3 van 3
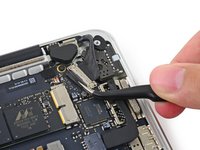
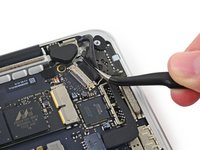
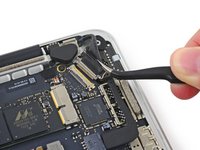
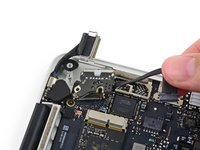
    • Grab the black plastic tab to flip the display cable connector open and pull it straight out of its socket on the logic board.

    • Pull in the direction of the cable, parallel to the logic board. Do not pull up.

    Vraag FixBot

    Voeg opmerking toe

  8. MacBook Pro 13" Retina Display Mid 2014 MagSafe DC-In Board Replacement: stap 8, afbeelding 1 van 2 MacBook Pro 13" Retina Display Mid 2014 MagSafe DC-In Board Replacement: stap 8, afbeelding 2 van 2
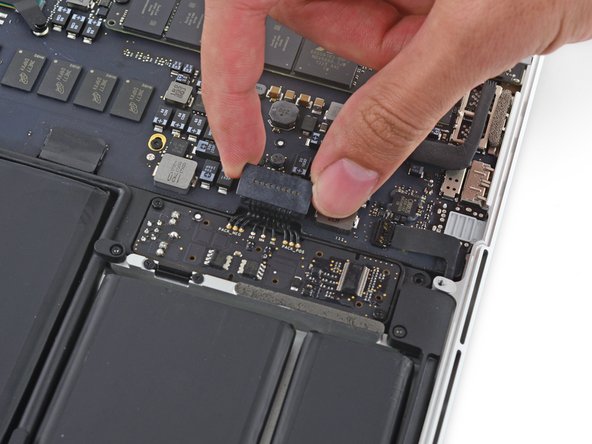
    • Pull the DC-In board connector straight out of its socket on the logic board.

    Vraag FixBot

    Voeg opmerking toe

  9. MacBook Pro 13" Retina Display Mid 2014 MagSafe DC-In Board Replacement: stap 9, afbeelding 1 van 1
    • Remove the two 3.5 mm T5 Torx screws securing the MagSafe DC-In board to the upper case.

    • You may need to gently push the display cable out of the way to expose the screws.

    Vraag FixBot

    Voeg opmerking toe

  10. MacBook Pro 13" Retina Display Mid 2014 MagSafe DC-In Board Replacement: stap 10, afbeelding 1 van 3 MacBook Pro 13" Retina Display Mid 2014 MagSafe DC-In Board Replacement: stap 10, afbeelding 2 van 3 MacBook Pro 13" Retina Display Mid 2014 MagSafe DC-In Board Replacement: stap 10, afbeelding 3 van 3
    • Use the MagSafe DC-In board cable to pull the board out and up from the upper case to remove it.

    Vraag FixBot

    Voeg opmerking toe

Conclusie

To reassemble your device, follow these instructions in reverse order.

Annuleren: ik heb deze handleiding niet afgemaakt.

30 andere personen hebben deze handleiding voltooid.

Sam Goldheart

Lid sinds: 10/18/12

477.698 Reputatie

538 handleidingen geschreven

Team

iFixit Lid van iFixit

Staff

123 Leden

28.236 handleidingen geschreven

7Gids Commentaar

Thanks very much, took me 10 mins, A nice cheap and fast repair for my damaged MagSafe socket

lewismacqueen - Antwoord Deel

Thank you for your guidance! Spent $30 on tools as opposed to hundreds and made a simple repair

Brian Smithson - Antwoord Deel

Thank you ...just what we need !..

Mark White - Antwoord Deel

Did anyone else lose the display to their MacBook Pro mid 2014 after following this repair?

Vance - Antwoord Deel

yes I just did and wonder what you did to solve this?

Kaleem - Antwoord Deel

Voeg opmerking toe

Weergavestatistieken:

Afgelopen 24 uren: 9

Afgelopen 7 dagen: 26

Afgelopen 30 dagen: 85

Altijd: 18,918