Wat je nodig hebt
-
-
-
Draai eerst de muis om en schroef de enkele schroef aan de onderkant los.
-
Ik laat niet zien hoe je het lampje verwijdert, omdat ik daar niet het juiste gereedschap voor heb.
-
Een muis werkt door het rode licht te laten weerkaatsen en vervolgens te detecteren hoeveel licht er werd weerkaatst of geblokkeerd om te bepalen in welke richting de muis is bewogen.
-
Een muis gebruikt soms potentiometers of roterende encoders om de draaibeweging van het wieltje om te zetten in digitale codes. Die informatie wordt vervolgens door de muis en via de USB-kabel naar de computer gestuurd. De USB-kabel levert ook de stroom voor de muis door energie van de computer over te brengen.
 Vraag FixBot
-
-
-
Open nu de twee delen voorzichtig zodat de interne onderdelen er niet uitvallen zodra het apparaat is geopend.
-
-
-
-
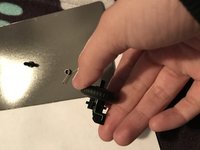
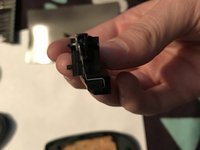
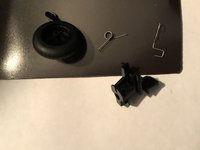
Verwijder het middendeel met het wiel en kantel het naar rechts zodat de veer eraf kan glijden.
-
Verwijder vervolgens de linkerbedrading door deze uit het stopcontact te trekken waarin deze is geplaatst.
-
De veer hier is wat ervoor zorgt dat je het wiel kunt indrukken zonder dat het vast blijft zitten. Het zorgt er in feite voor dat het weer terugveert. En de bedrading aan de linkerkant staat onder spanning om tegen de binnenkant van het wiel te komen, waardoor het scrollwiel wat weerstand krijgt.
-
-
-
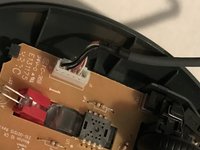
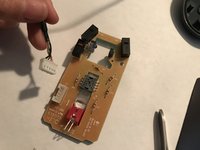
Dit onderdeel is een klein beetje lastig. Om de USB-kabel te verwijderen, moet je met je vingers aan de treklip trekken. Dit duurt even, omdat je voorzichtig moet zijn dat je de plastic behuizing waarin hij zit niet per ongeluk verbuigt. Gelukkig is het plaatsen ervan uiterst eenvoudig zodra hij eruit is.
-
-





11Gids Commentaar
how do i put it back together, though?
okay, but how does it go back together?
The way you put together (I assume you’re interested in the wheel) is as follows, looking at the mouse from the above, buttons at the top.
- The spring that’s spooled up goes to the right side of the wheel, the spring that’s a bit more curvy goes to the left side of the wheel.
- Try to assemble the plastic piece with the wheel - they should look as Step3 / Pic1.
- Put it back into the housing, to give you a guidance how it should look like.
- Take it out and disassemble.
- Add the left spring with its rectangle corner, one end of it to the wheel holder, for the other end there is a small hole on the left part of the plastic piece.
- Add the wheel. Try to roll it, you should hear the usual clicking voice.
- Put the right spring to the right side of the wheel, to the rod.
- Put the assembly back into the housing. Try to click the wheel - the right spring should bounce it back.
Hope this helps.
Thank you thank you! I had opened mine up to do a thorough cleaning and SPROIINNNNGGGG… then I had no clue how to get it all back inside. Your 2nd photo on Step 2 gave me exactly what I needed to be able to reassemble!! So thank you!
If anyone’s wondering, the old-fashioned mouse (with the rubber ball underneath) has the exact same scroll wheel assembly as the kind with the ‘light’, like in your photo.
Could you please tell where can I find the replacement cable for B100 mouse or the white connector ? I have damaged the cable and I need to replace it. I have another cable but do not have the connector.
