Ga door naar hoofdinhoud
Word lid van de reparatiegemeenschap - Account aanmaken

Logitech M100 USB Cable Replacement

Wat je nodig hebt

  1. Logitech M100 USB Cable Replacement, USB Cable: stap 1, afbeelding 1 van 2 Logitech M100 USB Cable Replacement, USB Cable: stap 1, afbeelding 2 van 2
    • Not all variants of this mouse require the mouse feet to be taken off for disassembly, but their removal is detailed anyway.

    • Carefully remove the feet of the mouse with an opening pick.

    • Keep track of the mouse feet, as you'll be reapplying them at the end of the guide.

    Vraag FixBot

    Voeg opmerking toe

  2. Logitech M100 USB Cable Replacement: stap 2, afbeelding 1 van 2 Logitech M100 USB Cable Replacement: stap 2, afbeelding 2 van 2
    • Use a Phillips #0 screwdriver to remove the 10mm screws on the bottom of the mouse.

    • Once all screws are removed, use the plastic opening tool to gently pry the mouse apart. This shouldn't take much force.

    Vraag FixBot

    Voeg opmerking toe

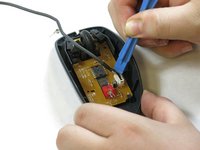
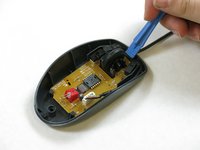
  3. Logitech M100 USB Cable Replacement: stap 3, afbeelding 1 van 2 Logitech M100 USB Cable Replacement: stap 3, afbeelding 2 van 2
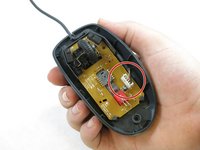
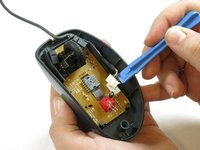
    • Once the mouse is opened, locate the USB cable's 5-pin connector, which is plugged directly into the mouse's mainboard.

    • Take note of the position and route that the USB cable takes before removal. The replacement cable must follow the same route when inserted.

    • Using a plastic opening tool, gently remove the 5-pin connector from the mainboard.

    Vraag FixBot

    Voeg opmerking toe

  4. Logitech M100 USB Cable Replacement: stap 4, afbeelding 1 van 2 Logitech M100 USB Cable Replacement: stap 4, afbeelding 2 van 2
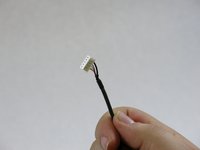
    • Take the replacement USB cable and connect it to the mainboard.

    Vraag FixBot

    Voeg opmerking toe

  5. Logitech M100 USB Cable Replacement: stap 5, afbeelding 1 van 2 Logitech M100 USB Cable Replacement: stap 5, afbeelding 2 van 2
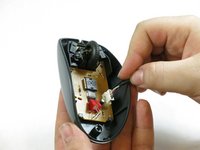
    • Ensure that the 5-pin connector is fully seated into its slot on the mainboard. You may want to use a spudger to apply pressure onto it.

    • Using a plastic opening tool, route the cable through the case in the same way that was noted in Step 3.

    Vraag FixBot

    Voeg opmerking toe

  6. Logitech M100 USB Cable Replacement: stap 6, afbeelding 1 van 1
    • After re-assembling the mouse, don't forget to reattach the mouse feet onto their correct locations on the bottom of the mouse.

    Vraag FixBot

    Voeg opmerking toe

Conclusie

To reassemble, follow the steps in reverse order.

Annuleren: ik heb deze handleiding niet afgemaakt.

4 andere personen hebben deze handleiding voltooid.

Jake Janicke

Lid sinds: 10/26/17

161 Reputatie

1 Handleiding geschreven

Team

1Gids Commentaar

Removing the mouse feet is completely unnecessary, as there are no screws underneath the feet.

Andy Joonseo Bae - Antwoord Deel

Voeg opmerking toe

Weergavestatistieken:

Afgelopen 24 uren: 2

Afgelopen 7 dagen: 11

Afgelopen 30 dagen: 37

Altijd: 6,546