Ga door naar hoofdinhoud
Word lid van de reparatiegemeenschap - Account aanmaken

Levoit Core 300-RAC Motor Replacement

Wat je nodig hebt

  1. Levoit Core 300-RAC Motor Replacement, Air Filter: stap 1, afbeelding 1 van 2 Levoit Core 300-RAC Motor Replacement, Air Filter: stap 1, afbeelding 2 van 2
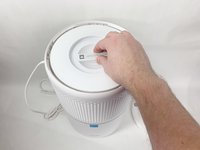
    • Make sure your device is turned off and unplugged for safety.

    • Turn the Levoit Core 300-RAC over so the bottom is facing up.

    Vraag FixBot
  2. Levoit Core 300-RAC Motor Replacement: stap 2, afbeelding 1 van 3 Levoit Core 300-RAC Motor Replacement: stap 2, afbeelding 2 van 3 Levoit Core 300-RAC Motor Replacement: stap 2, afbeelding 3 van 3
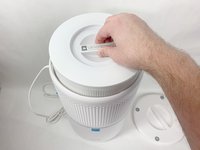
    • Turn the bottom cover counterclockwise and lift it off to remove it.

    • The cover does not "snap" on or off when turned.

    Vraag FixBot
  3. Levoit Core 300-RAC Motor Replacement: stap 3, afbeelding 1 van 3 Levoit Core 300-RAC Motor Replacement: stap 3, afbeelding 2 van 3 Levoit Core 300-RAC Motor Replacement: stap 3, afbeelding 3 van 3
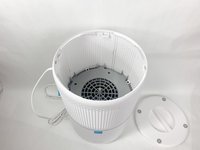
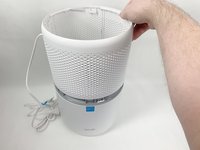
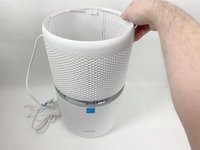
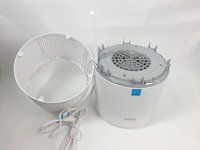
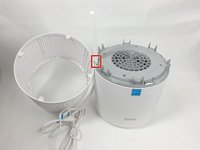
    • Lift the filter straight up and out of the device.

    Vraag FixBot
  4. Levoit Core 300-RAC Motor Replacement, Power Board: stap 4, afbeelding 1 van 3 Levoit Core 300-RAC Motor Replacement, Power Board: stap 4, afbeelding 2 van 3 Levoit Core 300-RAC Motor Replacement, Power Board: stap 4, afbeelding 3 van 3
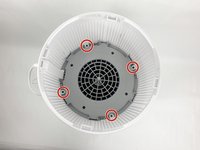
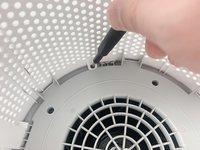
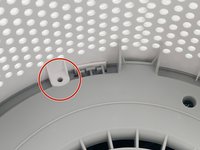
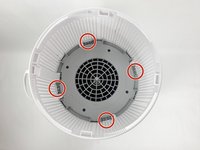
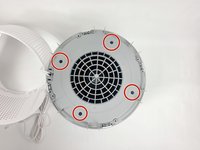
    • Use a Phillips #2 screwdriver to remove the four screws that secure the gray lid towards the base of the device.

    • Set the screws aside in a safe place.

    Vraag FixBot
  5. Levoit Core 300-RAC Motor Replacement: stap 5, afbeelding 1 van 3 Levoit Core 300-RAC Motor Replacement: stap 5, afbeelding 2 van 3 Levoit Core 300-RAC Motor Replacement: stap 5, afbeelding 3 van 3
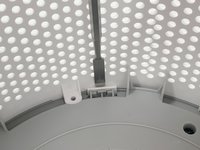
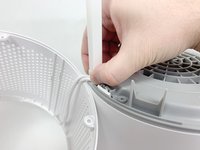
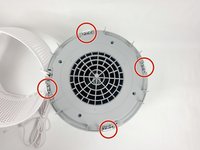
    • Use a metal spudger or Jimmy to gently pry between the four white tabs and the white housing to release the outer housing.

    • Gently pulling up on the outer housing can prevent the clips from resetting.

    Vraag FixBot
  6. Levoit Core 300-RAC Motor Replacement: stap 6, afbeelding 1 van 2 Levoit Core 300-RAC Motor Replacement: stap 6, afbeelding 2 van 2
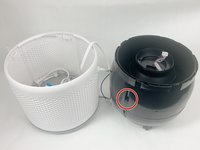
    • Remove the white outer housing and set it to the side.

    • The power cord is fed through a hole in the side of this housing, so it has to sit right next to the device.

    Vraag FixBot
  7. Levoit Core 300-RAC Motor Replacement: stap 7, afbeelding 1 van 3 Levoit Core 300-RAC Motor Replacement: stap 7, afbeelding 2 van 3 Levoit Core 300-RAC Motor Replacement: stap 7, afbeelding 3 van 3
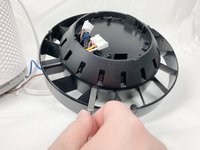
    • Grab the cable channel by its base, squeeze, and pull up at the same time to remove it.

    Vraag FixBot
  8. Levoit Core 300-RAC Motor Replacement: stap 8, afbeelding 1 van 2 Levoit Core 300-RAC Motor Replacement: stap 8, afbeelding 2 van 2
    • Remove the four Phillips #2 screws securing the gray face plate.

    • Set the screws aside in a safe place.

    Vraag FixBot
  9. Levoit Core 300-RAC Motor Replacement: stap 9, afbeelding 1 van 3 Levoit Core 300-RAC Motor Replacement: stap 9, afbeelding 2 van 3 Levoit Core 300-RAC Motor Replacement: stap 9, afbeelding 3 van 3
    • Insert a Jimmy or spudger between the white tab and the gray faceplate body to release the faceplate.

    • Lift it out.

    Vraag FixBot
  10. Levoit Core 300-RAC Motor Replacement: stap 10, afbeelding 1 van 1
    • Turn your device over so it is upright again.

    Vraag FixBot
  11. Levoit Core 300-RAC Motor Replacement: stap 11, afbeelding 1 van 3 Levoit Core 300-RAC Motor Replacement: stap 11, afbeelding 2 van 3 Levoit Core 300-RAC Motor Replacement: stap 11, afbeelding 3 van 3
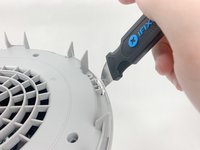
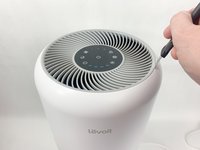
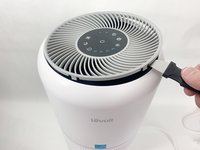
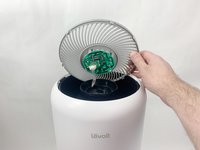
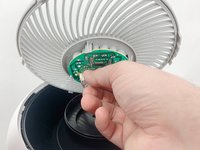
    • Insert the Jimmy between the gray grille cover and the top of the device.

    • Work your way around the grille cover with the Jimmy to release the clips holding it in place.

    • Take note of the placement of the clips, as they are keyed and need to go back in the exact way they came out.

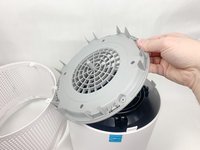
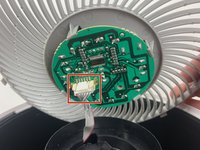
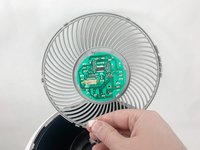
    • Remove the grille cover gently as it is connected by a ribbon cable.

    • Be careful not to put too much strain on the ribbon cable as it may break.

    Vraag FixBot
  12. Levoit Core 300-RAC Motor Replacement: stap 12, afbeelding 1 van 3 Levoit Core 300-RAC Motor Replacement: stap 12, afbeelding 2 van 3 Levoit Core 300-RAC Motor Replacement: stap 12, afbeelding 3 van 3
    • Squeeze the tab on the connector to release the bundled cable from the control board.

    • The connector should come out fairly easily, so do not force it. Pulling too hard could damage the connector.

    Vraag FixBot
  13. Levoit Core 300-RAC Motor Replacement: stap 13, afbeelding 1 van 3 Levoit Core 300-RAC Motor Replacement: stap 13, afbeelding 2 van 3 Levoit Core 300-RAC Motor Replacement: stap 13, afbeelding 3 van 3
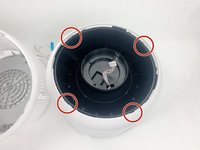
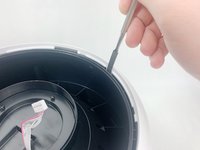
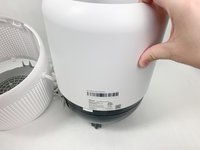
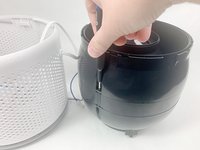
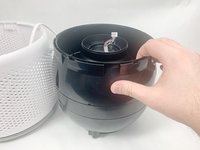
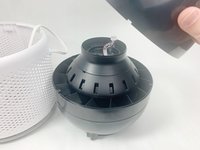
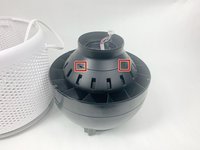
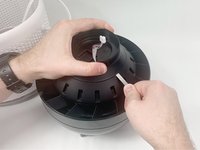
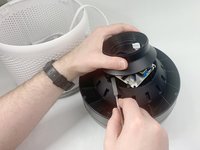
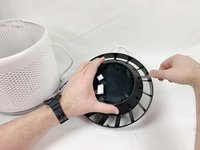
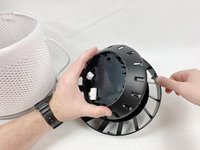
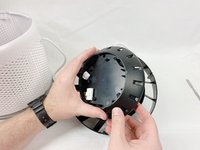
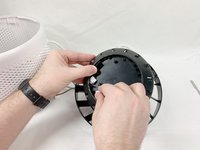
    • Insert a spudger or Jimmy into the four tabs to release them from holding the outer white housing to the inner black core.

    • Remove the white outer housing.

    Vraag FixBot
  14. Levoit Core 300-RAC Motor Replacement: stap 14, afbeelding 1 van 2 Levoit Core 300-RAC Motor Replacement: stap 14, afbeelding 2 van 2
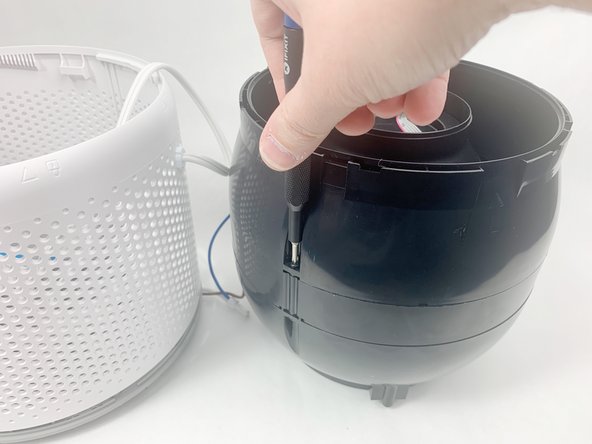
    • Use a Phillips #2 screwdriver to remove the three screws holding the top of the black center section to the middle section.

    Vraag FixBot
  15. Levoit Core 300-RAC Motor Replacement: stap 15, afbeelding 1 van 3 Levoit Core 300-RAC Motor Replacement: stap 15, afbeelding 2 van 3 Levoit Core 300-RAC Motor Replacement: stap 15, afbeelding 3 van 3
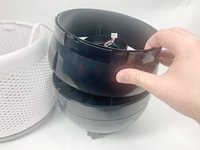
    • Lift and remove the upper portion of the black core.

    Vraag FixBot
  16. Levoit Core 300-RAC Motor Replacement: stap 16, afbeelding 1 van 3 Levoit Core 300-RAC Motor Replacement: stap 16, afbeelding 2 van 3 Levoit Core 300-RAC Motor Replacement: stap 16, afbeelding 3 van 3
    • Insert a spudger into the slots around the seam to gently pry the upper part off of the assembly.

    Vraag FixBot
  17. Levoit Core 300-RAC Motor Replacement: stap 17, afbeelding 1 van 2 Levoit Core 300-RAC Motor Replacement: stap 17, afbeelding 2 van 2
    • Feed the ribbon connector through the space in the top part of the assembly before removing it.

    • Carefully pass the connector through the hole so you do not damage it.

    Vraag FixBot
  18. Levoit Core 300-RAC Motor Replacement: stap 18, afbeelding 1 van 3 Levoit Core 300-RAC Motor Replacement: stap 18, afbeelding 2 van 3 Levoit Core 300-RAC Motor Replacement: stap 18, afbeelding 3 van 3
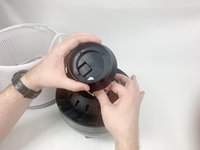
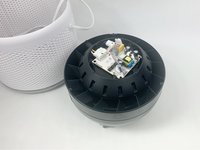
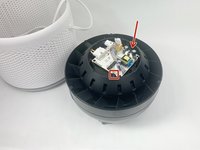
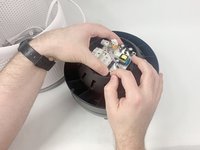
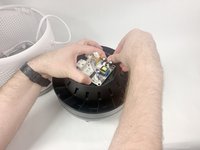
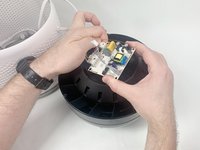
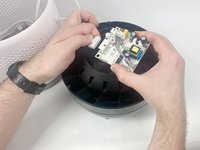
    • Use your hands to pry apart the two tabs on opposite sides of the power board.

    • Use one hand to push on the tabs while gently lifting with your other hand to keep them from resetting.

    • There is a third tab that the board will slide out from under when the other two are released.

    • After releasing the two tabs shown, the power board will be free. Do not pull hard on the attached cables as that can damage them as well as other parts.

    Vraag FixBot
  19. Levoit Core 300-RAC Motor Replacement: stap 19, afbeelding 1 van 3 Levoit Core 300-RAC Motor Replacement: stap 19, afbeelding 2 van 3 Levoit Core 300-RAC Motor Replacement: stap 19, afbeelding 3 van 3
    • Squeeze down on the clips holding the connectors in place to release the cables.

    • The power board is now completely removed.

    Vraag FixBot
  20. Levoit Core 300-RAC Motor Replacement, Motor: stap 20, afbeelding 1 van 1
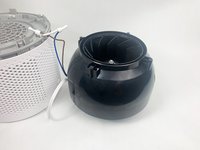
    • Turn the device over so that the fan is pointing up.

    Vraag FixBot
  21. Levoit Core 300-RAC Motor Replacement: stap 21, afbeelding 1 van 1
    • Use wire cutters to carefully cut off the crimped power cord connection.

    • Cut as close to the connection as possible to leave the most power cord available for reassembly.

    Vraag FixBot
  22. Levoit Core 300-RAC Motor Replacement: stap 22, afbeelding 1 van 1
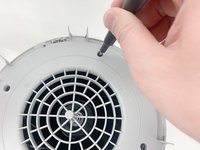
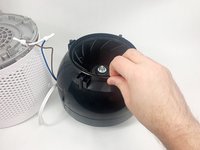
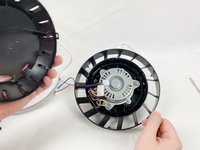
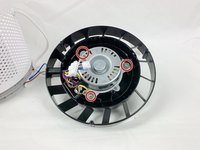
    • Use a Phillips #2 screwdriver to remove the three screws located around the fan cover.

    Vraag FixBot
  23. Levoit Core 300-RAC Motor Replacement: stap 23, afbeelding 1 van 3 Levoit Core 300-RAC Motor Replacement: stap 23, afbeelding 2 van 3 Levoit Core 300-RAC Motor Replacement: stap 23, afbeelding 3 van 3
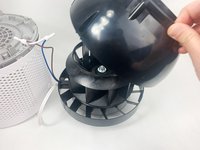
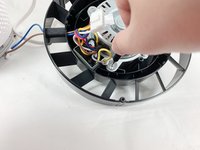
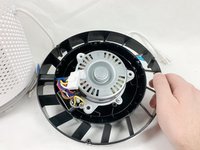
    • Lift the fan cover straight up to remove it.

    Vraag FixBot
  24. Levoit Core 300-RAC Motor Replacement: stap 24, afbeelding 1 van 3 Levoit Core 300-RAC Motor Replacement: stap 24, afbeelding 2 van 3 Levoit Core 300-RAC Motor Replacement: stap 24, afbeelding 3 van 3
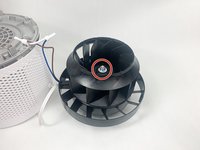
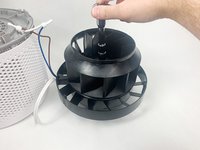
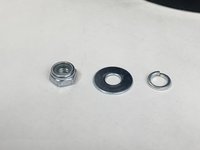
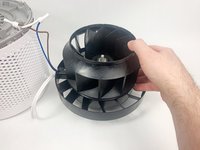
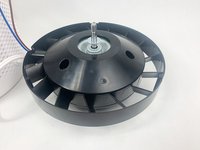
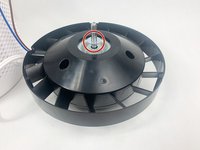
    • Use a 13 mm socket wrench with an extension to remove the nut holding the fan in place. Remove all hardware from the threaded shaft.

    • There should be a nylon-insert lock nut, a flat washer, and a split ring washer. Set these aside in a safe location.

    Vraag FixBot
  25. Levoit Core 300-RAC Motor Replacement: stap 25, afbeelding 1 van 3 Levoit Core 300-RAC Motor Replacement: stap 25, afbeelding 2 van 3 Levoit Core 300-RAC Motor Replacement: stap 25, afbeelding 3 van 3
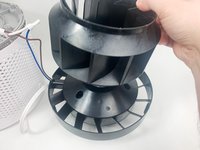
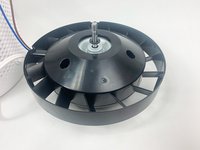
    • Lift the fan up and off of the threaded shaft.

    Vraag FixBot
  26. Levoit Core 300-RAC Motor Replacement: stap 26, afbeelding 1 van 3 Levoit Core 300-RAC Motor Replacement: stap 26, afbeelding 2 van 3 Levoit Core 300-RAC Motor Replacement: stap 26, afbeelding 3 van 3
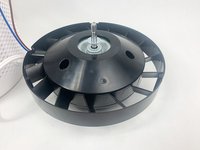
    • Remove the remaining washer that was underneath the fan.

    Vraag FixBot
  27. Levoit Core 300-RAC Motor Replacement: stap 27, afbeelding 1 van 1
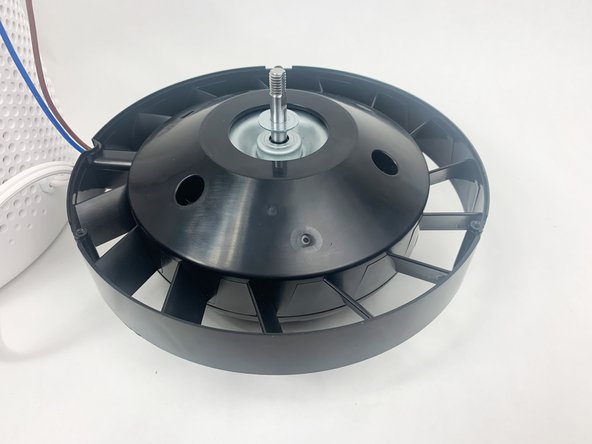
    • Turn the motor assembly over.

    • It will not lay flat.

    Vraag FixBot
  28. Levoit Core 300-RAC Motor Replacement: stap 28, afbeelding 1 van 3 Levoit Core 300-RAC Motor Replacement: stap 28, afbeelding 2 van 3 Levoit Core 300-RAC Motor Replacement: stap 28, afbeelding 3 van 3
    • Pry apart the motor housing using a spudger inserted into the notches around the seam.

    • Breaking one or more of the internal tabs holding the housing together may be unavoidable.

    Vraag FixBot
  29. Levoit Core 300-RAC Motor Replacement: stap 29, afbeelding 1 van 3 Levoit Core 300-RAC Motor Replacement: stap 29, afbeelding 2 van 3 Levoit Core 300-RAC Motor Replacement: stap 29, afbeelding 3 van 3
    • Lift off the free portion of the motor housing.

    • The cables that connected to the power board may get caught on the holes in this piece.

    Vraag FixBot
  30. Levoit Core 300-RAC Motor Replacement: stap 30, afbeelding 1 van 3 Levoit Core 300-RAC Motor Replacement: stap 30, afbeelding 2 van 3 Levoit Core 300-RAC Motor Replacement: stap 30, afbeelding 3 van 3
    • Use a Phillips #2 screwdriver to remove the three flange screws holding the motor in place.

    Vraag FixBot
  31. Levoit Core 300-RAC Motor Replacement: stap 31, afbeelding 1 van 3 Levoit Core 300-RAC Motor Replacement: stap 31, afbeelding 2 van 3 Levoit Core 300-RAC Motor Replacement: stap 31, afbeelding 3 van 3
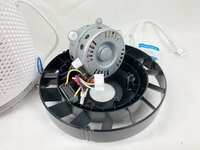
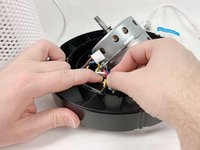
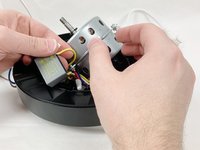
    • Lift the motor out of the housing and set it down on its side.

    • There are still wires holding the motor in place.

    • The remaining piece of the motor housing should rest flat now.

    Vraag FixBot
  32. Levoit Core 300-RAC Motor Replacement: stap 32, afbeelding 1 van 3 Levoit Core 300-RAC Motor Replacement: stap 32, afbeelding 2 van 3 Levoit Core 300-RAC Motor Replacement: stap 32, afbeelding 3 van 3
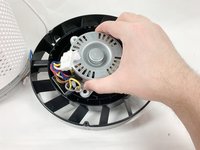
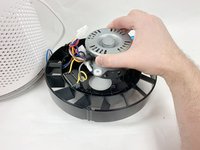
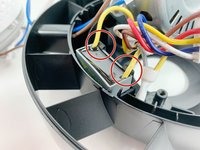
    • Use your hands to unclip the capacitor in the motor housing.

    Vraag FixBot
  33. Levoit Core 300-RAC Motor Replacement: stap 33, afbeelding 1 van 1
    • Remove the motor completely from the motor housing.

    Vraag FixBot
Conclusie

To reassemble your device, follow these instructions in reverse order. You may use solder and heat shrink tubing, or wire nuts to reconnect the power cable.

2 andere personen hebben deze handleiding voltooid.

David Kamp

Lid sinds: 11/02/23

589 Reputatie

3 handleidingen geschreven

Team

UMass Dartmouth, Team 1-6, Petersen Fall 2023 Lid van UMass Dartmouth, Team 1-6, Petersen Fall 2023

UMASSD-PETERSEN-F23S1G6

5 Leden

8 handleidingen geschreven

5Gids Commentaar

Thanks for a comprehensive teardown, and here because I'm thinking of making a new control board for the Leovit. One thing, the article seems to fall short on one crucial point though, given that it's about replacing the motor, and that's where to get a replacement and details about the motor itself. Being pedantic, it also doesn't actually describe how to replace the motor, only how to get to the stage of being able to replace it.

Nick - Antwoord Deel
Yes, where can we order the new motor?

Namrebod - Antwoord Deel

Hello, thanks for the instructions, do you have a photo of the production label of the fan please? I can't read it. Thank you. John

Jan Nedbal - Antwoord Deel
Thank you for your instructions. Our Levoit 300 is making a high pitched sound. I've read on other sites to grease the bearings. Could you please explain how I can find the bearings and what they look like?

Thank you

Alaskan Grown - Antwoord Deel
I have same question. I have a high-pitched sound coming out of it and have read that I should lubricate the motor. Is there a way to do that without doing this complete teardown? And how and where do I do it?

Karin B - Antwoord Deel

Voeg opmerking toe

Weergavestatistieken:

Afgelopen 24 uren: 4

Afgelopen 7 dagen: 35

Afgelopen 30 dagen: 169

Altijd: 3,868