Ga door naar hoofdinhoud
Word lid van de reparatiegemeenschap - Account aanmaken

Leapfrog My Own Leaptop Keyboard Buttons Replacement Guide

Wat je nodig hebt

    1. Leapfrog My Own Leaptop Keyboard Buttons Replacement Guide, Battery: stap 1, afbeelding 1 van 1
      • Flip over device so that back portion of the device is facing you.

      Vraag FixBot

      Voeg opmerking toe

    2. Leapfrog My Own Leaptop Keyboard Buttons Replacement Guide: stap 2, afbeelding 1 van 1
      • Unscrew the one 10mm screw that holds the battery cover in place with a a PH1 phillips head screwdriver.

      • Please note that the screw cannot be removed as it is attached to the battery cover.

      Vraag FixBot

      Voeg opmerking toe

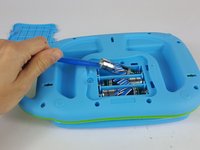
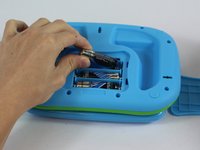
    3. Leapfrog My Own Leaptop Keyboard Buttons Replacement Guide: stap 3, afbeelding 1 van 2 Leapfrog My Own Leaptop Keyboard Buttons Replacement Guide: stap 3, afbeelding 2 van 2
      • Carefully pry the batteries out with a plastic opening tool prying from the non spring side.

      • Remove the three AA batteries.

      • Note the direction of the batteries for when reassembling.

      Vraag FixBot

      Voeg opmerking toe

    1. Leapfrog My Own Leaptop Keyboard Buttons Replacement Guide, Keyboard Buttons: stap 4, afbeelding 1 van 1
      • Remove the eleven 10mm screws from the back of the device with a a PH1 phillips head screwdriver.

      Vraag FixBot

      Voeg opmerking toe

    2. Leapfrog My Own Leaptop Keyboard Buttons Replacement Guide: stap 5, afbeelding 1 van 1
      • Carefully remove back of the device.

      • Make sure not to rip the wires when lifting the cover off.

      Vraag FixBot

      Voeg opmerking toe

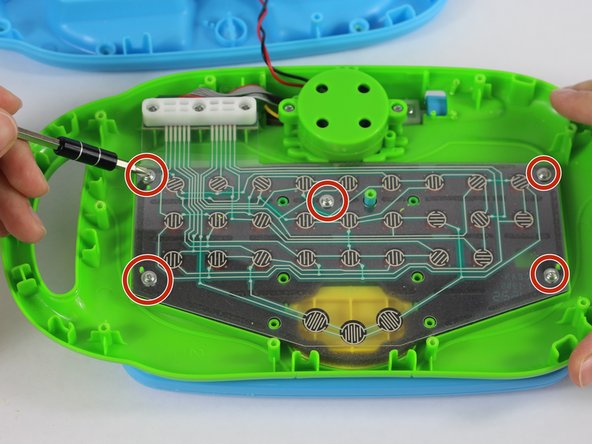
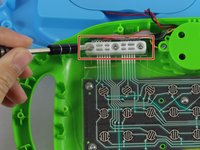
    3. Leapfrog My Own Leaptop Keyboard Buttons Replacement Guide: stap 6, afbeelding 1 van 2 Leapfrog My Own Leaptop Keyboard Buttons Replacement Guide: stap 6, afbeelding 2 van 2
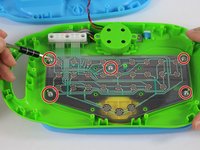
      • Remove the three 10mm screws from the upper left hand corner white plastic piece with a PH1 phillips head screwdriver.

      • Unscrew the five 4mm screws from the plastic membrane with a PH1 phillips head screwdriver.

      Vraag FixBot

      Voeg opmerking toe

    4. Leapfrog My Own Leaptop Keyboard Buttons Replacement Guide: stap 7, afbeelding 1 van 1
      • Remove the white plastic piece and place it to the side.

      Vraag FixBot

      Voeg opmerking toe

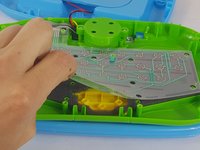
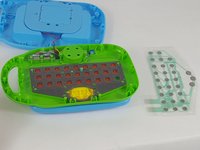
    5. Leapfrog My Own Leaptop Keyboard Buttons Replacement Guide: stap 8, afbeelding 1 van 3 Leapfrog My Own Leaptop Keyboard Buttons Replacement Guide: stap 8, afbeelding 2 van 3 Leapfrog My Own Leaptop Keyboard Buttons Replacement Guide: stap 8, afbeelding 3 van 3
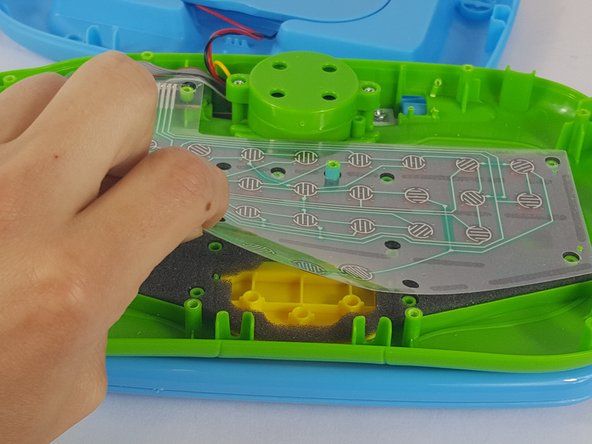
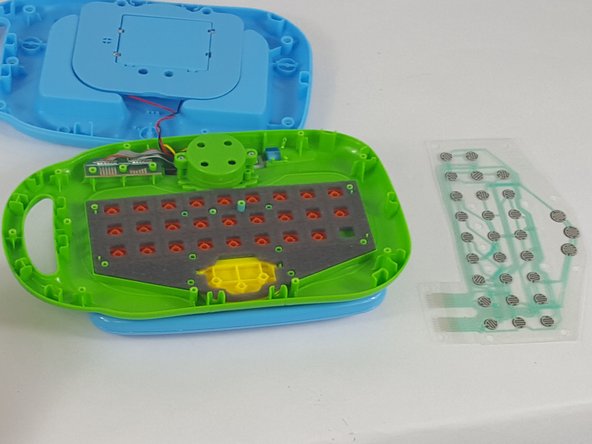
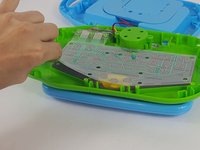
      • Gently grab the membrane and peal it upwards.

      • Carefully remove the membrane and set it to the side.

      • From this step you can also clean the membrane of any residue with a lightly dampened paper towel.

      • Ensure that the membrane is completely dry before reassembly.

      Vraag FixBot

      Voeg opmerking toe

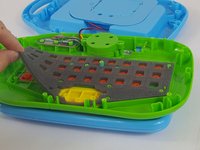
    6. Leapfrog My Own Leaptop Keyboard Buttons Replacement Guide: stap 9, afbeelding 1 van 2 Leapfrog My Own Leaptop Keyboard Buttons Replacement Guide: stap 9, afbeelding 2 van 2
      • Gently lift and remove the foam piece

      Vraag FixBot

      Voeg opmerking toe

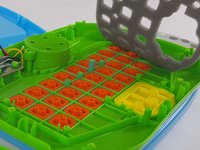
    7. Leapfrog My Own Leaptop Keyboard Buttons Replacement Guide: stap 10, afbeelding 1 van 3 Leapfrog My Own Leaptop Keyboard Buttons Replacement Guide: stap 10, afbeelding 2 van 3 Leapfrog My Own Leaptop Keyboard Buttons Replacement Guide: stap 10, afbeelding 3 van 3
      Gereedschap gebruikt in deze stap:
      Tweezers
      $4.99
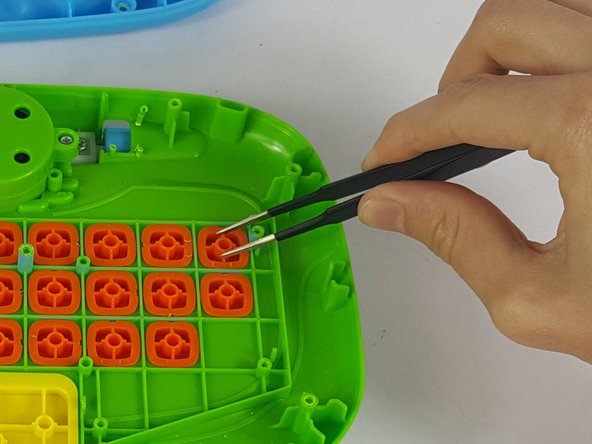
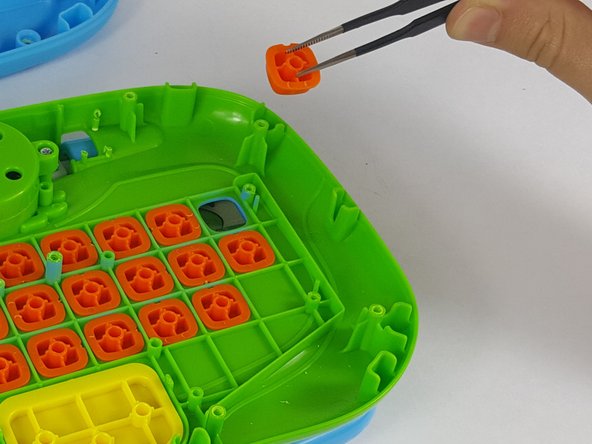
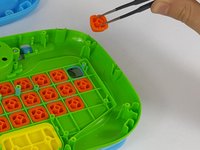
      • From here, each button is able to be removed for cleaning or replacement.

      • Using a tweezers or needle nose pliers, remove the necessary pieces from the device.

      Vraag FixBot

      Voeg opmerking toe

Conclusie

To reassemble your device, follow these instructions in reverse order.

Annuleren: ik heb deze handleiding niet afgemaakt.

3 andere personen hebben deze handleiding voltooid.

Jonathan Fitzer

Lid sinds: 02/10/16

629 Reputatie

3 handleidingen geschreven

Team

USF Tampa, Team 14-6, Lacy Spring 2016 Lid van USF Tampa, Team 14-6, Lacy Spring 2016

USFT-LACY-S16S14G6

4 Leden

6 handleidingen geschreven

7Gids Commentaar

Very useful. but where to get a new membrane? please help

Alina Timchenko - Antwoord Deel

Didn't work. I'll buy a new toy.

victoria_nglover19 - Antwoord Deel

Is the screen on this suppose to light up?

stewartmelinda41 - Antwoord Deel

I was wondering if the screen is suppose to light up because the one I have doesnt

stewartmelinda41 - Antwoord Deel

thank you very much

Njabulo Mbele - Antwoord Deel

Voeg opmerking toe

Weergavestatistieken:

Afgelopen 24 uren: 0

Afgelopen 7 dagen: 32

Afgelopen 30 dagen: 81

Altijd: 6,475