Ga door naar hoofdinhoud
Word lid van de reparatiegemeenschap - Account aanmaken

LG Optimus 3D Motherboard Replacement

Wat je nodig hebt

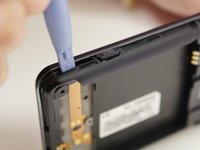
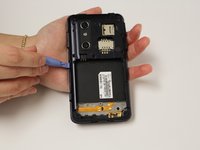
    1. LG Optimus 3D Motherboard Replacement, Back Cover Removal: stap 1, afbeelding 1 van 2 LG Optimus 3D Motherboard Replacement, Back Cover Removal: stap 1, afbeelding 2 van 2
      • Pry the back cover off of the phone with your fingernail. There is a notch located at the bottom of the phone for improved leverage.

      Vraag FixBot

      Voeg opmerking toe

    2. LG Optimus 3D Motherboard Replacement, Battery Removal: stap 2, afbeelding 1 van 3 LG Optimus 3D Motherboard Replacement, Battery Removal: stap 2, afbeelding 2 van 3 LG Optimus 3D Motherboard Replacement, Battery Removal: stap 2, afbeelding 3 van 3
      • The battery is the large black rectangle towards the bottom half of the phone.

      • There is a semi-circular notch at the bottom edge of the battery. Press against and up on the battery to pop it out.

      Vraag FixBot

      Voeg opmerking toe

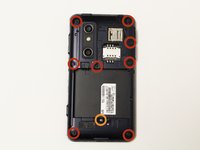
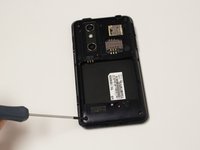
    1. LG Optimus 3D Motherboard Replacement, Screw Removal: stap 3, afbeelding 1 van 2 LG Optimus 3D Motherboard Replacement, Screw Removal: stap 3, afbeelding 2 van 2
      • Remove 9 screws from the phone. The locations of these screws are circled in the picture.

      • 5.5mm length PH00 screws

      • 4mm length PH00 screws

      Vraag FixBot

      Voeg opmerking toe

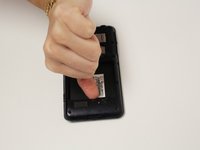
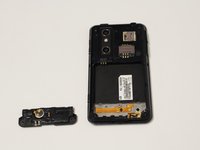
    2. LG Optimus 3D Motherboard Replacement, Bottom Cover Removal: stap 4, afbeelding 1 van 2 LG Optimus 3D Motherboard Replacement, Bottom Cover Removal: stap 4, afbeelding 2 van 2
      • Gently pull down on the bottom cover to remove it.

      Vraag FixBot

      Voeg opmerking toe

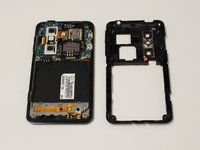
    3. LG Optimus 3D Motherboard Replacement, Mid-Cover Bezel Removal: stap 5, afbeelding 1 van 3 LG Optimus 3D Motherboard Replacement, Mid-Cover Bezel Removal: stap 5, afbeelding 2 van 3 LG Optimus 3D Motherboard Replacement, Mid-Cover Bezel Removal: stap 5, afbeelding 3 van 3
      • Using a plastic opening tool, gently pry around the perimeter of the device.

      • The ribbons behind the buttons and ports are very delicate. Make sure you do not run your plastic opening tool too deep into the bezel, as you could damage them.

      • The button covers rest under the Mid-Cover Bezel. Remove them and set aside.

      Vraag FixBot

      Voeg opmerking toe

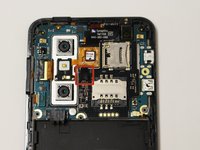
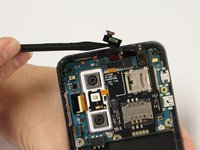
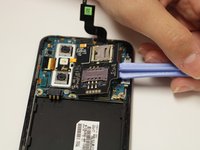
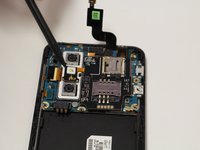
    4. LG Optimus 3D Motherboard Replacement, Ribbon Cable Disconnection: stap 6, afbeelding 1 van 2 LG Optimus 3D Motherboard Replacement, Ribbon Cable Disconnection: stap 6, afbeelding 2 van 2
      • Using a spudger or plastic opening tool, gently disconnect the ribbon cable attached to the black SIM card board.

      Vraag FixBot

      Voeg opmerking toe

    5. LG Optimus 3D Motherboard Replacement, Adhesive Loosening: stap 7, afbeelding 1 van 1
      • Use a hair-dryer on high, or a heat-gun on low to heat the device and loosen the adhesive which holds down the SD/SIM Card Board.

      • Evenly heat the device in short intervals for about one minute.

      • Do not heat the device for more than 30 seconds at a time to prevent over-heating.

      Vraag FixBot

      Voeg opmerking toe

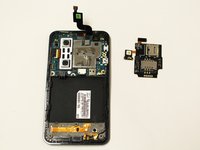
    6. LG Optimus 3D Motherboard Replacement, SD/SIM Card Board Removal: stap 8, afbeelding 1 van 3 LG Optimus 3D Motherboard Replacement, SD/SIM Card Board Removal: stap 8, afbeelding 2 van 3 LG Optimus 3D Motherboard Replacement, SD/SIM Card Board Removal: stap 8, afbeelding 3 van 3
      • Gently pry the board up to release it from the now soft adhesive. Make sure you pry up the little tab connected to the camera unit as well.

      • If the board is too difficult to separate than more heating may be required.

      Vraag FixBot

      Voeg opmerking toe

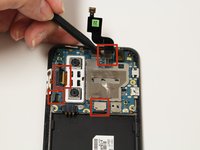
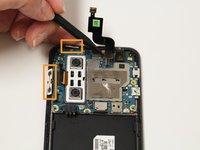
    1. LG Optimus 3D Motherboard Replacement, Disconnect Ribbon Cables: stap 9, afbeelding 1 van 2 LG Optimus 3D Motherboard Replacement, Disconnect Ribbon Cables: stap 9, afbeelding 2 van 2
      • Using a spudger or plastic opening tool, gently lift the ribbon cables connected to the motherboard.

      • The button tabs, highlighted in orange, are held in with a light adhesive. Gently lift them out of the body of the phone with a spudger.

      Vraag FixBot

      Voeg opmerking toe

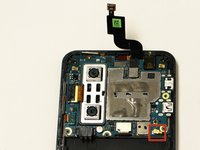
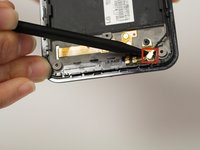
    2. LG Optimus 3D Motherboard Replacement, Disconnect Antenna: stap 10, afbeelding 1 van 2 LG Optimus 3D Motherboard Replacement, Disconnect Antenna: stap 10, afbeelding 2 van 2
      • Remove the antenna cable by disconnecting both ends.

      • One end connects to the motherboard and the other connects near bottom of the phone.

      Vraag FixBot

      Voeg opmerking toe

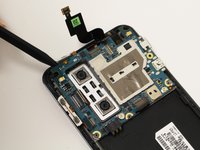
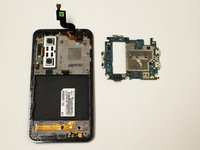
    3. LG Optimus 3D Motherboard Replacement, Remove Motherboard: stap 11, afbeelding 1 van 2 LG Optimus 3D Motherboard Replacement, Remove Motherboard: stap 11, afbeelding 2 van 2
      • Using a spudger gently lift the motherboard assembly out of the case.

      • Make sure the motherboard does not get snagged on the camera's ribbon cable.

      Vraag FixBot

      Voeg opmerking toe

Conclusie

To reassemble your device, follow these instructions in reverse order.

Annuleren: ik heb deze handleiding niet afgemaakt.

3 andere personen hebben deze handleiding voltooid.

Dale Pearson

Lid sinds: 09/22/14

784 Reputatie

6 handleidingen geschreven

Team

USF Tampa, Team 10-6, Brown Fall 2014 Lid van USF Tampa, Team 10-6, Brown Fall 2014

USFT-BROWN-F14S10G6

3 Leden

42 handleidingen geschreven

0Gids Commentaar

Voeg opmerking toe

Weergavestatistieken:

Afgelopen 24 uren: 0

Afgelopen 7 dagen: 14

Afgelopen 30 dagen: 42

Altijd: 1,876