Deze versie kan foutieve bewerkingen bevatten. Schakel over naar de recentste gecontroleerde momentopname.
Wat je nodig hebt
-
Deze stap is niet vertaald. Help het te vertalen
-
Insert a thumbnail, or a prying tool like a spudger, into the notch at the bottom left of the back cover.
-
Pry the back cover up to separate its plastic clips.
-
-
Deze stap is niet vertaald. Help het te vertalen
-
Lift the back cover to release the rest of the plastic clips and remove it.
-
-
Deze stap is niet vertaald. Help het te vertalen
-
Use a fingernail or a prying tool at the marked notch to lever the battery out of its recess.
-
-
Deze stap is niet vertaald. Help het te vertalen
-
Insert a thumbnail, or a prying tool like a spudger, into the notch at the bottom left of the back cover you used earlier to remove the back cover.
-
Pry up the plastic panel, including the loudspeaker, until you can get a good grip.
-
-
Deze stap is niet vertaald. Help het te vertalen
-
Carefully remove the plastic panel including the loudspeaker by gently pulling it away from the phone assembly.
-
-
Deze stap is niet vertaald. Help het te vertalen
-
Remove the eight Phillips #00 screws (4 mm length).
-
-
Deze stap is niet vertaald. Help het te vertalen
-
Insert an opening pick between the bottom right corner of the motherboard cover and the motherboard.
-
Pry up the motherboard cover to open the plastic clips which hold the cover in its place.
-
Work your way along the right edge.
-
-
-
Deze stap is niet vertaald. Help het te vertalen
-
Carefully lift the right edge of the motherboard cover.
-
Remove the motherboard assembly.
-
-
Deze stap is niet vertaald. Help het te vertalen
-
Use a spudger to pry up and disconnect the display flex cable.
-
-
Deze stap is niet vertaald. Help het te vertalen
-
Use a spudger to pry up and disconnect the digitizer flex cable.
-
-
Deze stap is niet vertaald. Help het te vertalen
-
Use a spudger to pry up and disconnect the rear camera flex cable.
-
-
Deze stap is niet vertaald. Help het te vertalen
-
Use a spudger to pry up and disconnect the front camera flex cable.
-
-
Deze stap is niet vertaald. Help het te vertalen
-
Slide an opening pick under the bottom right corner of the motherboard and slowly pry it out of its recess by rotating the opening pick sideways.
-
-
Deze stap is niet vertaald. Help het te vertalen
-
Slide the opening pick under the right edge of the motherboard where the SIM card slot is located and pry it up by rotating the opening pick sideways.
-
-
Deze stap is niet vertaald. Help het te vertalen
-
Grab the top section of the motherboard and carefully lift it out of the phone.
-
-
Deze stap is niet vertaald. Help het te vertalen
-
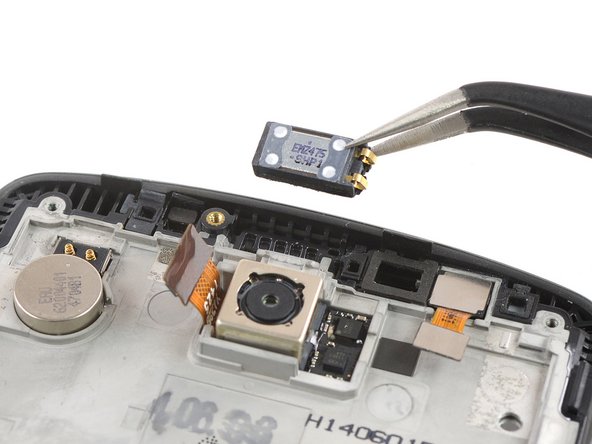
Use a pair of tweezers to remove the earpiece speaker.
-
-
Deze stap is niet vertaald. Help het te vertalen
-
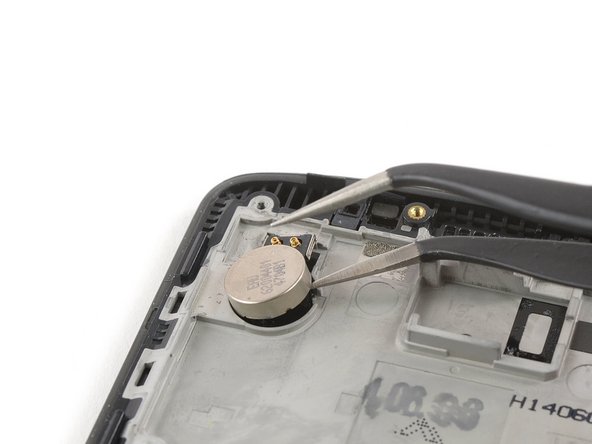
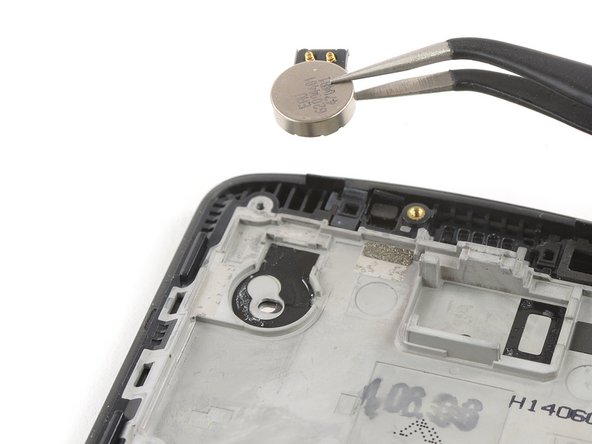
Insert one of the tweezer arms under the vibration motor and pry it up.
-
Remove the vibration motor.
-
-
Deze stap is niet vertaald. Help het te vertalen
-
Apply a heated iOpener to the bottom end of the screen to loosen the adhesive underneath.
-
-
Deze stap is niet vertaald. Help het te vertalen
-
Use the pointed end of a spudger to pry up the headphone jack and remove it with a pair of tweezers.
-
-
Deze stap is niet vertaald. Help het te vertalen
-
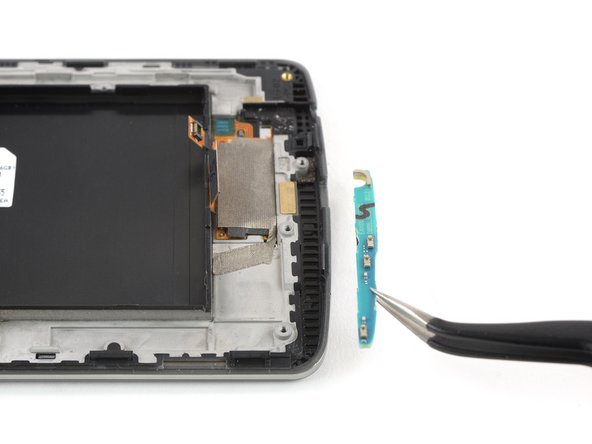
Use a pair of tweezers to carefully pry up and remove the daughterboard at the bottom end of the screen assembly.
-


Annuleren: ik heb deze handleiding niet afgemaakt.
129 andere personen hebben deze handleiding voltooid.


42 opmerkingen
Ok so after I did all this my screen is black and so I ordered a second screen and also nothing the phone works great and makes noises also touch responds but nothing on lcd just black can you help me with this also if I take battery out and plug up charger it shows a battery warning on lcd so clearly it works
Has it sustained any water damage?
Did you get it working i have the same issue? the picture displays with the original screen but not with the new one. i have tried 3 different screens and get the same on all of them. i even tried updating to the latest software but only get a black screen, no picture.
When i have had this on iphones i just so a reset by holding down the buttons and the screen starts to work.
Please someone help
Matt -
Same here! I also findout that lcd still works, if you get some flashlight on screen in a dark room, you will see that only backlight not working when battery plugged. I tried to baking it but it still didn't worked. It's obvious that backlight could properly operate as it works when you take off the battery. I'm looking for solutions, if I find any, will wrote it here.
Did someone find a solution to this? I also replaced my screen and it keeps black solid when I turn it on, even with the touch working properly.