Ga door naar hoofdinhoud

LG EnV VX9900 Number Keypad Replacement

Wat je nodig hebt

  1. LG EnV VX9900 Number Keypad Replacement, Battery: stap 1, afbeelding 1 van 1
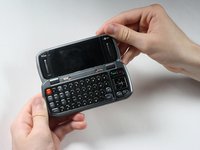
    • Place the phone so the screen side is facing down.

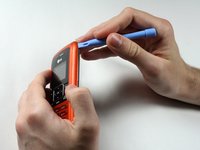
    • Locate the latch at the end of the phone, opposite of the camera.

  2. LG EnV VX9900 Number Keypad Replacement: stap 2, afbeelding 1 van 1
    • Push/pull the latch away from the camera, causing the battery to pop out.

  3. LG EnV VX9900 Number Keypad Replacement: stap 3, afbeelding 1 van 1
    • Remove the battery.

  4. LG EnV VX9900 Number Keypad Replacement, Circuit Board and Full Key Board: stap 4, afbeelding 1 van 2 LG EnV VX9900 Number Keypad Replacement, Circuit Board and Full Key Board: stap 4, afbeelding 2 van 2
    • Remove the 5 screw covers on the back of the phone using a Push Pin.

  5. LG EnV VX9900 Number Keypad Replacement: stap 5, afbeelding 1 van 1
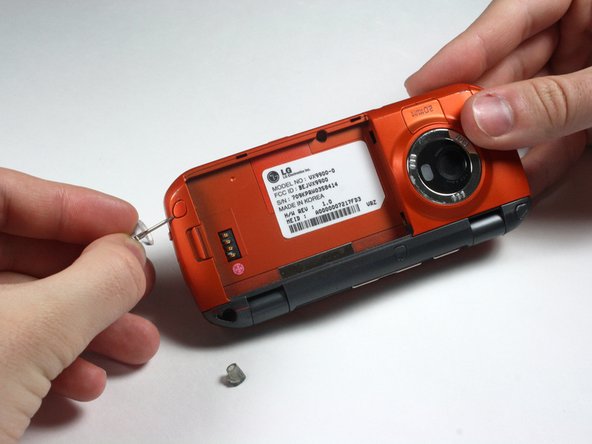
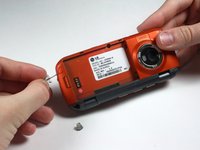
    • With a Phillips #00 Screwdriver, remove the five 3.44 mm screws that were under the screw covers.

    • Also with a Phillips #00 Screwdriver, remove the screw that was revealed once the battery was removed.

  6. LG EnV VX9900 Number Keypad Replacement: stap 6, afbeelding 1 van 2 LG EnV VX9900 Number Keypad Replacement: stap 6, afbeelding 2 van 2
    • Open the phone.

  7. LG EnV VX9900 Number Keypad Replacement: stap 7, afbeelding 1 van 2 LG EnV VX9900 Number Keypad Replacement: stap 7, afbeelding 2 van 2
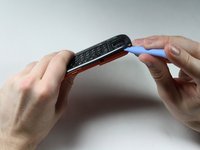
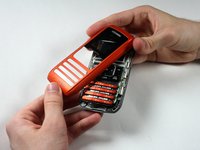
    • Starting at the card slot or charger port for greater ease, pry off the colored casing from the back of the phone using the Plastic Pry Tool (or a finger nail may work).

    • Prying open the part just to the left of the right hinge can be difficult.

    • Remove the back colored casing and set it to the side.

  8. LG EnV VX9900 Number Keypad Replacement: stap 8, afbeelding 1 van 2 LG EnV VX9900 Number Keypad Replacement: stap 8, afbeelding 2 van 2
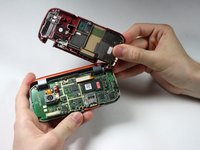
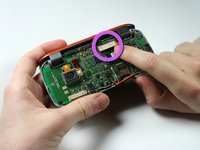
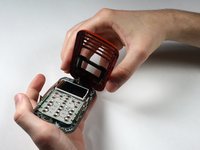
    • Gently pry and detach the connection located near the hinge with fingers.

  9. LG EnV VX9900 Number Keypad Replacement: stap 9, afbeelding 1 van 2 LG EnV VX9900 Number Keypad Replacement: stap 9, afbeelding 2 van 2
    • The circuit board and the key board will be attached, as shown in the second picture.

    • Lift them both out from the rest of the phone.

    • Do not try to the detach key board pad from the circuit board. They are replaced as a unit.

  10. LG EnV VX9900 Number Keypad Replacement, LCD Screen: stap 10, afbeelding 1 van 1
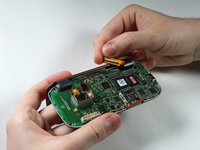
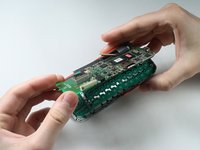
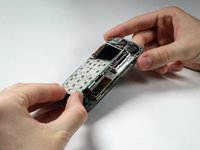
    • After removing the circuit board and key board, separate the top part with the screen from the bottom part by detaching the hinges.

  11. LG EnV VX9900 Number Keypad Replacement: stap 11, afbeelding 1 van 1
    • Careful! The paint is easy to scratch.

    • Remove the 4 screw covers from top piece of phone by using a Push Pin.

  12. LG EnV VX9900 Number Keypad Replacement: stap 12, afbeelding 1 van 1
    • Remove the four 3.44 mm screws that were under the covers using a Phillips #00 Screwdriver.

  13. LG EnV VX9900 Number Keypad Replacement: stap 13, afbeelding 1 van 3 LG EnV VX9900 Number Keypad Replacement: stap 13, afbeelding 2 van 3 LG EnV VX9900 Number Keypad Replacement: stap 13, afbeelding 3 van 3
    • Be careful while breaking the adhesive connecting the speaker and the casing in the following sub step so that you do not tear any wires.

    • Pry open the colored casing using the Plastic Pry Tool.

    • Remove the number pad and place it to the side.

  14. LG EnV VX9900 Number Keypad Replacement: stap 14, afbeelding 1 van 2 LG EnV VX9900 Number Keypad Replacement: stap 14, afbeelding 2 van 2
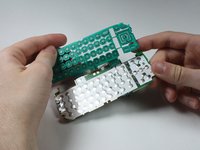
    • Because the Number Keypad is attached on one side and on top of the outer screen, open its metal casing, in a "door-opening" manner.

  15. LG EnV VX9900 Number Keypad Replacement: stap 15, afbeelding 1 van 1
    • The pieces connected by wires are magnets and are removable.

    • Remove the LCD Screen.

  16. LG EnV VX9900 Number Keypad Replacement, Number Keypad: stap 16, afbeelding 1 van 1
    • The Number Keypad and its metal casing are attached to the clear plastic screen that the LCD Screen was in. Replace both the Keypad and the casing as a unit.

Conclusie

To reassemble your device, follow these instructions in reverse order.

Één andere persoon heeft deze handleiding voltooid.

Nathan Farnum

Lid sinds: 04/05/12

72 Reputatie

1 Handleiding geschreven

Team

Cal Poly, Team 15-15, Forte Spring 2012 Lid van Cal Poly, Team 15-15, Forte Spring 2012

CPSU-FORTE-S12S15G15

5 Leden

8 handleidingen geschreven

0 opmerkingen

Voeg opmerking toe

Weergavestatistieken:

Afgelopen 24 uren: 0

Afgelopen 7 dagen: 0

Afgelopen 30 dagen: 2

Altijd: 1,040