Ga door naar hoofdinhoud
Word lid van de reparatiegemeenschap - Account aanmaken

LG Dare Earpiece Replacement

Wat je nodig hebt

  1. LG Dare Earpiece Replacement, Battery: stap 1, afbeelding 1 van 2 LG Dare Earpiece Replacement, Battery: stap 1, afbeelding 2 van 2
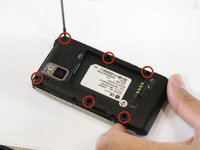
    • Remove the back cover by firmly pressing against the raised lip on the back panel. Slide the cover towards the top of the phone.

    Vraag FixBot

    Voeg opmerking toe

  2. LG Dare Earpiece Replacement: stap 2, afbeelding 1 van 3 LG Dare Earpiece Replacement: stap 2, afbeelding 2 van 3 LG Dare Earpiece Replacement: stap 2, afbeelding 3 van 3
    • Remove the battery by placing your fingernail or a opening tool in the recessed edge and lift the battery out.

    Vraag FixBot

    Voeg opmerking toe

  3. LG Dare Earpiece Replacement, Logic Board: stap 3, afbeelding 1 van 2 LG Dare Earpiece Replacement, Logic Board: stap 3, afbeelding 2 van 2
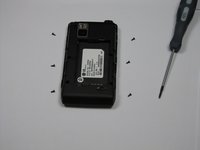
    • Use the #00 screwdriver to remove the six 4mm phillips screws located around the edges of the phone.

    Vraag FixBot

    Voeg opmerking toe

  4. LG Dare Earpiece Replacement: stap 4, afbeelding 1 van 3 LG Dare Earpiece Replacement: stap 4, afbeelding 2 van 3 LG Dare Earpiece Replacement: stap 4, afbeelding 3 van 3
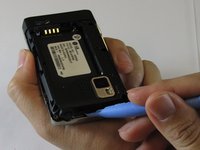
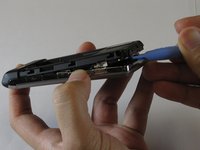
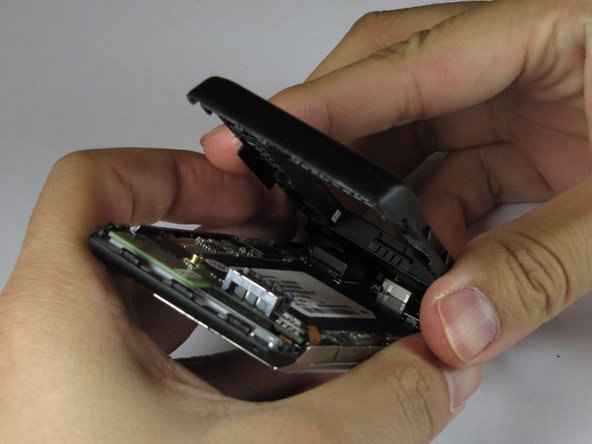
    • Lift the back plastic cover off by moving the opening tool around the edges of the phone.

    • Wedging the opening tool in several places on the bottom of the phone will help release small tabs that hold the back to the front frame.

    • The side buttons may fall out when removing the back plastic.

    Vraag FixBot

    Voeg opmerking toe

  5. LG Dare Earpiece Replacement: stap 5, afbeelding 1 van 3 LG Dare Earpiece Replacement: stap 5, afbeelding 2 van 3 LG Dare Earpiece Replacement: stap 5, afbeelding 3 van 3
    • Pull off the back plastic panel.

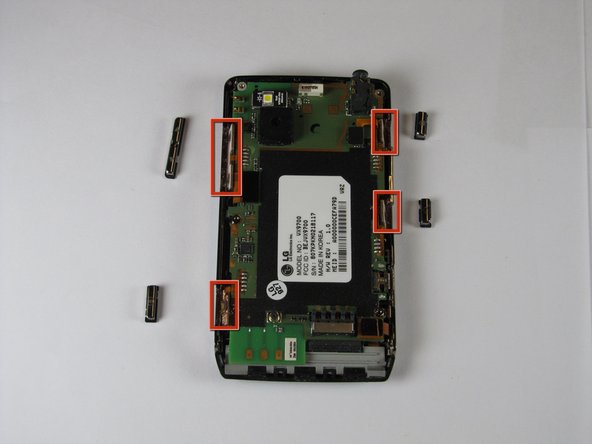
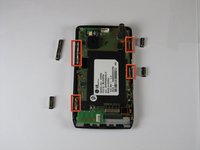
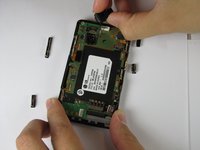
    • Remove the buttons from the edge of the frame. The buttons are [lock], [volume control], [speaker], and [camera].

    Vraag FixBot

    Voeg opmerking toe

  6. LG Dare Earpiece Replacement: stap 6, afbeelding 1 van 1
    • Disconnect the three ribbon connectors from the motherboard.

    Vraag FixBot

    Voeg opmerking toe

  7. LG Dare Earpiece Replacement: stap 7, afbeelding 1 van 3 LG Dare Earpiece Replacement: stap 7, afbeelding 2 van 3 LG Dare Earpiece Replacement: stap 7, afbeelding 3 van 3
    • Remove the LED.

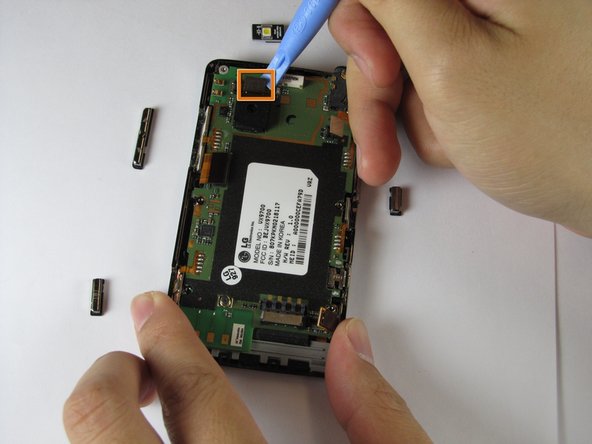
    • Remove the camera connector.

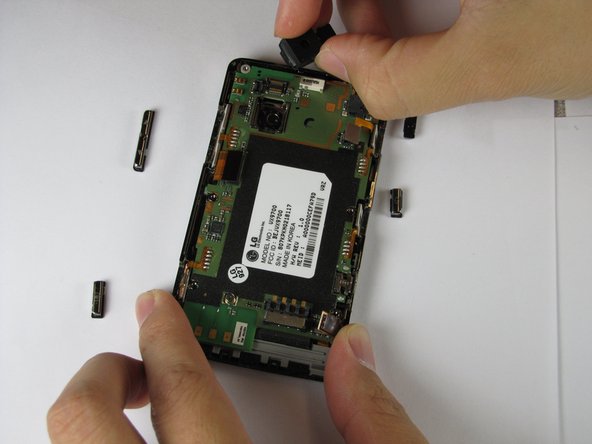
    • Remove the camera sensor from the logic board. Squeeze the sides of the camera sensor firmly and pull straight up.

    Vraag FixBot

    Voeg opmerking toe

  8. LG Dare Earpiece Replacement: stap 8, afbeelding 1 van 1
    • Open the USB port cover.

    Vraag FixBot

    Voeg opmerking toe

  9. LG Dare Earpiece Replacement: stap 9, afbeelding 1 van 3 LG Dare Earpiece Replacement: stap 9, afbeelding 2 van 3 LG Dare Earpiece Replacement: stap 9, afbeelding 3 van 3
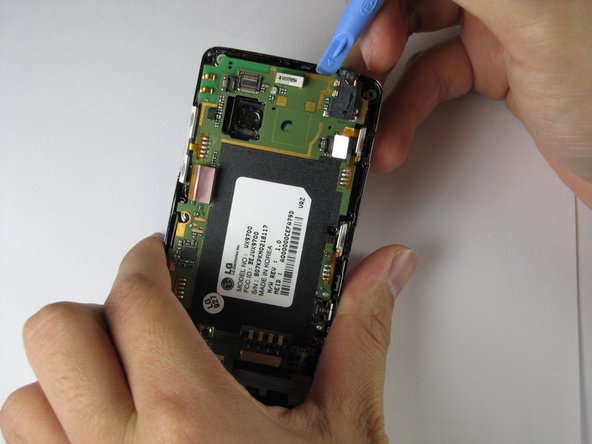
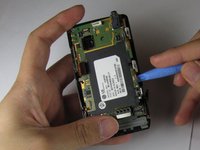
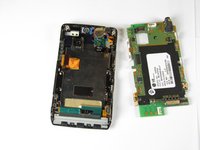
    • Use the opening tool to lift up the green logic board in all areas and remove it.

    • The logic board may require some force to remove because it is taped to the plastic frame.

    • When removing the logic board, be careful not to tear any of the ribbon cables or side buttons.

    Vraag FixBot

    Voeg opmerking toe

  10. LG Dare Earpiece Replacement, Earpiece: stap 10, afbeelding 1 van 3 LG Dare Earpiece Replacement, Earpiece: stap 10, afbeelding 2 van 3 LG Dare Earpiece Replacement, Earpiece: stap 10, afbeelding 3 van 3
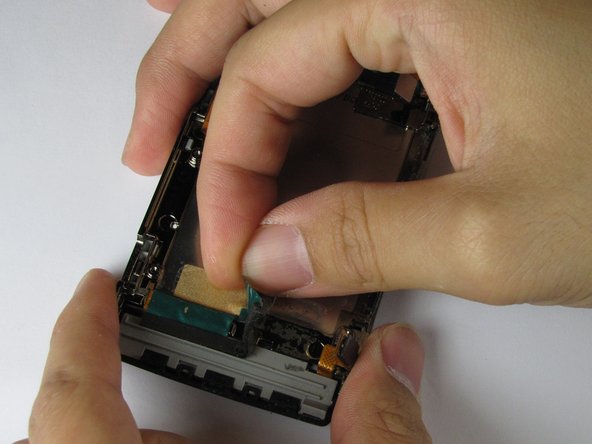
    • Peel off the gold and green tape near the bottom of the phone.

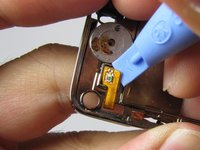
    • Peel off the blue tape covering the speaker connector.

    • Peel off the gold tape to the left of the earpiece speaker.

    • It is unnecessary to remove the blue and gold tape from the device if the speaker is not being removed.

    Vraag FixBot

    Voeg opmerking toe

  11. LG Dare Earpiece Replacement: stap 11, afbeelding 1 van 2 LG Dare Earpiece Replacement: stap 11, afbeelding 2 van 2
    • Lift up the orange ribbon cable in the bottom left corner of the device.

    • Peel off the small piece of gold tape underneath the orange component back.

    Vraag FixBot

    Voeg opmerking toe

  12. LG Dare Earpiece Replacement: stap 12, afbeelding 1 van 2 LG Dare Earpiece Replacement: stap 12, afbeelding 2 van 2
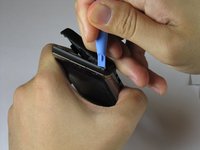
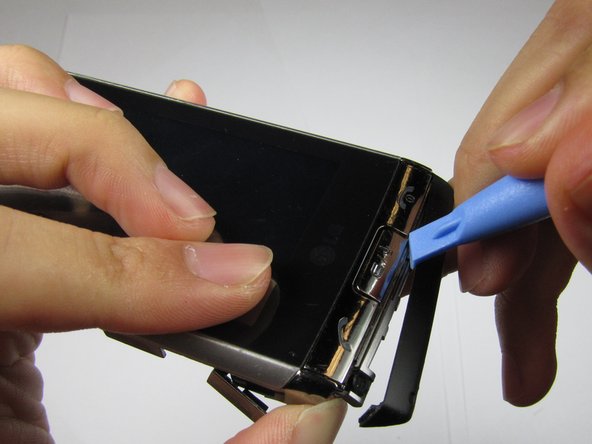
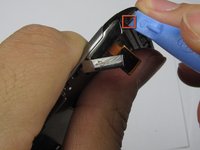
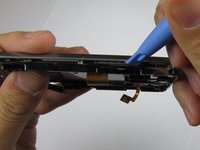
    • Undo the clips that attach the black plastic strip to the frame of the phone.

    • Pry the plastic strip away from the phone, using an opening tool, until it detaches.

    Vraag FixBot

    Voeg opmerking toe

  13. LG Dare Earpiece Replacement: stap 13, afbeelding 1 van 2 LG Dare Earpiece Replacement: stap 13, afbeelding 2 van 2
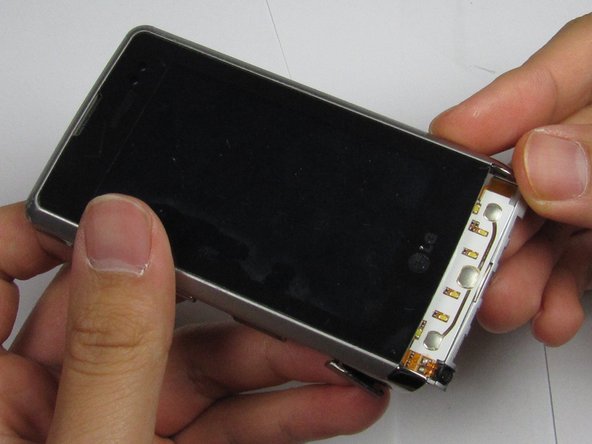
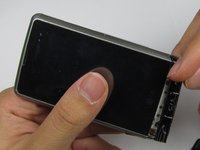
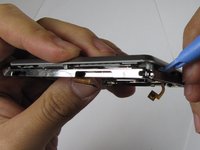
    • Pry the button panel from the device, starting where the screen and panel connect, until the panel detaches.

    Vraag FixBot

    Voeg opmerking toe

  14. LG Dare Earpiece Replacement: stap 14, afbeelding 1 van 2 LG Dare Earpiece Replacement: stap 14, afbeelding 2 van 2
    • Rotate the phone upside down with the back facing you.

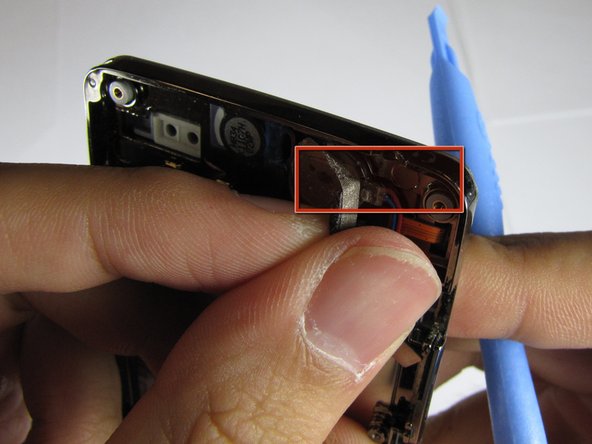
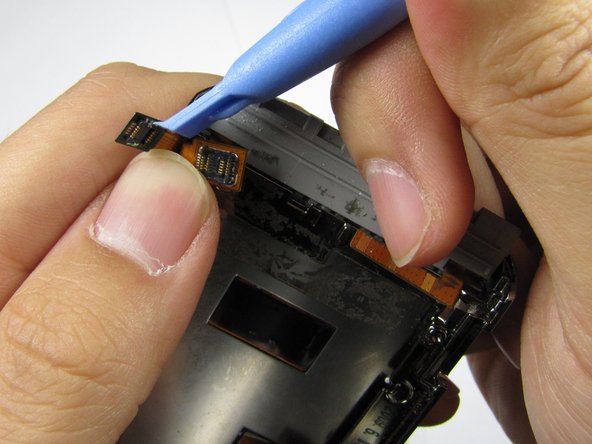
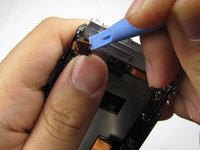
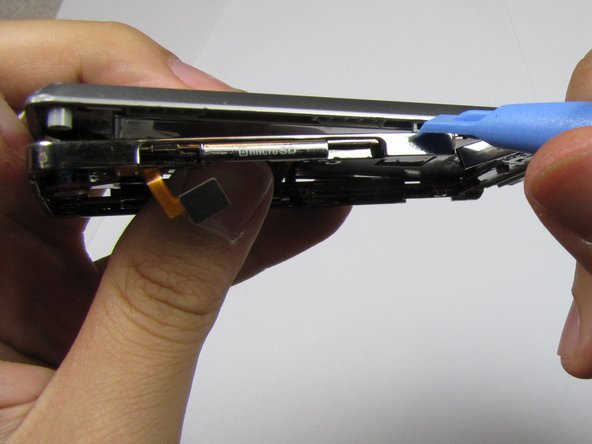
    • Using your finger to hold the bottom connector in place, use the opening tool to remove the top connector.

    Vraag FixBot

    Voeg opmerking toe

  15. LG Dare Earpiece Replacement: stap 15, afbeelding 1 van 3 LG Dare Earpiece Replacement: stap 15, afbeelding 2 van 3 LG Dare Earpiece Replacement: stap 15, afbeelding 3 van 3
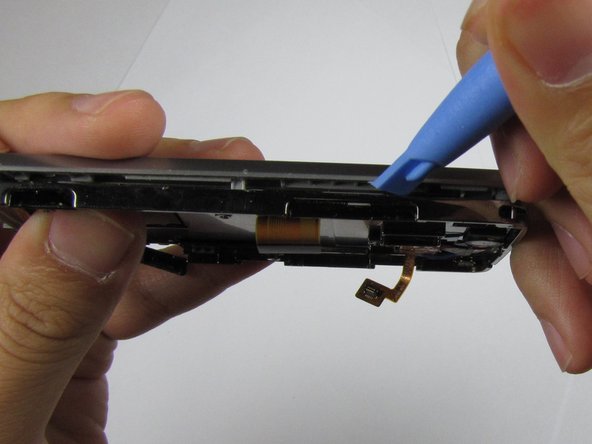
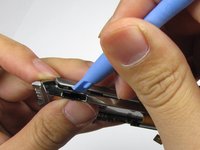
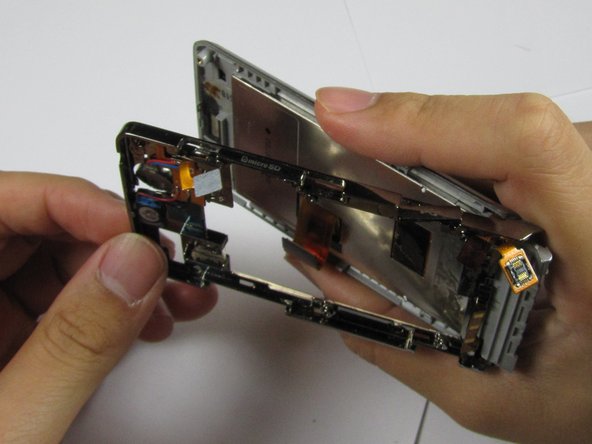
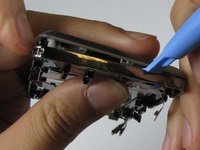
    • Using the opening tool, pry the frame from the device, starting at the open edges at the bottom of the device, and working your way around.

    • Do not detach the frame yet.

    Vraag FixBot

    Voeg opmerking toe

  16. LG Dare Earpiece Replacement: stap 16, afbeelding 1 van 3 LG Dare Earpiece Replacement: stap 16, afbeelding 2 van 3 LG Dare Earpiece Replacement: stap 16, afbeelding 3 van 3
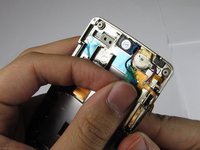
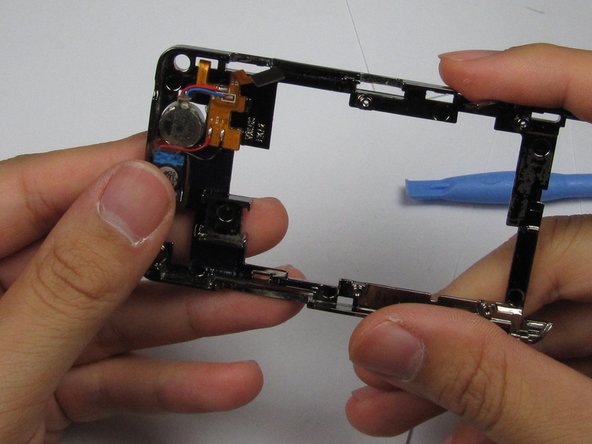
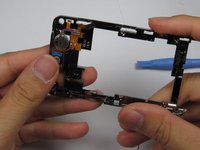
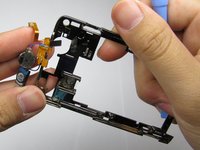
    • Gently separate the top of the frame from the back of the device, without completely detaching at the bottom, as shown in the third picture.

    Vraag FixBot

    Voeg opmerking toe

  17. LG Dare Earpiece Replacement: stap 17, afbeelding 1 van 2 LG Dare Earpiece Replacement: stap 17, afbeelding 2 van 2
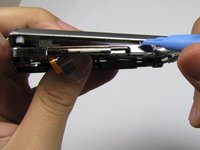
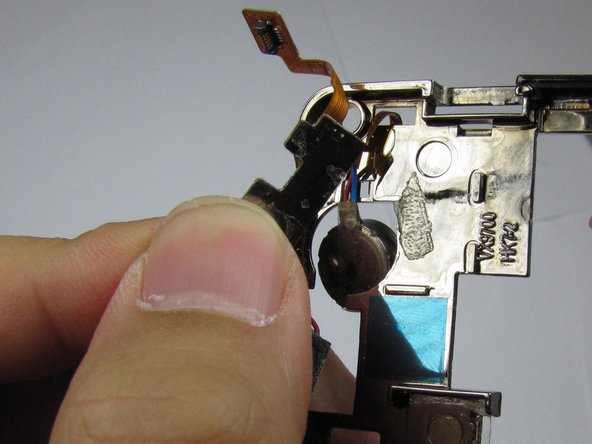
    • Remove both connectors from the frame. Fold back the L-shaped connector and slide the second connector through the hole in the metal frame.

    • Remove the frame from the plastic panel.

    • The next two steps are for earpiece removal only.

    Vraag FixBot

    Voeg opmerking toe

  18. LG Dare Earpiece Replacement: stap 18, afbeelding 1 van 2 LG Dare Earpiece Replacement: stap 18, afbeelding 2 van 2
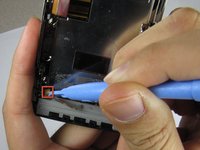
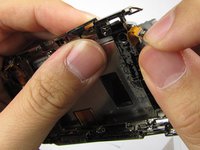
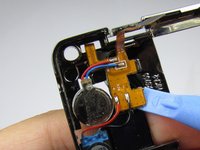
    • Using the opening tool, pry the orange connector pad that is securing the earpiece to the frame, away from the device, until it detaches.

    • It may be necessary to apply more force to remove the pad because it is taped to the frame.

    Vraag FixBot

    Voeg opmerking toe

  19. LG Dare Earpiece Replacement: stap 19, afbeelding 1 van 2 LG Dare Earpiece Replacement: stap 19, afbeelding 2 van 2
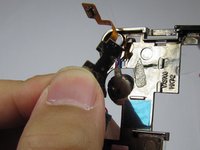
    • Pry the rest of the orange connector pad --on the opposite side of the device-- away from the frame, and carefully remove the entire earpiece.

    Vraag FixBot

    Voeg opmerking toe

Conclusie

To re-assemble your device, follow these instructions in reverse order.

Annuleren: ik heb deze handleiding niet afgemaakt.

Haoyan Huang

Lid sinds: 01/26/12

151 Reputatie

4 handleidingen geschreven

Team

Cal Poly, Team 9-4, Regan Winter 2012 Lid van Cal Poly, Team 9-4, Regan Winter 2012

CPSU-REGAN-W12S9G4

5 Leden

11 handleidingen geschreven

0Gids Commentaar

Voeg opmerking toe

Weergavestatistieken:

Afgelopen 24 uren: 0

Afgelopen 7 dagen: 16

Afgelopen 30 dagen: 52

Altijd: 1,648