Ga door naar hoofdinhoud
Word lid van de reparatiegemeenschap - Account aanmaken

Kurio Xtreme Touch Screen Replacement

Wat je nodig hebt

    1. Kurio Xtreme Touch Screen Replacement, Back Panel: stap 1, afbeelding 1 van 1
      • Remove the rubber case by beginning to peel from one of the top corners and continue peeling until the cover is completely removed.

      Vraag FixBot

      Voeg opmerking toe

    2. Kurio Xtreme Touch Screen Replacement: stap 2, afbeelding 1 van 2 Kurio Xtreme Touch Screen Replacement: stap 2, afbeelding 2 van 2
      • Unscrew the four 4 mm black screws using a Phillips #000 screw driver.

      • There are two screws on each side of the device (four total).

      Vraag FixBot

      Voeg opmerking toe

    3. Kurio Xtreme Touch Screen Replacement: stap 3, afbeelding 1 van 3 Kurio Xtreme Touch Screen Replacement: stap 3, afbeelding 2 van 3 Kurio Xtreme Touch Screen Replacement: stap 3, afbeelding 3 van 3
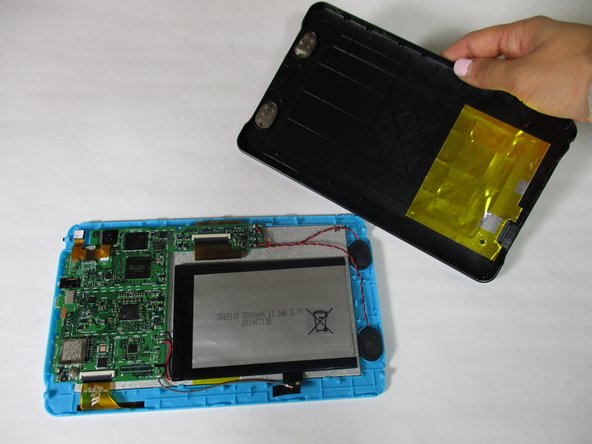
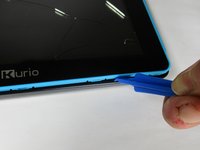
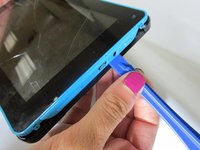
      • Insert the plastic opening tool in between the edges of the blue front casing and black back casing.

      • Slide the plastic opening tool around the perimeter of the device. This may require that you repeatedly run the opening tool up and down the edges of the device.

      • Be sure not to break any of the plastic clamps along the edges of the device when removing the back cover.

      • Carefully lift the back panel off of the rest of the device.

      Vraag FixBot

      Voeg opmerking toe

    1. Kurio Xtreme Touch Screen Replacement, Touch Screen: stap 4, afbeelding 1 van 1
      • Unscrew the three 4 mm screws with a Phillips #000 screwdriver.

      Vraag FixBot

      Voeg opmerking toe

    2. Kurio Xtreme Touch Screen Replacement: stap 5, afbeelding 1 van 2 Kurio Xtreme Touch Screen Replacement: stap 5, afbeelding 2 van 2
      • Remove the orange data display ribbon wire above the battery by prying open the ZIF connector with the plastic opening tool.

      Vraag FixBot

      Voeg opmerking toe

    3. Kurio Xtreme Touch Screen Replacement: stap 6, afbeelding 1 van 2 Kurio Xtreme Touch Screen Replacement: stap 6, afbeelding 2 van 2
      • Remove the orange data display ribbon wire to the left of the battery by prying open the ZIF connector with the plastic opening tool.

      Vraag FixBot

      Voeg opmerking toe

    4. Kurio Xtreme Touch Screen Replacement: stap 7, afbeelding 1 van 2 Kurio Xtreme Touch Screen Replacement: stap 7, afbeelding 2 van 2
      Gereedschap gebruikt in deze stap:
      Plastic Cards
      $2.99
      • Slide iFixit's Plastic Card tool or a credit card under the battery to remove the glue that is holding it in place.

      • Be patient and gentle. The glue is strong and may take up to 30 seconds to remove.

      • Carefully lift the battery out of the device and set it aside.

      • Be careful not to disconnect the black and red wires from the motherboard when setting the battery aside.

      Vraag FixBot

      Voeg opmerking toe

    5. Kurio Xtreme Touch Screen Replacement: stap 8, afbeelding 1 van 1
      • Carefully remove the speakers out of the plastic molds by lifting up the black and red wires. Set the speakers aside.

      • Be careful not to disconnect the black and red wires from the motherboard when setting the speakers aside.

      Vraag FixBot

      Voeg opmerking toe

    6. Kurio Xtreme Touch Screen Replacement: stap 9, afbeelding 1 van 2 Kurio Xtreme Touch Screen Replacement: stap 9, afbeelding 2 van 2
      • Remove the motherboard by lifting it out of the casing and set it aside along with the battery and speakers.

      • The motherboard will still be connected to the battery, speakers, and the gray ground wire.

      Vraag FixBot

      Voeg opmerking toe

    7. Kurio Xtreme Touch Screen Replacement: stap 10, afbeelding 1 van 1
      • Carefully peel the ground wire tape off of the blue front screen panel.

      • It is not necessary to peel the tape off of the back of the silver LCD screen.

      Vraag FixBot

      Voeg opmerking toe

    8. Kurio Xtreme Touch Screen Replacement: stap 11, afbeelding 1 van 2 Kurio Xtreme Touch Screen Replacement: stap 11, afbeelding 2 van 2
      • Pry open all 7 of the blue clamps by wedging the plastic opening tool under them and bending them backward.

      • The clamps will not "snap" open. This step requires you to actually bend the plastic back.

      Vraag FixBot

      Voeg opmerking toe

    9. Kurio Xtreme Touch Screen Replacement: stap 12, afbeelding 1 van 2 Kurio Xtreme Touch Screen Replacement: stap 12, afbeelding 2 van 2
      • Remove the LCD display from the blue touch screen casing by gently shaking them apart in the palm of your hand.

      • This could be stuck on, so you need heat to loosen the glue.

      • Be careful when prying the digitzer from the plastic, if you bend it too much it can break the frame!

      Vraag FixBot

      Voeg opmerking toe

Conclusie

To reassemble your device, follow these instructions in reverse order.

Annuleren: ik heb deze handleiding niet afgemaakt.

3 andere personen hebben deze handleiding voltooid.

Mallory Myers

Lid sinds: 09/22/15

1.190 Reputatie

7 handleidingen geschreven

Team

Baylor, Team 6-10, Williams Fall 2015 Lid van Baylor, Team 6-10, Williams Fall 2015

BU-WILLIAMS-F15S6G10

3 Leden

14 handleidingen geschreven

2Gids Commentaar

Thanks - very good guide! For the investment of an iFixit toolset and less than 10 GBP for a replacement digitizer, I was able to restore my little boy's treasure!

Patrick Niessen - Antwoord Deel

Thank you so much for the Guide!! Helped save Christmas!!! The steps were easy to follow and my kids tablets are back to new.

tdd82 - Antwoord Deel

Voeg opmerking toe

Weergavestatistieken:

Afgelopen 24 uren: 1

Afgelopen 7 dagen: 9

Afgelopen 30 dagen: 41

Altijd: 4,007