Inleiding
Your device power could be malfunctioning because of a faulty speed control plate. Learn how to access it with this guide.
Wat je nodig hebt
-
-
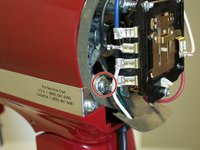
Using a Phillips #2 screwdriver, remove the 10mm screw on the back cover by rotating it counterclockwise.
-
The back cover is now free. Remove it by pulling back and up on the cover.
 Vraag FixBot
-
-
-
Using a Phillips #2 screwdriver, remove the 5mm screws holding the trimband to the top housing by rotating them counterclockwise.
-
Pull the trimband off the housing by grabbing each side and pulling it off the front.
-
-
-
Gereedschap gebruikt in deze stap:Tweezers$4.99
-
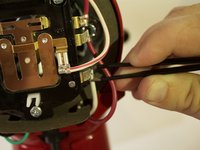
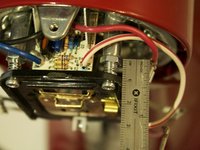
Using a Phillips #2 screwdriver, remove the 12mm screw by holding the grounding wire in place and rotating it counterclockwise.
-
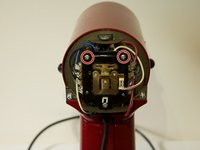
Using pliers or tweezers, remove the connectors attached to the speed control plate.
-
-
-
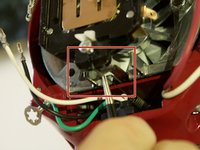
Remove the seal from the back of the mixer. Then unhook the spring from the bottom of the speed control plate by using tweezers and pulling it back and out of the plate.
-
Take a rag or towel and hook the spring on the towel so that the hook doesn’t spring back inside the mixer.
-
-
-
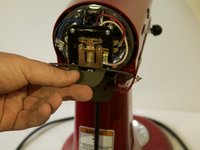
Using a Phillips #2 screwdriver, remove the two adjustment screws by rotating them counterclockwise.
-


To reassemble your device, follow these instructions in reverse order.
Annuleren: ik heb deze handleiding niet afgemaakt.
10 andere personen hebben deze handleiding voltooid.

Team

Cal Poly, Team S2-G5, Livingston Winter 2018 Lid van Cal Poly, Team S2-G5, Livingston Winter 2018
CPSU-LIVINGSTON-W18S2G5
4 Leden
16 handleidingen geschreven
1Gids Commentaar
Thanks for this, but a quick question, when the mixer is switched off, the metal bar on the back of the speed plate at the bottom, is that supposed to rest on the two prongs that stick out towards the bottom of the inside of the mixer? Thanks.