Inleiding
This is surprisingly easy to open - just clips! Hooray! Just wanted to kick it off by getting the first guide out so others can keep rolling with repair guides. First part is always hardest when you don't know what you're getting into, but give this a go, slow and easy, you'll have it opened up in no time flat!
Wat je nodig hebt
-
-
Using a guitar pick style pry tool and/or black pry tool get started on one of the corners to loosen back cover from display. Once the corner is loose, you'll notice you can pry the back away and slide your pick to the next corner
 Vraag FixBot
-
-
-
At this point, having one or more corners loose, you can almost pry by hand, but best to be safe and not break the plastic by continuing to run pry tool around each corner (see open case photo for clip style)
-
-
-
Ah sweet open Kindle...feels good. Easier than we thought. No messy adhesives. And no cables on back case just unclip, unclip...snap, snap, snap.
-
-
-
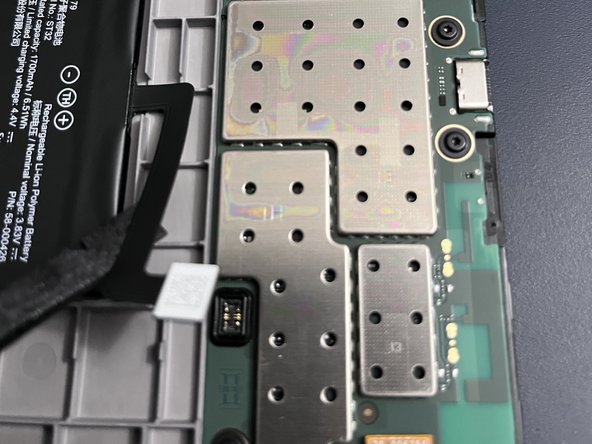
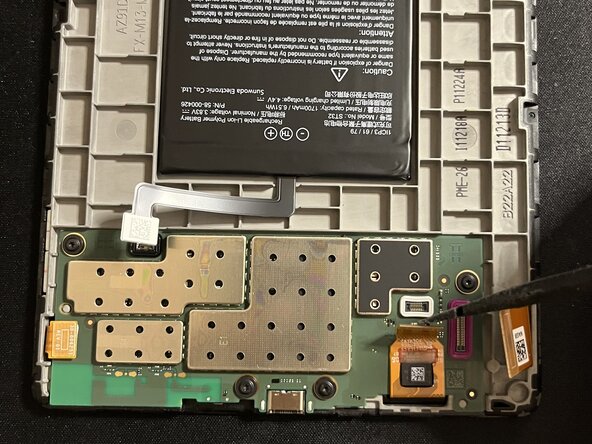
Whatever repair you have in mind next, always start with disconnecting the battery, and for this, the black pry tool is your friend. Enjoy.
-
-
-
-
Carefully lift all ribbon cables from the board. Plastic or metal spudger works best. Use ESD safe tools.
-
-
-
While lifting next ribbon cable, take note the lower portion appears to be glued down, exercise caution.
-
-
-
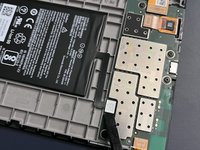
Use heat gun around edges of board as its glued down. Pay particular attention to the lower left corner as there is a stronger black glue strip there and this is where your main prying efforts will be applied once glue is heated. Use heat safe mat and as always do not overheat. Take it slow.
-
-
-
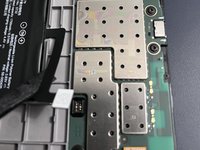
After edges and glue are heated, start prying lower corner while propped in a stable position. Take your time and re heat as needed. Use thin flat, thinnest picks you have to graduallly loosen around the edges, taking care not to damage the board. Take note you should lift the board from top as there is still one cable attached to the board.
-


To reassemble your device, follow these instructions in reverse order.
Annuleren: ik heb deze handleiding niet afgemaakt.
15 andere personen hebben deze handleiding voltooid.


7Gids Commentaar
Amazing. Thank you! I see my screen data ribbon is missing a pin (it snapped off) but I still have it. Not sure i can fix it but perhaps can get a new ribbon. Do you know the part number?
La placa esta pegada al marco? No sale facilmente. Te has quedado en como abrirlo pero luego habria que explicar como quitar la bateria o la placa para cambiar la pantalla
looks like the battery is stuck. Did you manage to remove it (I need to change the eink screen) ?