Inleiding
This trackball is of a very robust construction; I have been using it for my work since 2009.
I appreciate the ball's inertia; crossing the screen only takes a flick. The large buttons allow a great deal of freedom of positioning your fingers. The four buttons are programmable and accept 6 commands.
In normal usage the trackball can get dirty, but the ball and optical sensors are easy to clean with a microfiber cloth. However, as with all mice, the interior cannot be cleaned without disassembly. I recently lost the use of the right click.
Wat je nodig hebt
-
-
Remove the ball and flip the base over.
-
Take off the rubber feet hiding 4 Phillips (PH1) screws using a spudger.
-
Remove the rubber crown hiding 3 small Phillips (PH0) screws.
-
Remove the seven screws.
-
-
-
Using an opening pick, pry up the lower case from the bottom.
-
Tilt the lower case to the left to access the USB cable that is routed through a channel in the lower case.
-
Loosen the cable retainer to free the lower housing.
-
-
-
-
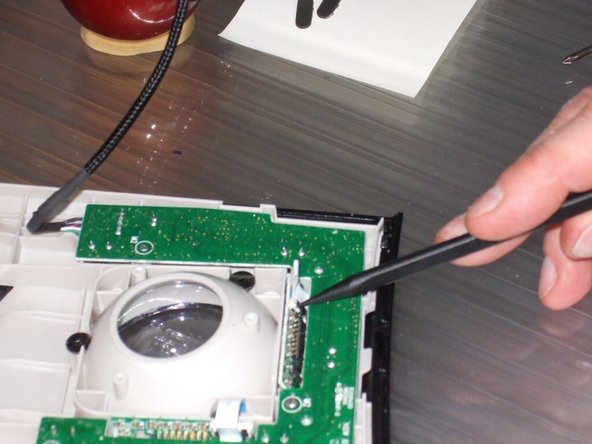
Flip up the retaining lever of the ZIF connector on the horizontal optical sensor.
-
Remove the cable from the connector.
-
Flip up the retaining lever of the ZIF connector on the vertical optical sensor.
-
Remove the cable from the connector.
-
Remove the 3 Phillips PH0 screws securing the circuit board. They are marked with white circles.
-
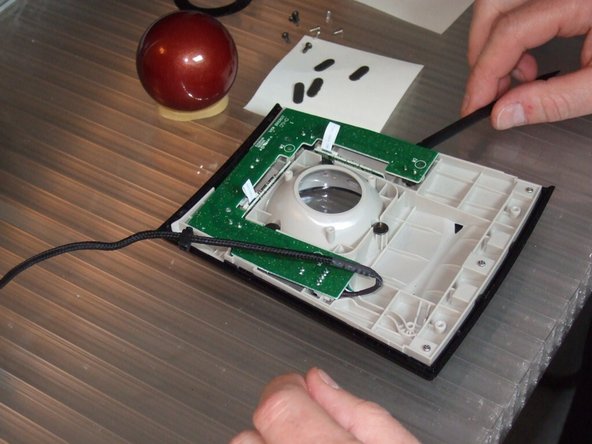
Remove the circuit board by carefully lifting with a spudger. Place it on a stable support to dust off the micro contacts.
-
-
-
Dust the button contacts by pressing on them with a spudger and blowing into them with a hand blower. Repeat ten to twenty times for each of the four contacts.
-
Remove the screws from the horizontal displacement sensor.
-
Dust the sensor as needed. (This one is surprisingly clean.)
-
Do the same for the vertical displacement sensor.
-


To reassemble your device, follow the instructions in reverse order.
To reassemble your device, follow the instructions in reverse order.
Annuleren: ik heb deze handleiding niet afgemaakt.
Één andere persoon heeft deze handleiding voltooid.
Met dank aan deze vertalers:
100%

Jerry Wheeler helpt ons de wereld te herstellen! Wil je bijdragen?
Begin met vertalen ›
Team
