Deze versie kan foutieve bewerkingen bevatten. Schakel over naar de recentste gecontroleerde momentopname.
Wat je nodig hebt
-
Deze stap is niet vertaald. Help het te vertalen
-
Using a metal spudger, peel back the foam pad on the bottom of the device to reveal six screws.
-
-
Deze stap is niet vertaald. Help het te vertalen
-
Remove the six 20 mm T6 screws from the bottom of the device.
-
-
Deze stap is niet vertaald. Help het te vertalen
-
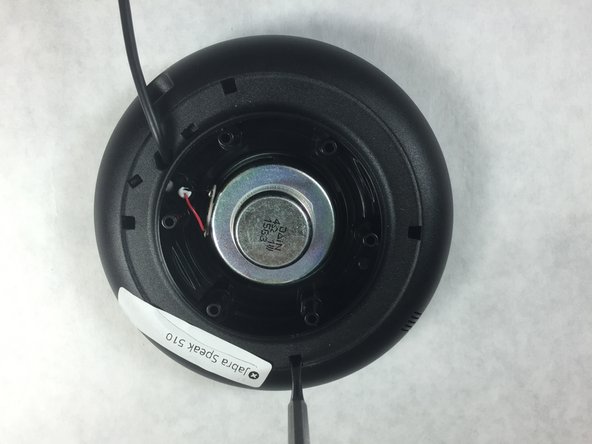
Remove the back plate and the grey foam underneath.
-
-
-
Deze stap is niet vertaald. Help het te vertalen
-
Use a small, pointed metal spudger to release the plastic tabs connecting the faceplate to the bottom of the speaker.
-
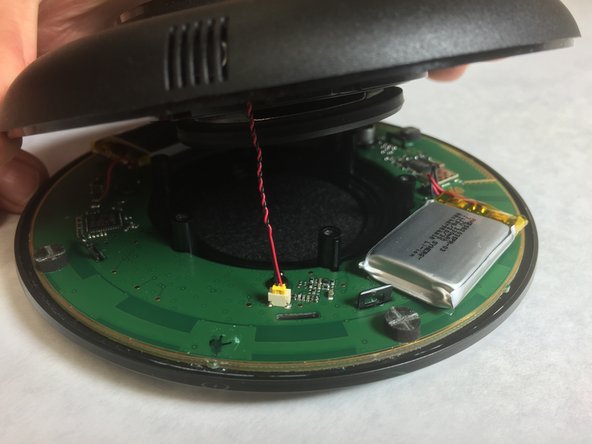
Slowly flip the device open like a clam shell.
-
-
Deze stap is niet vertaald. Help het te vertalen
-
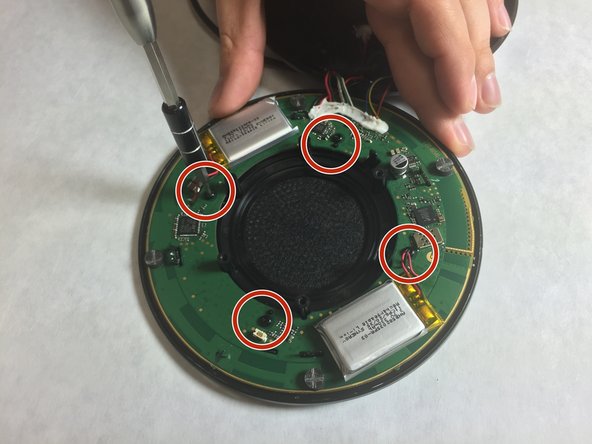
Using the T6 Torx Screwdriver, remove the four (4mm) screws.
-
-
Deze stap is niet vertaald. Help het te vertalen
-
After removing the screws, take out the center covering to free the motherboard by lifting the tabs and pulling it off.
-
-
Deze stap is niet vertaald. Help het te vertalen
-
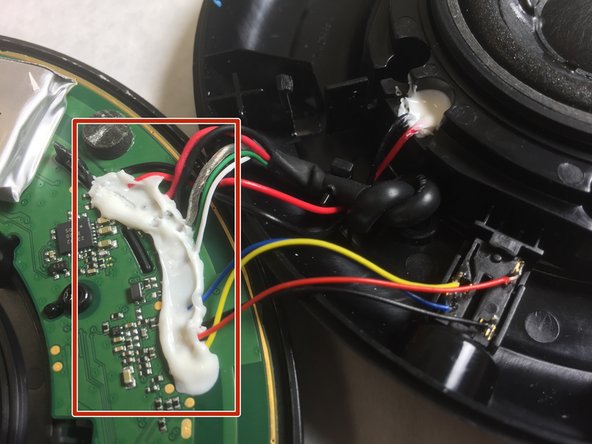
Peel off the white adhesive to desolder the connections underneath.
-
Desolder the wires connected to the motherboard.
-


Annuleren: ik heb deze handleiding niet afgemaakt.
4 andere personen hebben deze handleiding voltooid.

Team

IUPUI, Team 2-3, Harley Spring 2016 Lid van IUPUI, Team 2-3, Harley Spring 2016
IUPUI-HARLEY-S16S2G3
4 Leden
8 handleidingen geschreven
3 opmerkingen
Great walk-through... thanks
Be very careful when desoldering the connector cables! The soldering lugs are poor quality and tend to tear off the PCB