Deze versie kan foutieve bewerkingen bevatten. Schakel over naar de recentste gecontroleerde momentopname.
Wat je nodig hebt
-
Deze stap is niet vertaald. Help het te vertalen
-
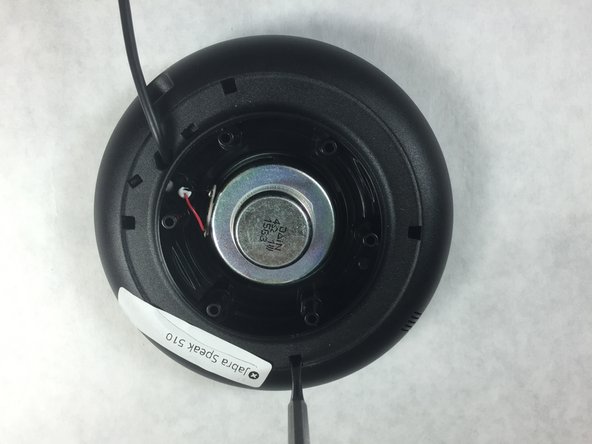
Using a metal spudger, peel back the foam pad on the bottom of the device to reveal six screws.
-
-
Deze stap is niet vertaald. Help het te vertalen
-
Remove the six 20 mm T6 screws from the bottom of the device.
-
-
-
Deze stap is niet vertaald. Help het te vertalen
-
Remove the back plate and the grey foam underneath.
-
-
Deze stap is niet vertaald. Help het te vertalen
-
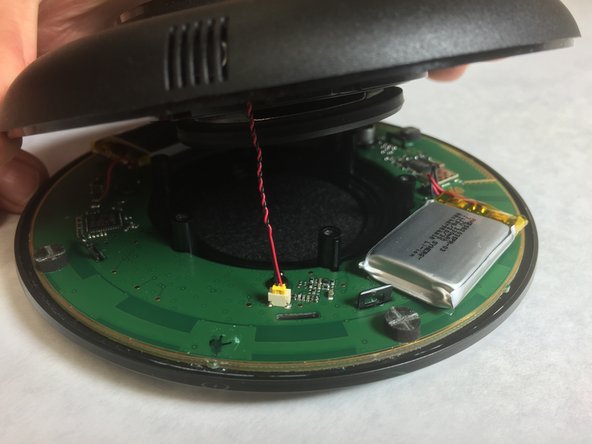
Use a small, pointed metal spudger to release the plastic tabs connecting the faceplate to the bottom of the speaker.
-
Slowly flip the device open like a clam shell.
-
-
Deze stap is niet vertaald. Help het te vertalen
-
Once you have carefully separated the bottom case from the top case, locate the two batteries attached to the motherboard.
-
Desolder the battery connections using the heated soldering iron.
-
-
Deze stap is niet vertaald. Help het te vertalen
-
Carefully pry the battery away from the motherboard using a plastic opening tool. The glue gives very slowly under constant pressure and cannot be hurried. As the battery starts to lift you can insert the prying tool further as you continue to lift the battery.
-
The adhesive may still have sufficient stickiness to hold the new batteries, but if not, replace it with double sided tape.
-
Solder the wires of the new batteries to the board, making sure that the red and black go to the correct pads.
-


Annuleren: ik heb deze handleiding niet afgemaakt.
20 andere personen hebben deze handleiding voltooid.
Team

IUPUI, Team 2-3, Harley Spring 2016 Lid van IUPUI, Team 2-3, Harley Spring 2016
IUPUI-HARLEY-S16S2G3
4 Leden
8 handleidingen geschreven
9 opmerkingen
Very precisely described steps, super well written - excellent job Ed, thanks
Thank`s so much! Great job!
Is it possible to change the USB cable?