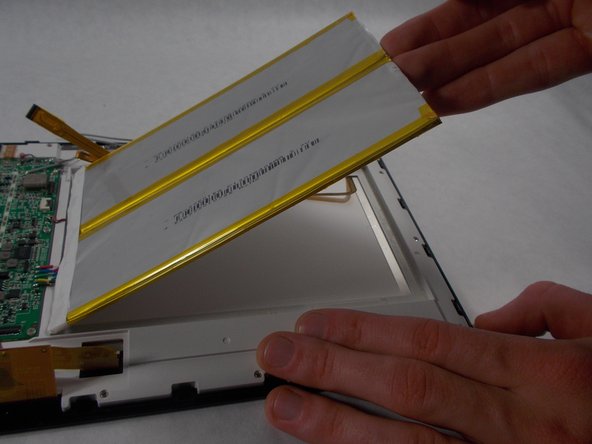
Ga door naar hoofdinhoud

Insignia Flex 10.1 Battery Replacement

Wat je nodig hebt

  1. Insignia Flex 10.1 Battery Replacement, Battery: stap 1, afbeelding 1 van 1
    • Please be aware that removing the rear panel from the back of the Flex 10.1 may cause damage to the rear panel.

  2. Insignia Flex 10.1 Battery Replacement: stap 2, afbeelding 1 van 2 Insignia Flex 10.1 Battery Replacement: stap 2, afbeelding 2 van 2
    • The rear panel is secured to the front case by 26 clips attached to the rear panel. These clips lock onto small tabs machined into the front case.

    • To free the tabs, they must be pushed toward the center of the device. When using the plastic opening tool to free the rear panel, be sure to work the tool at the location of these clips.

    • To help in visualization, the 9 clips boxed in red are located on the same side as the volume buttons.

    • Remove back cover by inserting a plastic opening tool along the edge of the device to release the clips.

  3. Insignia Flex 10.1 Battery Replacement: stap 3, afbeelding 1 van 1
    • Opening the Flex 10.1 can be challenging. Don't get discouraged if it takes multiple attempts before the Flex 10.1 is opened.

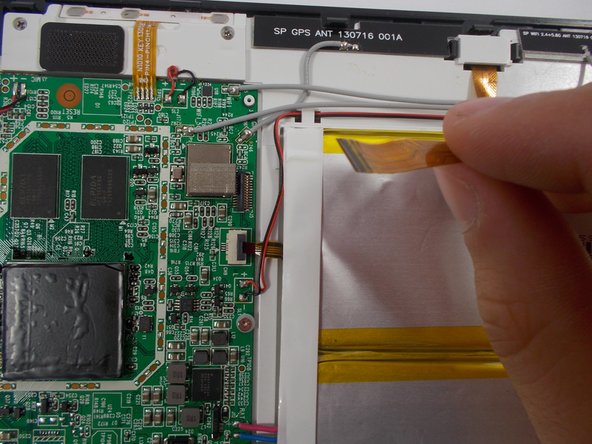
    • Insert the plastic opening tool into the seam between the front case and the rear panel of the Flex 10.1.

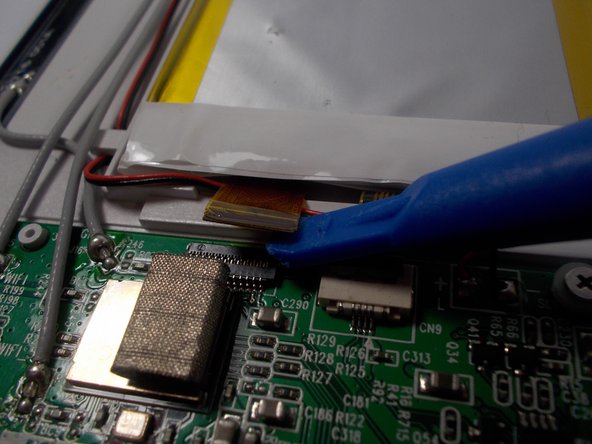
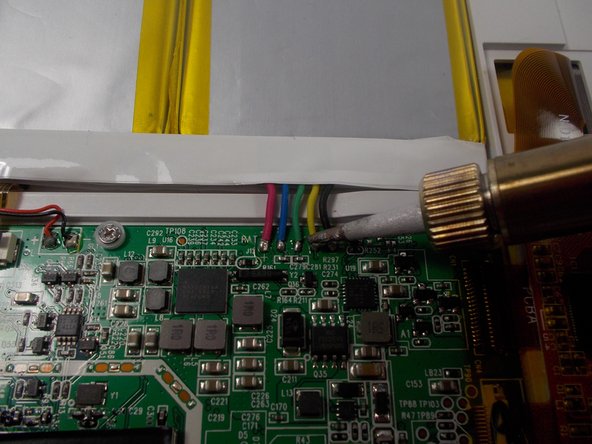
    • Gently enlarge the existing gap by pressing and wiggling the plastic opening tool into the gap near each of the clips attached to the rear case. Pushing the clips toward the center of the device until the clips have been freed.

    • Repeat the same procedure to free all clips around the Flex 10.1.

  4. Insignia Flex 10.1 Battery Replacement: stap 4, afbeelding 1 van 1
    • After ensuring all clips are free, separate the two halves of the Flex 10.1.

    • The rear panel is now free from the Flex 10.1.

  5. Insignia Flex 10.1 Battery Replacement: stap 5, afbeelding 1 van 1
    • With the rear panel removed, the back side of the Flex 10.1 should look like this.

  6. Insignia Flex 10.1 Battery Replacement: stap 6, afbeelding 1 van 3 Insignia Flex 10.1 Battery Replacement: stap 6, afbeelding 2 van 3 Insignia Flex 10.1 Battery Replacement: stap 6, afbeelding 3 van 3
    • Disconnect the ribbon cable from the motherboard by lifting up on the connector.

  7. Insignia Flex 10.1 Battery Replacement: stap 7, afbeelding 1 van 2 Insignia Flex 10.1 Battery Replacement: stap 7, afbeelding 2 van 2
    • The battery is connected to the motherboard by 5 wires soldered to the motherboard.

    • Those who are new to soldering may want to check out iFixit's soldering technique guide. Hoe moet je (de-)solderen?.

    • Begin by heating up the five solder joints on the motherboard one at a time.

    • When the solder melts and the wire is free from the motherboard, immediately lift the solder tip off the connection to avoid damage.

    • Due to the fragile nature of electronic components, it is important to limit the amount of heat transferred from the soldering iron to the motherboard. A simple way to accomplish this is to pull the wires with gentle continuous tension while the soldering iron heats up the connection.

  8. Insignia Flex 10.1 Battery Replacement: stap 8, afbeelding 1 van 2 Insignia Flex 10.1 Battery Replacement: stap 8, afbeelding 2 van 2
    • The battery is glued in place.

    • Insert the plastic opening tool along the edge of the battery and gently pry out the battery.

    • Don't be afraid to apply some extra force when lifting the battery. An optional step is to heat up the glue with a blow dryer to soften the glue so the battery is easier to remove.

  9. Insignia Flex 10.1 Battery Replacement: stap 9, afbeelding 1 van 1
    • The battery is now removed and can be replaced.

Conclusie

To reassemble your device, follow these instructions in reverse order.

5 andere personen hebben deze handleiding voltooid.

Nicholas Keene

Lid sinds: 03/08/16

276 Reputatie

1 Handleiding geschreven

Team

UMass Dartmouth, Team 2-1, Isaacson Spring 2016 Lid van UMass Dartmouth, Team 2-1, Isaacson Spring 2016

UMASSD-ISAACSON-S16S2G1

3 Leden

11 handleidingen geschreven

Één opmerking

ok, sounds easy enough..being a electrical/electronic tech……..but, i kinda don’t like he clips…thats gonna be an S.O.B for me….I ave to disassemble 2 batteries…yuk…… than you ..very insightful and explained well. next job , unlocking iclouds on iphones….just wish i as gettin paid..lol

Kathi shep - Antwoord

Voeg opmerking toe

Weergavestatistieken:

Afgelopen 24 uren: 0

Afgelopen 7 dagen: 0

Afgelopen 30 dagen: 6

Altijd: 7,360