Inleiding
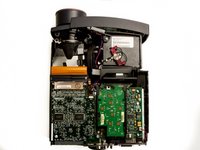
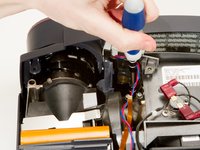
The small, secondary fan sits just behind the vents in the grill next to the lens in the front of the projector. It draws air over the light focusing area that can get quite hot due to the lamp, and also aids in drawing more airflow into the projector for the main fan to circulate.
Wat je nodig hebt
-
-
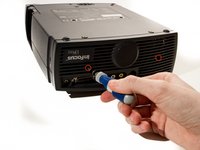
Place the projector on its back (buttons down) with the lens facing away from you.
-
Remove the two 84mm screws in the upper left and right corners of the projector using the Phillips #2 screwdriver.
-
Remove the remaining three 8.5mm screws using the Phillips #1 screwdriver.
 Vraag FixBot
-
-
-
Use the plastic opening tools to push down the clips holding the lamp cover in place, and remove it.
-
-
-
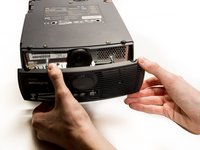
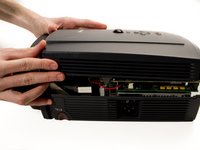
Remove the two 8.5mm rear screws holding the rear case plate to the projector using the Phillips #1 screwdriver.
-
Pull the rear plate straight off and set it aside.
-
-
-
-
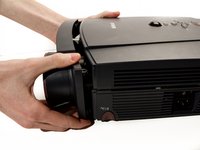
Flip the projector over and turn around so that the lens faces you.
-
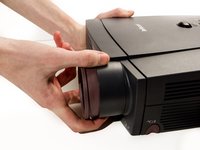
Twist the gray zoom adjustment ring clockwise and extend the lens all the way out, and then slide the zoom adjustment ring all the way towards the end of the lens as far as it will go.
-
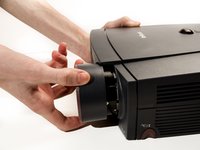
Slide the front case plate towards the loosened zoom adjustment ring, until the top plate of the projector is freed from underneath the lip of the front case plate.
-
-
-
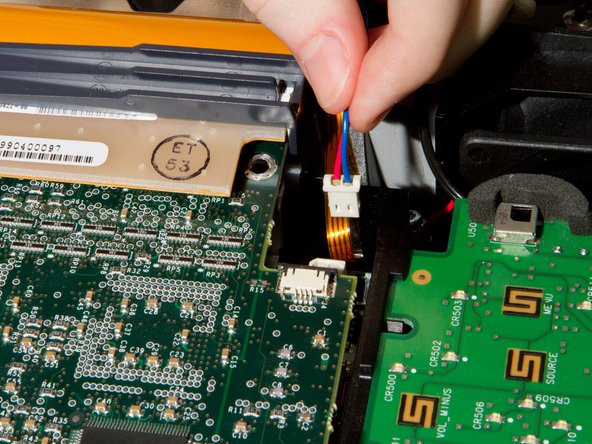
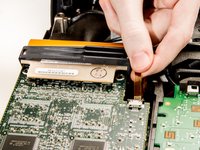
Unplug the small ribbon cable connecting the DLP board to the motherboard. It is obstructing the secondary fan power cable.
-
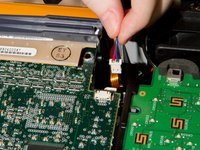
Unplug the secondary fan's power cable from the motherboard.
-
-
-
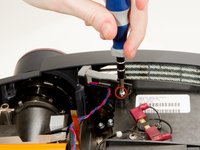
Remove the two Phillips #1 8.5mm screws holding the secondary fan in place.
-


To reassemble your device, follow these instructions in reverse order.
Annuleren: ik heb deze handleiding niet afgemaakt.
2 andere personen hebben deze handleiding voltooid.

Team

Cal Poly, Team 20-3, Maness Winter 2013 Lid van Cal Poly, Team 20-3, Maness Winter 2013
CPSU-MANESS-W13S20G3
4 Leden
13 handleidingen geschreven