Inleiding
Pop filters help to minimize audio cutting out or loud popping noises. If your HyperX QuadCast S Microphone is experiencing these issues, you may need to replace your pop filter. The pop filter is located inside the microphone rather than on its exterior. The pop filter is secured by a layer of glue attached to a wire, so it is important to remember to apply glue to any replacement pop filter.
-
-
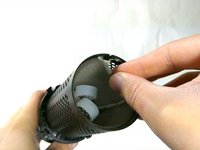
Set the microphone on a flat surface.
-
Pull each of the support bands upwards and off of the notches to release the microphone from its base.
 Vraag FixBot
-
-
-
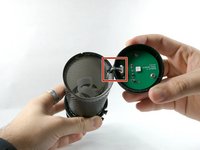
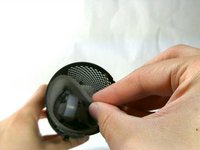
Grab ahold of the tap-to-mute Sensor and pull it upwards in a clockwise motion.
-
-
-
-
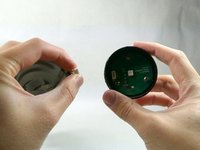
Gently unplug the cable, and remove the tap to the Tap-To-Mute sensor from the microphone.
-
-
-
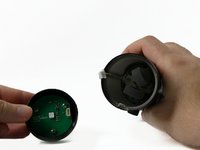
Once the Tap-To-Mute sensor has been removed, you will now have access to the pop filter.
-
-
-
The pop filter will be in a fixed position being glued to the wire. Remove glue residue before continuing to remove the pop filter.
-


To reassemble your device, follow these instructions in reverse order.
Annuleren: ik heb deze handleiding niet afgemaakt.
Één andere persoon heeft deze handleiding voltooid.

Team

UMass Dartmouth, Team 4-1, Sinclaire Fall 2022 Lid van UMass Dartmouth, Team 4-1, Sinclaire Fall 2022
UMASSD-SINCLAIRE-F22S4G1
5 Leden
9 handleidingen geschreven
3Gids Commentaar
"Grab ahold of the tap-to-mute Sensor and pull it upwards in a clockwise motion."
This part is keyed. It literally cannot be pulled in any rotational motion...
Is there a place where you recomend i can get a replacement peice of foam for the pop filter. I cant find one anywhere online.
did you happen to find anything?