Ga door naar hoofdinhoud
Word lid van de reparatiegemeenschap - Account aanmaken

HyperX Pulsefire Haste Battery Replacement

Wat je nodig hebt

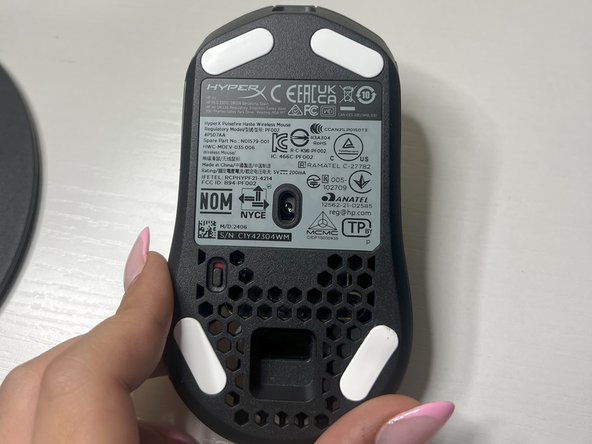
    1. HyperX Pulsefire Haste Battery Replacement, Battery: stap 1, afbeelding 1 van 2 HyperX Pulsefire Haste Battery Replacement, Battery: stap 1, afbeelding 2 van 2
      • Power off the mouse using the switch located underneath and rest on the underside.

      Vraag FixBot

      Voeg opmerking toe

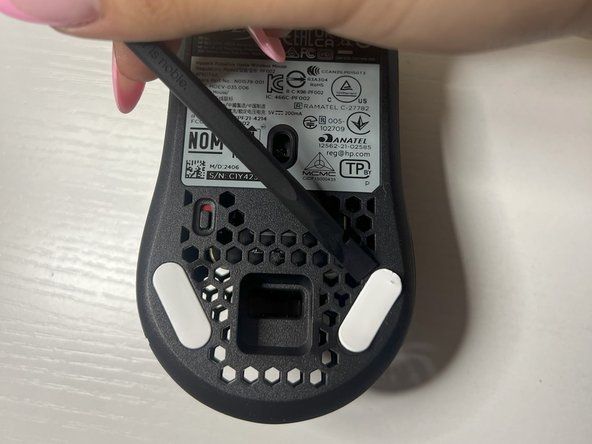
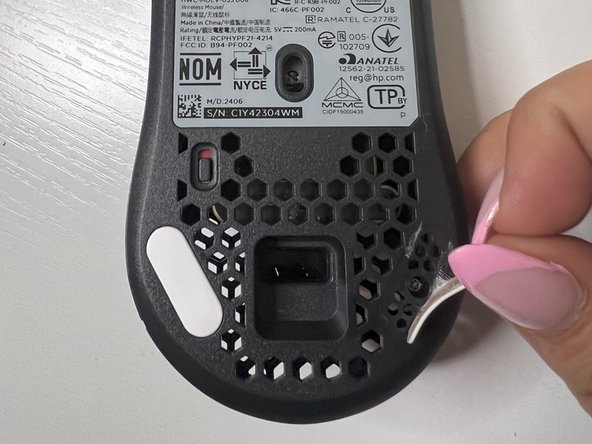
    2. HyperX Pulsefire Haste Battery Replacement: stap 2, afbeelding 1 van 3 HyperX Pulsefire Haste Battery Replacement: stap 2, afbeelding 2 van 3 HyperX Pulsefire Haste Battery Replacement: stap 2, afbeelding 3 van 3
      • Using the plastic spudger, remove the white mouse sticker grips on both sides of lower portion of the bottom mouse to reveal the screw holes underneath.

      Vraag FixBot

      Voeg opmerking toe

    3. HyperX Pulsefire Haste Battery Replacement: stap 3, afbeelding 1 van 3 HyperX Pulsefire Haste Battery Replacement: stap 3, afbeelding 2 van 3 HyperX Pulsefire Haste Battery Replacement: stap 3, afbeelding 3 van 3
      • Remove both of the screws on the bottom of the mouse using a TR6 Torx screwdriver.

      Vraag FixBot

      Voeg opmerking toe

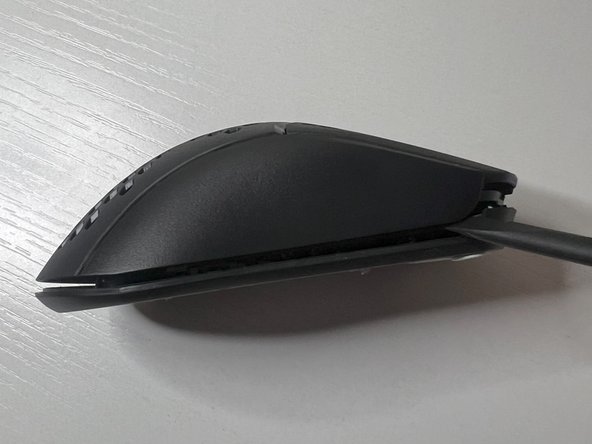
    4. HyperX Pulsefire Haste Battery Replacement: stap 4, afbeelding 1 van 3 HyperX Pulsefire Haste Battery Replacement: stap 4, afbeelding 2 van 3 HyperX Pulsefire Haste Battery Replacement: stap 4, afbeelding 3 van 3
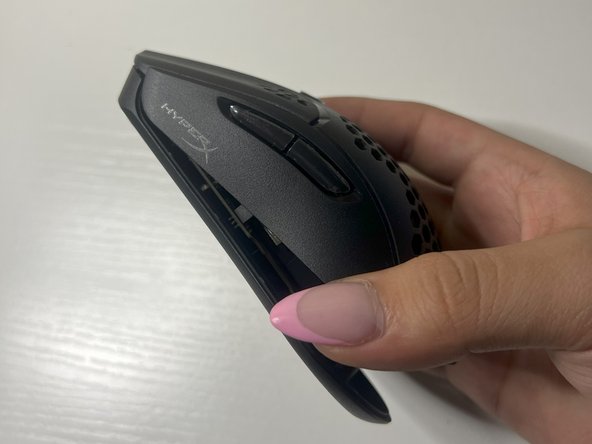
      • Use the plastic spudger to separate the mouse covering from the base on both sides of the mouse.

      • It is helpful to place the spudger in the front crevices underneath the mouse buttons and move in upward and downward motions until it loosens.

      Vraag FixBot

      Voeg opmerking toe

    5. HyperX Pulsefire Haste Battery Replacement: stap 5, afbeelding 1 van 1
      • Remove the three screws located on the battery casing at the top, left, and right sides using a TR6 Torx screwdriver.

      Vraag FixBot

      Voeg opmerking toe

    6. HyperX Pulsefire Haste Battery Replacement: stap 6, afbeelding 1 van 3 HyperX Pulsefire Haste Battery Replacement: stap 6, afbeelding 2 van 3 HyperX Pulsefire Haste Battery Replacement: stap 6, afbeelding 3 van 3
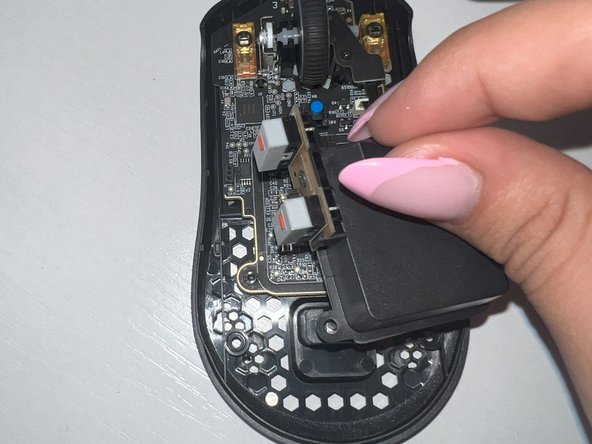
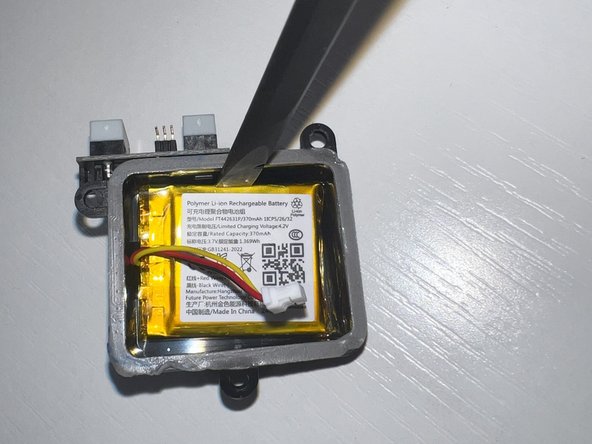
      • Use the plastic spudger to gently lift the battery cover with the battery inside, ensuring the wiring is still connected, setting it nearby.

      Vraag FixBot

      Voeg opmerking toe

    7. HyperX Pulsefire Haste Battery Replacement: stap 7, afbeelding 1 van 3 HyperX Pulsefire Haste Battery Replacement: stap 7, afbeelding 2 van 3 HyperX Pulsefire Haste Battery Replacement: stap 7, afbeelding 3 van 3
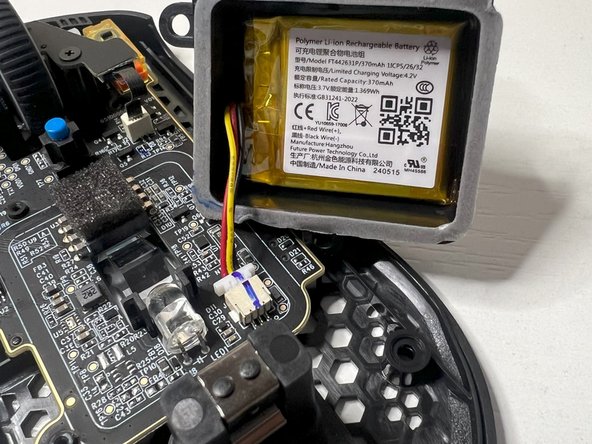
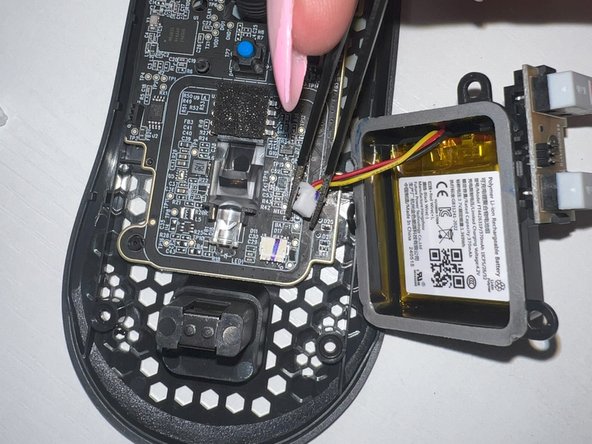
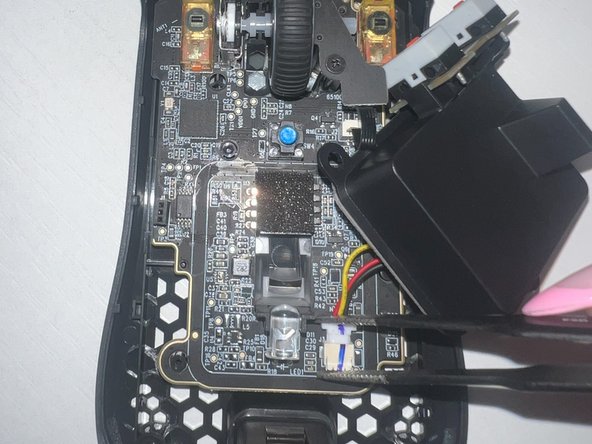
      • Use the tweezers to grab the white connector and remove the battery wiring from the mouse base.

      Vraag FixBot

      Voeg opmerking toe

    8. HyperX Pulsefire Haste Battery Replacement: stap 8, afbeelding 1 van 3 HyperX Pulsefire Haste Battery Replacement: stap 8, afbeelding 2 van 3 HyperX Pulsefire Haste Battery Replacement: stap 8, afbeelding 3 van 3
      • Place the new battery with the label facing upwards into the casing.

      • Ensure you set the old battery aside to be able to be properly disposed of, either by taking it to a recycling center or returning it to the retailer. Do not throw the battery in the trash.

      Vraag FixBot

      Voeg opmerking toe

    9. HyperX Pulsefire Haste Battery Replacement: stap 9, afbeelding 1 van 3 HyperX Pulsefire Haste Battery Replacement: stap 9, afbeelding 2 van 3 HyperX Pulsefire Haste Battery Replacement: stap 9, afbeelding 3 van 3
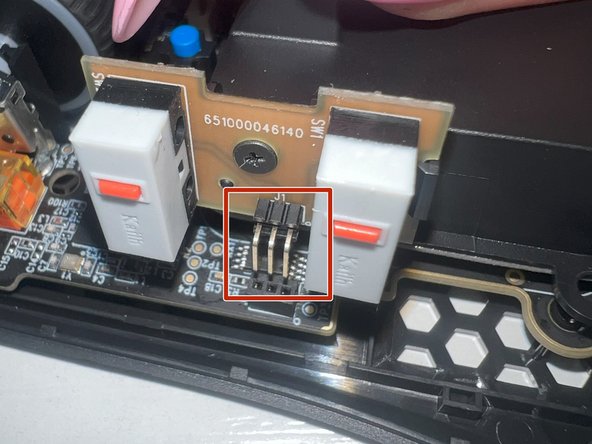
      • Using the tweezers, gently connect the wire back to its location, while ensuring the three pins are back in their original pinholes.

      Vraag FixBot

      Voeg opmerking toe

    10. HyperX Pulsefire Haste Battery Replacement: stap 10, afbeelding 1 van 1
      • Using the TR6 Torx screwdriver, screw back all three of the screws originally taken off of the battery casing.

      Vraag FixBot

      Voeg opmerking toe

    11. HyperX Pulsefire Haste Battery Replacement: stap 11, afbeelding 1 van 3 HyperX Pulsefire Haste Battery Replacement: stap 11, afbeelding 2 van 3 HyperX Pulsefire Haste Battery Replacement: stap 11, afbeelding 3 van 3
      • Place the mouse covering back on, ensuring the component is properly aligned with the screw holes underneath.

      Vraag FixBot

      Voeg opmerking toe

    12. HyperX Pulsefire Haste Battery Replacement: stap 12, afbeelding 1 van 2 HyperX Pulsefire Haste Battery Replacement: stap 12, afbeelding 2 van 2
      • Screw both of the outer screws back on the lower bottom of the mouse using a TR6 Torx screwdriver.

      Vraag FixBot

      Voeg opmerking toe

    13. HyperX Pulsefire Haste Battery Replacement: stap 13, afbeelding 1 van 3 HyperX Pulsefire Haste Battery Replacement: stap 13, afbeelding 2 van 3 HyperX Pulsefire Haste Battery Replacement: stap 13, afbeelding 3 van 3
      • Place the mouse sticker grips that you previously took off back on to cover the screw holes.

      Vraag FixBot

      Voeg opmerking toe

Conclusie

Congratulations! You have successfully completed replacing the battery inside of your wireless mouse! You can now use your knowledge you have gained from this replacement in future similar scenarios and continue on doing your part in reducing the amount of e-waste on our planet.

Annuleren: ik heb deze handleiding niet afgemaakt.

luna

Lid sinds: 09/19/24

217 Reputatie

1 Handleiding geschreven

0Gids Commentaar

Voeg opmerking toe

Weergavestatistieken:

Afgelopen 24 uren: 4

Afgelopen 7 dagen: 30

Afgelopen 30 dagen: 135

Altijd: 2,861