Deze handleiding heeft recentere wijzigingen. Schakel over naar de nieuwste niet-geverifieerde versie.
Inleiding
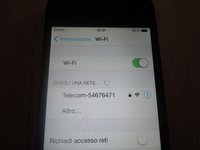
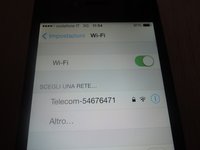
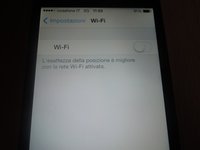
A common problem in the iPhone 4S, sometimes the Wi-Fi button will be grayed out and unclickable. This problem seems to be related to thermal shock — the problem may be temporarily fixed by simply putting the phone in the refrigerator for 15 minutes, or under a lamp for 30 minutes.
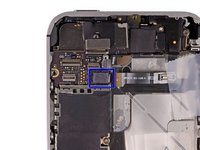
If this is the case, then the necessary permanent solution is to reflow the Murata SW SS1830010 Wi-Fi chip on the logic board.
Wat je nodig hebt
-
-
Power off your iPhone before beginning disassembly.
-
Remove the two 3.6 mm Pentalobe P2 screws next to the dock connector.
-
-
-
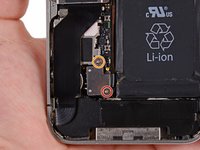
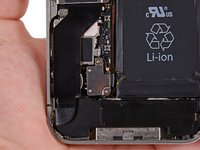
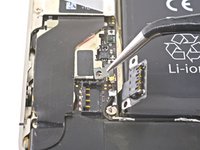
Remove the following screws securing the battery connector to the logic board:
-
One 1.7 mm Phillips screw
-
One 1.5 mm Phillips screw
-
-
-
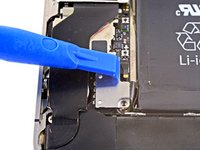
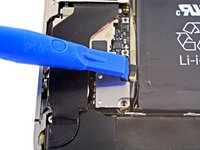
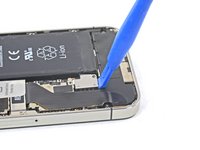
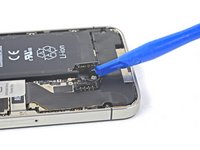
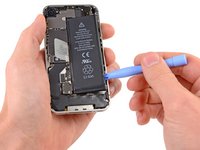
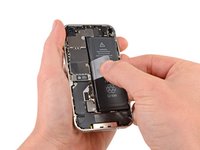
Insert the edge of a plastic opening tool between the battery and the outer case near the bottom of the iPhone.
-
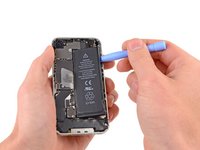
Run the plastic opening tool along the right edge of the battery and pry up at several points to completely separate it from the adhesive securing it to the outer case.
-
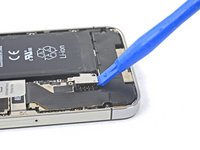
Wait about one minute for the alcohol solution to weaken the adhesive.
-
Use the flat end of a plastic opening tool to gently lift the battery.
-
-
-
Remove the following screws securing the dock connector cable cover to the logic board:
-
One 1.5 mm Phillips screw
-
One 1.2 mm Phillips screw
-
Remove the metal dock connector cable cover.
-
-
-
-
Use a SIM eject tool or a paperclip to eject the SIM and its tray.
-
Remove the SIM and its tray.
-
-
-
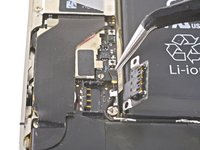
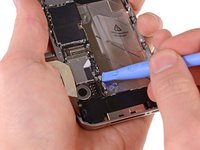
Remove the five cables near the top of the logic board in the following order:
-
Headphone jack/volume button cable
-
Front facing camera cable
-
Digitizer cable
-
Display data cable
-
Power button cable (located underneath the headphone jack/volume button cable as shown in the second picture.)
-
-
-
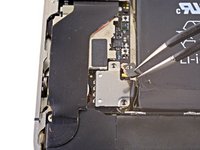
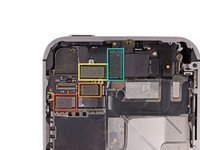
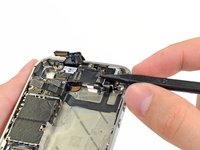
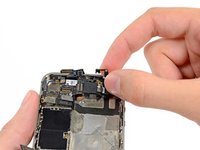
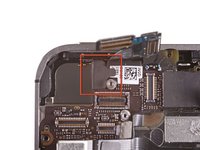
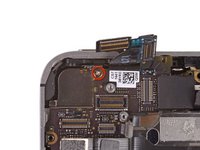
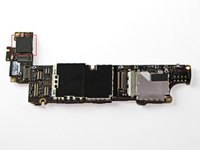
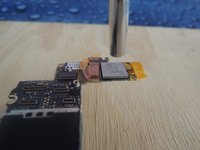
Remove the adhesive protection on the Wi-Fi/bluetooth chip.
-
Now we can see the Murata SS1830010 chip.
-
-
-
Edit: the correct temperature is almost 180-200 °C because around the chip there is a little black protection that can go under the chip.
-
Set a low air flow: 1 or 2 (on a 1 to 7 scale).
-
Now, doing circular movement, you have to reflow for 4-5 minutes.
-
After 5 minutes, gradually decrease the temperature from 200 to 0 °C.
-


To reassemble your device, follow these instructions in reverse order.
To reassemble your device, follow these instructions in reverse order.
Annuleren: ik heb deze handleiding niet afgemaakt.
188 andere personen hebben deze handleiding voltooid.
124 opmerkingen
Mille grazie, Andrea! I completed the repair thanks to your awesome Guide. Could it be you forgot to describe disassembly of the camera + surroundings? I took it out, too.
However, thank you,
Alex
Feel free to describe...
floresc -
you dont need to take out the surrounding and the vibrator, you have just to take out the motherboard, so u dont need to do that..
the camera yes, you have to pull out. im sorry
reply to @Alex Holzhey
Thank you! i'm happy to hear this. and i'm glad to know that my guide is useful. anyway i have done a "copy and paste" for the first 20 steps, so i dont care about if something is the guide is missing..i think that if someone wanna try this guide, he have to know a little how to disassemble his phone. :)
Thanks again