Ga door naar hoofdinhoud

Honda 6500 Watt Generator EG6500CL AT Brush Assembly Replacement

Wat je nodig hebt

  1. Honda 6500 Watt Generator EG6500CL AT Brush Assembly Replacement, Honda 6500 Watt Generator EG6500CL AT Safety Precautions: stap 1, afbeelding 1 van 2 Honda 6500 Watt Generator EG6500CL AT Brush Assembly Replacement, Honda 6500 Watt Generator EG6500CL AT Safety Precautions: stap 1, afbeelding 2 van 2
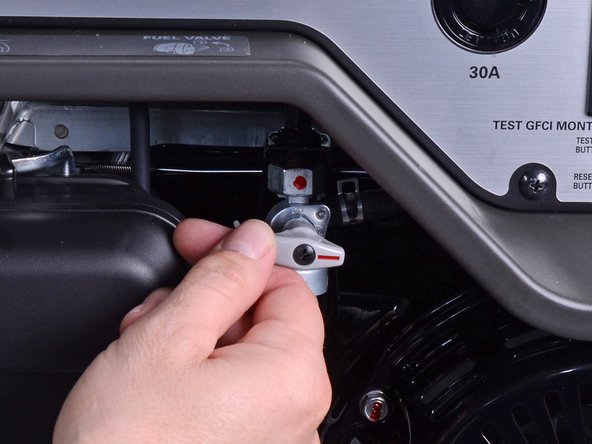
    • Before you work on the device, make sure to switch the engine off.

    • Switch the circuit breaker off.

  2. Honda 6500 Watt Generator EG6500CL AT Brush Assembly Replacement, Disconnect the spark plug: stap 2, afbeelding 1 van 2 Honda 6500 Watt Generator EG6500CL AT Brush Assembly Replacement, Disconnect the spark plug: stap 2, afbeelding 2 van 2
    • Grab the plastic housing at the end of the spark plug wire.

    • Pull firmly to disconnect the wire from the spark plug.

  3. Honda 6500 Watt Generator EG6500CL AT Brush Assembly Replacement: stap 3, afbeelding 1 van 2 Honda 6500 Watt Generator EG6500CL AT Brush Assembly Replacement: stap 3, afbeelding 2 van 2
    • Twist the fuel valve clockwise into the cutoff position.

  4. Honda 6500 Watt Generator EG6500CL AT Brush Assembly Replacement, Remove the generator cover: stap 4, afbeelding 1 van 1
    • Use a Phillips screwdriver to remove the two screws securing the generator cover.

  5. Honda 6500 Watt Generator EG6500CL AT Brush Assembly Replacement: stap 5, afbeelding 1 van 2 Honda 6500 Watt Generator EG6500CL AT Brush Assembly Replacement: stap 5, afbeelding 2 van 2
    • Remove the generator cover.

  6. Honda 6500 Watt Generator EG6500CL AT Brush Assembly Replacement, Remove the brush assembly: stap 6, afbeelding 1 van 2 Honda 6500 Watt Generator EG6500CL AT Brush Assembly Replacement, Remove the brush assembly: stap 6, afbeelding 2 van 2
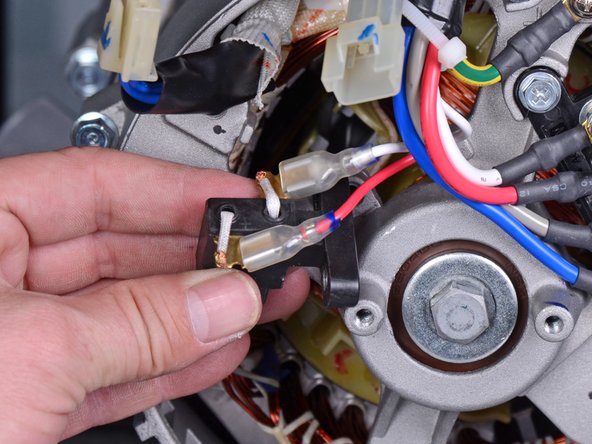
    • Squeeze and disconnect the stator connector from the wiring harness.

  7. Honda 6500 Watt Generator EG6500CL AT Brush Assembly Replacement: stap 7, afbeelding 1 van 2 Honda 6500 Watt Generator EG6500CL AT Brush Assembly Replacement: stap 7, afbeelding 2 van 2
    • Use a 10 mm socket to remove the bolt securing the brush assembly.

    • Pull the brush assembly out slightly from its recess.

  8. Honda 6500 Watt Generator EG6500CL AT Brush Assembly Replacement: stap 8, afbeelding 1 van 2 Honda 6500 Watt Generator EG6500CL AT Brush Assembly Replacement: stap 8, afbeelding 2 van 2
    • Disconnect the two spade connectors from the brush assembly.

  9. Honda 6500 Watt Generator EG6500CL AT Brush Assembly Replacement: stap 9, afbeelding 1 van 2 Honda 6500 Watt Generator EG6500CL AT Brush Assembly Replacement: stap 9, afbeelding 2 van 2
    • Remove the brush assembly.

    • During reassembly, use the second photo as reference for how to wire the brush assembly.

Conclusie

To reassemble your device, follow these instructions in reverse order.

Arthur Shi

Lid sinds: 01/03/18

254.682 Reputatie

529 handleidingen geschreven

Team

iFixit Lid van iFixit

Staff

136 Leden

17.439 handleidingen geschreven

0 opmerkingen

Voeg opmerking toe

Weergavestatistieken:

Afgelopen 24 uren: 0

Afgelopen 7 dagen: 7

Afgelopen 30 dagen: 12

Altijd: 672