Ga door naar hoofdinhoud

Hisense Sero 8 Speaker Replacement

Wat je nodig hebt

  1. Hisense Sero 8 Speaker Replacement, Speaker: stap 1, afbeelding 1 van 3 Hisense Sero 8 Speaker Replacement, Speaker: stap 1, afbeelding 2 van 3 Hisense Sero 8 Speaker Replacement, Speaker: stap 1, afbeelding 3 van 3
    • Remove the back cover of the device using a combination of both plastic opening tools.

    • Use your plastic opening tool to pry open a corner of the device. Continue using the tool down the side of the device to open it completely.

  2. Hisense Sero 8 Speaker Replacement: stap 2, afbeelding 1 van 1
    • Remove the black tape located to the left of the device.

  3. Hisense Sero 8 Speaker Replacement: stap 3, afbeelding 1 van 1
    • Use a Phillips head #00 screwdriver to remove the two 4.43mm screws on the bottom that keep the speakers in place.

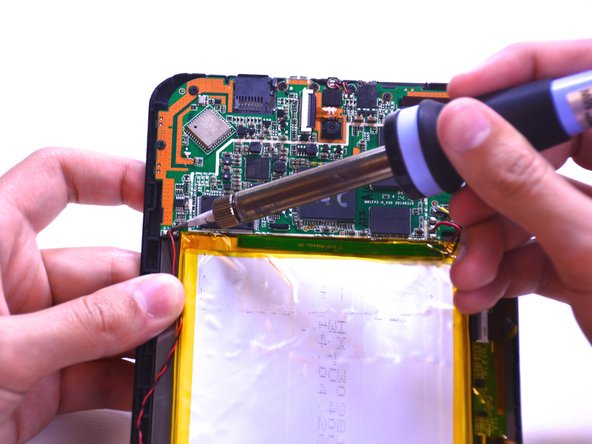
  4. Hisense Sero 8 Speaker Replacement: stap 4, afbeelding 1 van 2 Hisense Sero 8 Speaker Replacement: stap 4, afbeelding 2 van 2
    • Unsolder the red and black wires connecting the speaker to the motherboard. Take a look at this guide to learn how to solder and unsolder connections.

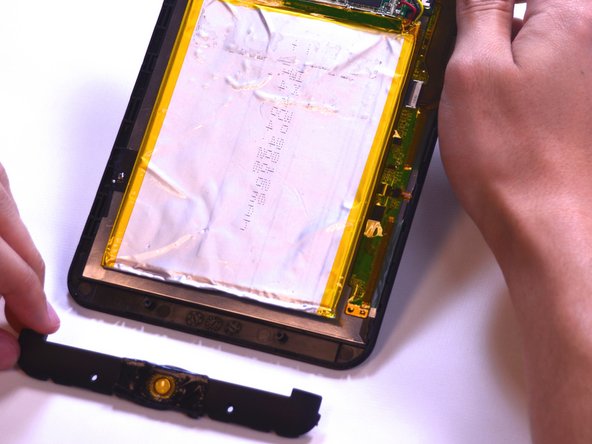
  5. Hisense Sero 8 Speaker Replacement: stap 5, afbeelding 1 van 2 Hisense Sero 8 Speaker Replacement: stap 5, afbeelding 2 van 2
    • Use the spudger tool to remove the speaker panel carefully.

Conclusie

To reassemble your device, follow these instructions in reverse order.

Één andere persoon heeft deze handleiding voltooid.

Katharina

Lid sinds: 02/23/15

506 Reputatie

2 handleidingen geschreven

Team

USF Tampa, Team 1-2, Leahy Winter 2015 Lid van USF Tampa, Team 1-2, Leahy Winter 2015

USFT-LEAHY-W15S1G2

3 Leden

10 handleidingen geschreven

0 opmerkingen

Voeg opmerking toe

Weergavestatistieken:

Afgelopen 24 uren: 0

Afgelopen 7 dagen: 0

Afgelopen 30 dagen: 1

Altijd: 565