Ga door naar hoofdinhoud

Heyday Suitcase Turntable Volume Knob Replacement

Wat je nodig hebt

  1. Heyday Suitcase Turntable Volume Knob Replacement, Baseboard: stap 1, afbeelding 1 van 1
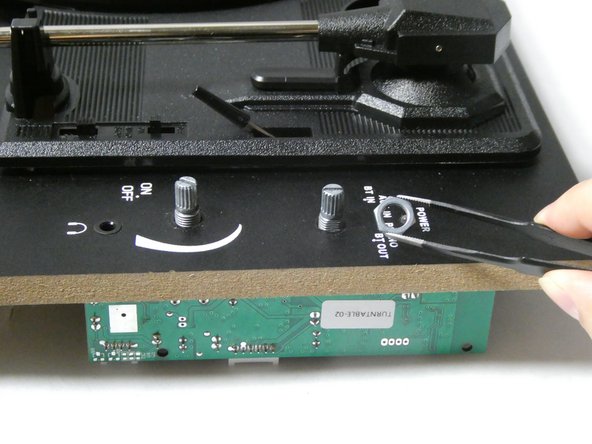
    • Use a Phillips #2 screwdriver to remove the four screws on each corner of the baseboard.

  2. Heyday Suitcase Turntable Volume Knob Replacement: stap 2, afbeelding 1 van 1
    • Use a metal spudger to pry the baseboard off of the case.

    • Be cautious of the cords and circuit located underneath the knob and the lever. Don't pull or yank the baseboard off.

  3. Heyday Suitcase Turntable Volume Knob Replacement: stap 3, afbeelding 1 van 2 Heyday Suitcase Turntable Volume Knob Replacement: stap 3, afbeelding 2 van 2
    • Disconnect the cords from the circuit board.

    • Take a picture beforehand so it's easier to put them back during reassembly.

    • Remove the baseboard.

  4. Heyday Suitcase Turntable Volume Knob Replacement, Volume Knob: stap 4, afbeelding 1 van 1
    • Use a metal spudger to pry the volume knob off of the baseboard.

  5. Heyday Suitcase Turntable Volume Knob Replacement: stap 5, afbeelding 1 van 2 Heyday Suitcase Turntable Volume Knob Replacement: stap 5, afbeelding 2 van 2
    • Use your fingers to unscrew the nut securing the volume knob.

  6. Heyday Suitcase Turntable Volume Knob Replacement: stap 6, afbeelding 1 van 1
    • Use a metal spudger to pry the power knob off of the baseboard.

  7. Heyday Suitcase Turntable Volume Knob Replacement: stap 7, afbeelding 1 van 2 Heyday Suitcase Turntable Volume Knob Replacement: stap 7, afbeelding 2 van 2
    • Use your fingers to unscrew the nut securing the power knob.

  8. Heyday Suitcase Turntable Volume Knob Replacement: stap 8, afbeelding 1 van 1
    • Pull the circuit board down from the baseboard to separate them.

  9. Heyday Suitcase Turntable Volume Knob Replacement: stap 9, afbeelding 1 van 1
    • To release the volume knob, desolder each of the eight solder joints.

    • Make sure to take proper safety precautions while operating soldering iron. For a review, take a look at the guide on How to Solder and Desolder Connections.

Conclusie

To reassemble your device, follow these instructions in reverse order.

Caroline D'Amato

Lid sinds: 10/26/22

565 Reputatie

6 handleidingen geschreven

Team

UMass Dartmouth, Team 2-1, Petersen Fall 2022 Lid van UMass Dartmouth, Team 2-1, Petersen Fall 2022

UMASSD-PETERSEN-F22S2G1

4 Leden

7 handleidingen geschreven

0 opmerkingen

Voeg opmerking toe

Weergavestatistieken:

Afgelopen 24 uren: 0

Afgelopen 7 dagen: 1

Afgelopen 30 dagen: 5

Altijd: 121