Ga door naar hoofdinhoud
Word lid van de reparatiegemeenschap - Account aanmaken

HTC One Max Motherboard Replacement

Wat je nodig hebt

  1. HTC One Max Motherboard Replacement, Back Case: stap 1, afbeelding 1 van 1
    • Lift back cover while pressing highlighted release switch towards the center of the phone.

    Vraag FixBot

    Voeg opmerking toe

  2. HTC One Max Motherboard Replacement: stap 2, afbeelding 1 van 2 HTC One Max Motherboard Replacement: stap 2, afbeelding 2 van 2
    • Remove the four white stickers in each corner that cover the Tri-Wing screws.

    • Remove the white sticker near the buttons that control the volume.

    • Remove the white sticker near the SIM card.

    • Remove the big white sticker with the bar-code in the center of the phone.

    Vraag FixBot

    Voeg opmerking toe

  3. HTC One Max Motherboard Replacement: stap 3, afbeelding 1 van 1
    • Remove the thirteen Tri-Wing Y00 screws (Upper & Lower screws are 5 mm length, middle screws are 3.8 mm length) from the back case.

    • Disconnect the cable near the volume buttons.

    Vraag FixBot

    Voeg opmerking toe

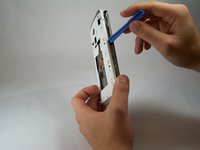
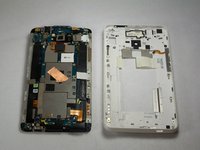
  4. HTC One Max Motherboard Replacement: stap 4, afbeelding 1 van 2 HTC One Max Motherboard Replacement: stap 4, afbeelding 2 van 2
    • Use the small plastic opening tool to pry between the screen and the rear case.

    Vraag FixBot

    Voeg opmerking toe

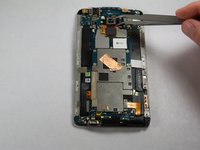
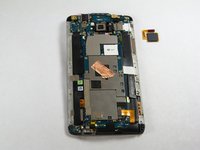
  5. HTC One Max Motherboard Replacement, Fingerprint Sensor: stap 5, afbeelding 1 van 2 HTC One Max Motherboard Replacement, Fingerprint Sensor: stap 5, afbeelding 2 van 2
    Gereedschap gebruikt in deze stap:
    Tweezers
    $4.99
    • Use Tweezers to disconnect the ribbon cable connecting the fingerprint sensor to the motherboard.

    • When replacing the fingerprint sensor, make sure the ribbon cable snaps into the port on the motherboard.

    Vraag FixBot

    Voeg opmerking toe

  6. HTC One Max Motherboard Replacement, Motherboard: stap 6, afbeelding 1 van 2 HTC One Max Motherboard Replacement, Motherboard: stap 6, afbeelding 2 van 2
    • Remove the two 2.2 mm Phillips #000 screws holding the battery cable.

    • Use a plastic tool to remove the ribbon cable.

    Vraag FixBot

    Voeg opmerking toe

  7. HTC One Max Motherboard Replacement: stap 7, afbeelding 1 van 2 HTC One Max Motherboard Replacement: stap 7, afbeelding 2 van 2
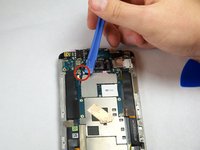
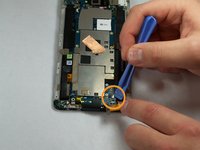
    • Use the plastic opening tool to disconnect the two antenna wires at the top of the phone.

    • Use the plastic opening tool to disconnect a third antenna wire at the bottom of the phone.

    Vraag FixBot

    Voeg opmerking toe

  8. HTC One Max Motherboard Replacement: stap 8, afbeelding 1 van 1
    • Remove the seven 3 mm Phillips #000 screws from the motherboard.

    Vraag FixBot

    Voeg opmerking toe

  9. HTC One Max Motherboard Replacement: stap 9, afbeelding 1 van 3 HTC One Max Motherboard Replacement: stap 9, afbeelding 2 van 3 HTC One Max Motherboard Replacement: stap 9, afbeelding 3 van 3
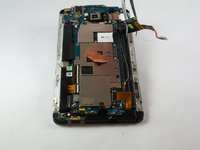
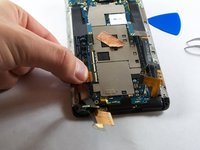
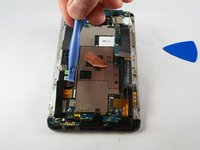
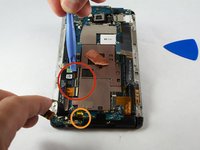
    • Use a plastic tool to pry up and disconnect the large ribbon cables on each side of the motherboard.

    • Use caution prying the ribbon cable on the right side because other ribbon cables run under it.

    Vraag FixBot

    Voeg opmerking toe

  10. HTC One Max Motherboard Replacement: stap 10, afbeelding 1 van 3 HTC One Max Motherboard Replacement: stap 10, afbeelding 2 van 3 HTC One Max Motherboard Replacement: stap 10, afbeelding 3 van 3
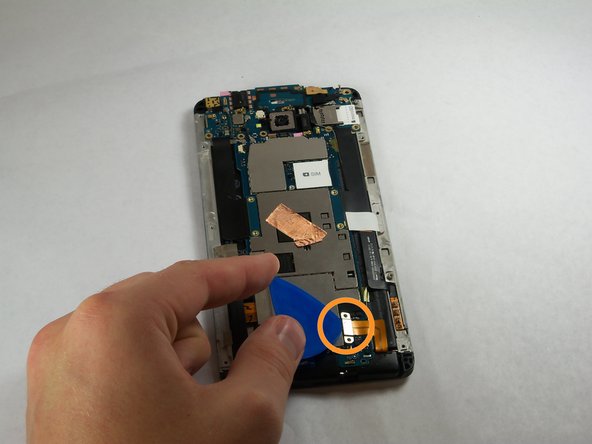
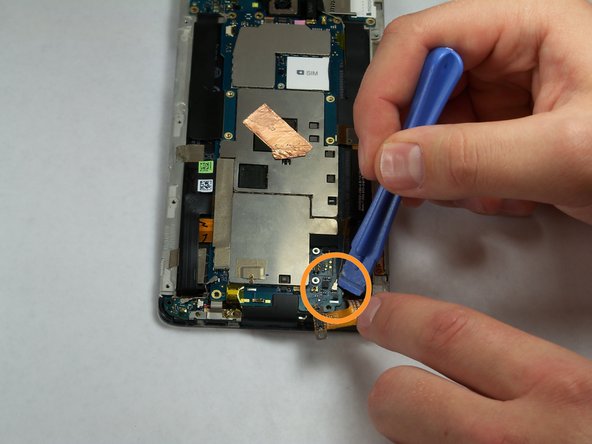
    • Remove the tape covering three flex cable gate connectors on the bottom left side of the phone.

    • Use small plastic opening tool to pry open the latch on each of these gate connectors to disconnect the three cables.

    • Use small plastic opening tool to pry open the latch on each of these gate connectors to disconnect the three cables.

    Vraag FixBot

    Voeg opmerking toe

  11. HTC One Max Motherboard Replacement: stap 11, afbeelding 1 van 2 HTC One Max Motherboard Replacement: stap 11, afbeelding 2 van 2
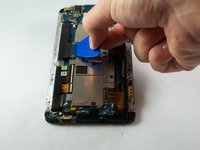
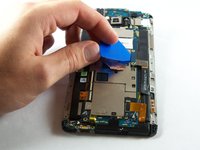
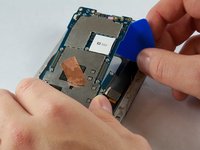
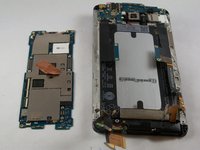
    • Use a plastic tool to lift and remove the motherboard.

    • Use a heat gun to loosen adhesive at bottom if needed.

    Vraag FixBot

    Voeg opmerking toe

Conclusie

To reassemble your device, follow these instructions in reverse order.

Annuleren: ik heb deze handleiding niet afgemaakt.

6 andere personen hebben deze handleiding voltooid.

Andrew Keller

Lid sinds: 09/23/14

1.131 Reputatie

5 handleidingen geschreven

Team

USF Tampa, Team 11-3, Blackwell Fall 2014 Lid van USF Tampa, Team 11-3, Blackwell Fall 2014

USFT-BLACKWELL-F14S11G3

4 Leden

7 handleidingen geschreven

0Gids Commentaar

Voeg opmerking toe

Weergavestatistieken:

Afgelopen 24 uren: 0

Afgelopen 7 dagen: 8

Afgelopen 30 dagen: 40

Altijd: 6,068