Ga door naar hoofdinhoud
Word lid van de reparatiegemeenschap - Account aanmaken

HTC Droid DNA Rear-Facing Camera Replacement

Wat je nodig hebt

  1. HTC Droid DNA Rear-Facing Camera Replacement, Remove the SIM Card Tray: stap 1, afbeelding 1 van 1
    • Poke a paperclip into the hole to the right of the SIM Card Tray. The SIM Card Tray will automatically pop out.

    Vraag FixBot
  2. HTC Droid DNA Rear-Facing Camera Replacement, Removing the SIM Card Tray: stap 2, afbeelding 1 van 2 HTC Droid DNA Rear-Facing Camera Replacement, Removing the SIM Card Tray: stap 2, afbeelding 2 van 2
    • Pull out the SIM Card Tray with your fingers.

    Vraag FixBot
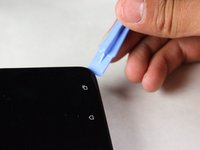
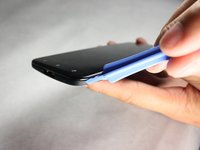
  3. HTC Droid DNA Rear-Facing Camera Replacement, Loosen the Phone Casing: stap 3, afbeelding 1 van 2 HTC Droid DNA Rear-Facing Camera Replacement, Loosen the Phone Casing: stap 3, afbeelding 2 van 2
    • Make sure the USB cover on the bottom of the phone is removed first.

    • Starting at a corner, slowly work your way around the edge of the sides with your prying tool to loosen the front panel.

    • Take your time. A lot of force is necessary to loosen the front panel.

    Vraag FixBot
  4. HTC Droid DNA Rear-Facing Camera Replacement, Pull the Casing Apart: stap 4, afbeelding 1 van 1
    • Slowly pull the panel apart from the back of the phone.

    • Apply a moderate force to pry the panel from the back of the phone.

    Vraag FixBot
  5. HTC Droid DNA Rear-Facing Camera Replacement, Remove the Black Tape: stap 5, afbeelding 1 van 1
    • Set the device down so that the bottom of the phone is facing to the right.

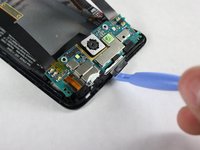
    • Gently take off the piece of black tape surrounding the motherboard.

    • Be careful not to rip the tape.

    Vraag FixBot
  6. HTC Droid DNA Rear-Facing Camera Replacement, Remove the Yellow Tape: stap 6, afbeelding 1 van 1
    Gereedschap gebruikt in deze stap:
    Tweezers
    $4.99
    • Use your tweezers to take off the yellow tape on the bottom left corner of the phone.

    Vraag FixBot
  7. HTC Droid DNA Rear-Facing Camera Replacement: stap 7, afbeelding 1 van 1
    • Rotate your phone 90 degrees clockwise so the bottom of the phone is facing you.

    • Use the T5 Torx screwdriver to remove the two 4mm screws located at the bottom of the phone.

    Vraag FixBot
  8. HTC Droid DNA Rear-Facing Camera Replacement, Remove the Void Screw: stap 8, afbeelding 1 van 1
    • Use the Phillips #000 screwdriver to remove the single 2.7mm void screw on the bottom right.

    Vraag FixBot
  9. HTC Droid DNA Rear-Facing Camera Replacement, Remove the Screw Retaining Bracket: stap 9, afbeelding 1 van 1
    • Rotate your phone back 90 Degrees counter-clockwise.

    • Use your tweezers to take off the small metal retaining bracket on the bottom right of the phone.

    Vraag FixBot
  10. HTC Droid DNA Rear-Facing Camera Replacement, Remove the Connector Screws: stap 10, afbeelding 1 van 1
    • Remove the following Phillips #000 screws from the motherboard:

    • Four 1.6 mm screws

    • Two 1.5 mm screws

    Vraag FixBot
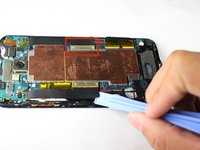
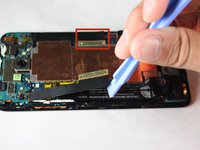
  11. HTC Droid DNA Rear-Facing Camera Replacement, Unfasten the Connectors: stap 11, afbeelding 1 van 2 HTC Droid DNA Rear-Facing Camera Replacement, Unfasten the Connectors: stap 11, afbeelding 2 van 2
    • Use your pry tool to unfasten the connectors on both sides of the motherboard.

    • The connectors will still be attached to the green camera board at the top so DO NOT try to pull them off or bend them severely.

    Vraag FixBot
  12. HTC Droid DNA Rear-Facing Camera Replacement, Remove the Yellow Tape: stap 12, afbeelding 1 van 1
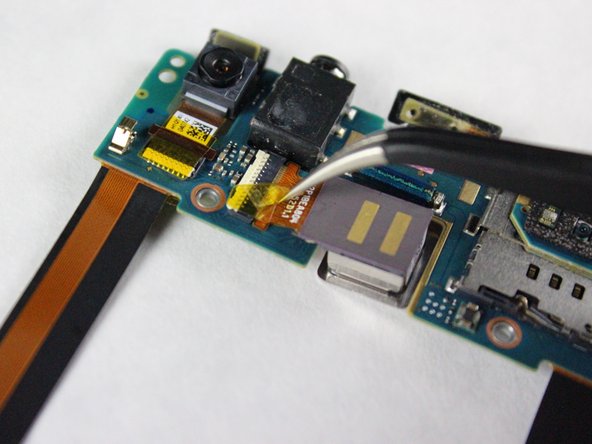
    • Use your tweezers to remove the two pieces of yellow tape shown.

    Vraag FixBot
  13. HTC Droid DNA Rear-Facing Camera Replacement, Flipping up the White Board: stap 13, afbeelding 1 van 2 HTC Droid DNA Rear-Facing Camera Replacement, Flipping up the White Board: stap 13, afbeelding 2 van 2
    • Use your tweezers to gently snap up the white board on the bottom right of the motherboard.

    Vraag FixBot
  14. HTC Droid DNA Rear-Facing Camera Replacement, Disconnect the Connector: stap 14, afbeelding 1 van 1
    • Use your tweezers to disconnect the black connector on the bottom right of the motherboard.

    • Be careful not to bend the Flex Cable of the Connector.

    Vraag FixBot
  15. HTC Droid DNA Rear-Facing Camera Replacement, Flipping up the White Board: stap 15, afbeelding 1 van 2 HTC Droid DNA Rear-Facing Camera Replacement, Flipping up the White Board: stap 15, afbeelding 2 van 2
    • Use your tweezers to gently snap the other white board on the bottom right of the motherboard up.

    Vraag FixBot
  16. HTC Droid DNA Rear-Facing Camera Replacement, Disconnect the Connector: stap 16, afbeelding 1 van 1
    • Use your tweezers to disconnect the other small connector on the bottom right of the motherboard.

    • Be careful not to bend the Flex Cables for the Connector.

    Vraag FixBot
  17. HTC Droid DNA Rear-Facing Camera Replacement, Flipping up the White Board: stap 17, afbeelding 1 van 2 HTC Droid DNA Rear-Facing Camera Replacement, Flipping up the White Board: stap 17, afbeelding 2 van 2
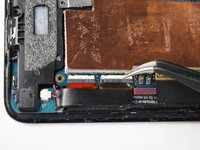
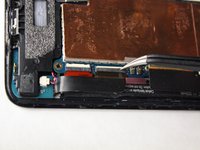
    • Rotate the phone 180 degrees.

    • Use your tweezers to gently snap up the white board on the top left of the motherboard.

    Vraag FixBot
  18. HTC Droid DNA Rear-Facing Camera Replacement, Disconnect the Connector: stap 18, afbeelding 1 van 1
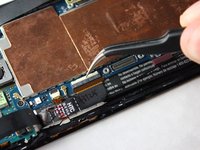
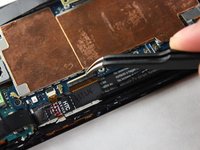
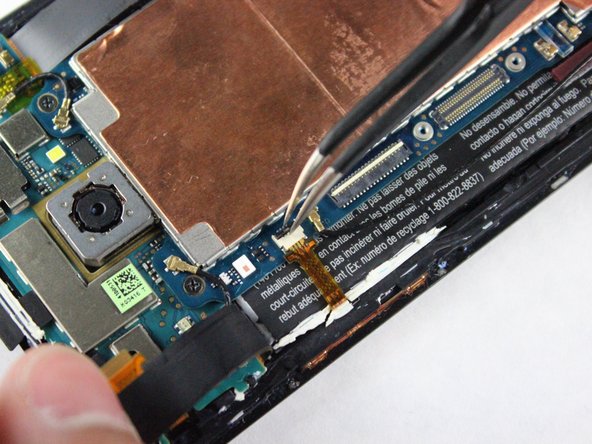
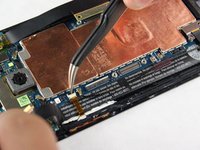
    • Use your tweezers to disconnect the cable on the top left of the motherboard.

    • Be careful not to bend the Flex Cable of the Connector.

    Vraag FixBot
  19. HTC Droid DNA Rear-Facing Camera Replacement, Flipping up the Black Board: stap 19, afbeelding 1 van 2 HTC Droid DNA Rear-Facing Camera Replacement, Flipping up the Black Board: stap 19, afbeelding 2 van 2
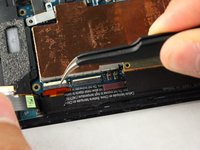
    • Use your tweezers to gently snap up the black board on the top left of the motherboard.

    Vraag FixBot
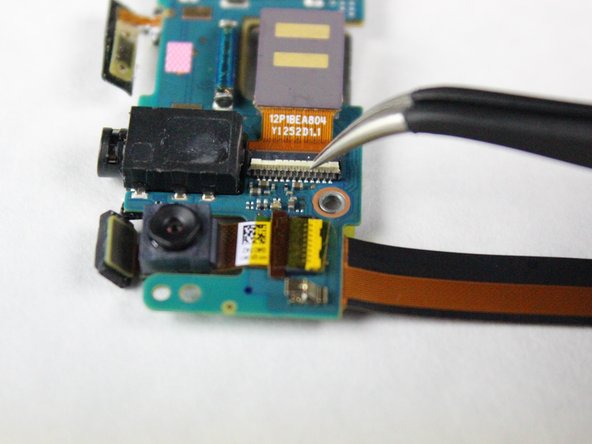
  20. HTC Droid DNA Rear-Facing Camera Replacement, Disconnect the Small Ribbon Connector: stap 20, afbeelding 1 van 1
    • Use your tweezers to gently remove the yellow connector on the top left of the phone.

    Vraag FixBot
  21. HTC Droid DNA Rear-Facing Camera Replacement, Remove the Black Wire: stap 21, afbeelding 1 van 1
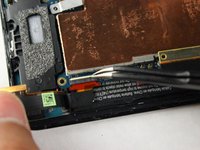
    • Remove the long black wire on the left of the motherboard.

    Vraag FixBot
  22. HTC Droid DNA Rear-Facing Camera Replacement, Remove the Two Black Wires: stap 22, afbeelding 1 van 1
    • Reorient the phone so that the green camera board is farthest from you.

    • Use your tweezers to remove the two wires located at the top of the board. The wires snap off very easily so not much force is needed.

    Vraag FixBot
  23. HTC Droid DNA Rear-Facing Camera Replacement, Remove the Screws: stap 23, afbeelding 1 van 1
    • Use a Phillips #000 screwdriver to remove the two 3.9mm screws on top of motherboard.

    Vraag FixBot
  24. HTC Droid DNA Rear-Facing Camera Replacement, Remove the Motherboard: stap 24, afbeelding 1 van 2 HTC Droid DNA Rear-Facing Camera Replacement, Remove the Motherboard: stap 24, afbeelding 2 van 2
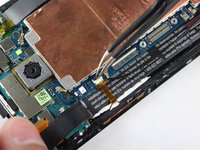
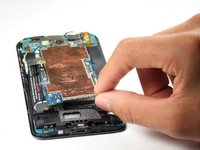
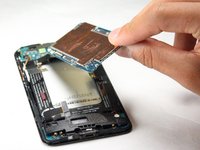
    • Now, use your fingers to slowly pull up the motherboard and remove it from the phone.

    Vraag FixBot
  25. HTC Droid DNA Rear-Facing Camera Replacement, Remove Screws: stap 25, afbeelding 1 van 1
    • Use a Phillips #000 screwdriver to remove the two 2.1mm screws on the top of the camera board.

    Vraag FixBot
  26. HTC Droid DNA Rear-Facing Camera Replacement, Loosen the Adhesive: stap 26, afbeelding 1 van 2 HTC Droid DNA Rear-Facing Camera Replacement, Loosen the Adhesive: stap 26, afbeelding 2 van 2
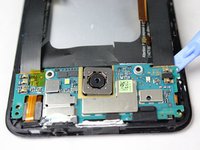
    • Use the pry tool along the bottom and sides of the camera board to loosen the adhesive.

    • The power button and headphone jack need to be carefully removed with the camera board or they could snap off of the camera board.

    Vraag FixBot
  27. HTC Droid DNA Rear-Facing Camera Replacement, Remove Camera Board: stap 27, afbeelding 1 van 1
    • Slowly lift the camera board up and work on removing the remaining adhesive. You can then take the camera board off of the phone.

    Vraag FixBot
  28. HTC Droid DNA Rear-Facing Camera Replacement, Remove Yellow Tape: stap 28, afbeelding 1 van 2 HTC Droid DNA Rear-Facing Camera Replacement, Remove Yellow Tape: stap 28, afbeelding 2 van 2
    Gereedschap gebruikt in deze stap:
    Tweezers
    $4.99
    • Use your tweezers to gently pull off the two pieces of yellow tape in the center of the camera board.

    Vraag FixBot
  29. HTC Droid DNA Rear-Facing Camera Replacement, White Connector Clip: stap 29, afbeelding 1 van 2 HTC Droid DNA Rear-Facing Camera Replacement, White Connector Clip: stap 29, afbeelding 2 van 2
    • Use your tweezers to gently flip the white connector board into the upright position.

    Vraag FixBot
  30. HTC Droid DNA Rear-Facing Camera Replacement, Remove Rear-Facing Camera: stap 30, afbeelding 1 van 1
    • Use your tweezers to remove the rear-facing camera from the camera board.

    Vraag FixBot
Conclusie

To reassemble your device, follow these instructions in reverse order.

2 andere personen hebben deze handleiding voltooid.

Adrian Williams

Lid sinds: 10/14/14

585 Reputatie

3 handleidingen geschreven

Team

Cal Poly, Team 4-43, Amido Fall 2014 Lid van Cal Poly, Team 4-43, Amido Fall 2014

CPSU-AMIDO-F14S4G43

4 Leden

10 handleidingen geschreven

0Gids Commentaar

Voeg opmerking toe

Weergavestatistieken:

Afgelopen 24 uren: 0

Afgelopen 7 dagen: 2

Afgelopen 30 dagen: 24

Altijd: 1,295