Wat je nodig hebt
-
-
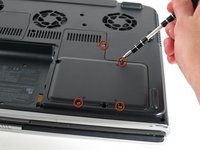
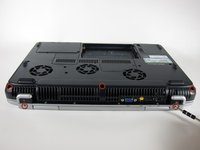
Unscrew the four 8mm Philips screws marked with an icon resembling a stacks of discs.
-
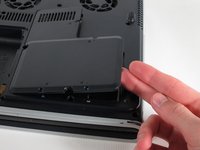
Lift the cover from the right to remove it.
-
-
Gereedschap gebruikt in deze stap:Tweezers$4.99
-
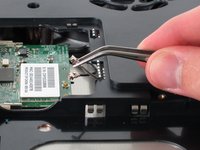
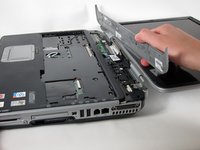
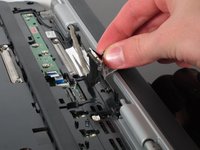
Use tweezers to detach the grey and black cables connected to the green WiFi card.
-
-
-
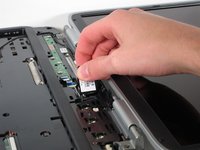
Remove the two 8mm Philips screws marked “K” on the bottom of the laptop.
-
-
-
Flip the laptop over and open the screen.
-
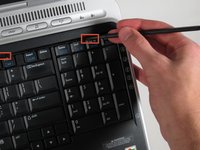
Push up on the four latches located at the top of the keyboard with the spudger to release them.
-
-
-
-
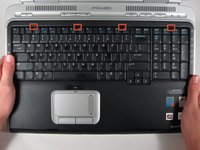
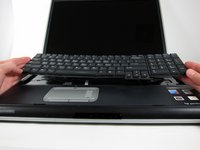
Lift the top of the keyboard towards you. Then, while keeping the keyboard at an angle, lift it towards the display.
-
-
-
Rotate the keyboard so that the bottom is visible.
-
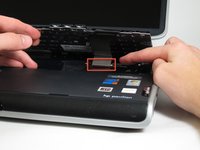
With the keyboard lifted, locate the blue-striped tab on the underside of the black ribbon cable.
-
Pull the tab towards you to release the keyboard from the laptop.
-
-
-
Place the laptop face-down and rotate it 180 degrees so the vents are facing you.
-
Remove the five 8mm Philips screws. Three are on the black base and two are near the hinges.
-
-
-
Rotate it so the display is on your right and the keyboard is on your left.
-
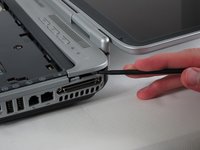
Lift the switch cover carefully from one end while sliding the spudger between the switch cover and the laptop to separate them.
-
The switch cover should easily separate from the laptop as you run the spudger through.
-
-
-
Close the lid and rotate the laptop so that the vents are facing you.
-
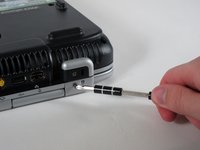
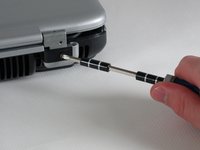
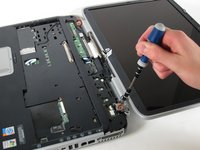
Unscrew the two 8mm Philips screws below the hinges.
-
-
-
Carefully rotate the laptop 90 degrees counter-clockwise and open the screen.
-
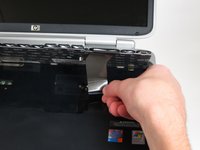
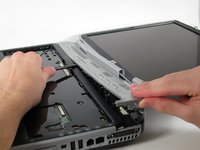
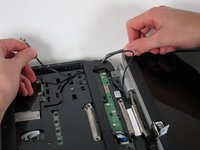
Pull on the black tab with the HP service sticker to unplug the display from the motherboard.
-
-
Gereedschap gebruikt in deze stap:Tweezers$4.99
-
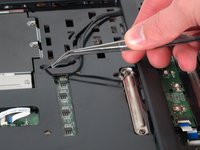
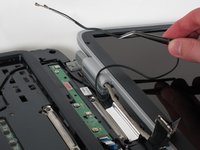
Using tweezers, remove the black cable from the hole leading to the WiFi enclosure.
-
Pull gently to remove the black and grey cables from the case.
-
-
-
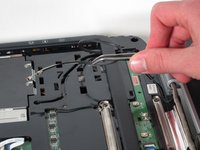
Using tweezers, pull the black cable towards the display and through the hole in the casing.
-
-
-
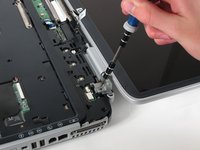
Unscrew the two 8mm Philips screws that attach the hinge to the laptop's display.
-
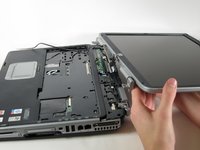
Lift the screen upwards to detach it from the laptop.
-


To reassemble your device, follow these instructions in reverse order.
Annuleren: ik heb deze handleiding niet afgemaakt.
4 andere personen hebben deze handleiding voltooid.
Team

Cal Poly, Team 24-56, Amido Spring 2011 Lid van Cal Poly, Team 24-56, Amido Spring 2011
CPSU-AMIDO-S11S24G56
4 Leden
13 handleidingen geschreven
1Gids Commentaar
As a first timer to this particular task, but with many years experience with PC hardware, the only suggestion I would make is changing the completion time from 15 minutes to 45-60 minutes.
That’s a tad more realistic for someone so unfamiliar with this particular type of job/notebook model that they had to look it up here to see how to do it.
15 minutes sounds like someone who has actually done it dozens of times before, and, hence, would not be seeking help here. A first timer would be wise to take more time and caution, certainly more than 15 minutes. Other than that, this is a great guide to replacing the zd8000 screen.