Ga door naar hoofdinhoud
Word lid van de reparatiegemeenschap - Account aanmaken

HP Pavilion Wave 600-a014 RAM Replacement

Wat je nodig hebt

  1. HP Pavilion Wave 600-a014 RAM Replacement, RAM: stap 1, afbeelding 1 van 1
    • Disconnect PC from power source and any other devices.

    Vraag FixBot
  2. HP Pavilion Wave 600-a014 RAM Replacement: stap 2, afbeelding 1 van 2 HP Pavilion Wave 600-a014 RAM Replacement: stap 2, afbeelding 2 van 2
    • Turn over computer and remove the rubber feet.

    • Remove the three 8mm Philips screws with a Philips #0 screwdriver.

    • Use a pry tool and lift up on the lid.

    Vraag FixBot
  3. HP Pavilion Wave 600-a014 RAM Replacement: stap 3, afbeelding 1 van 2 HP Pavilion Wave 600-a014 RAM Replacement: stap 3, afbeelding 2 van 2
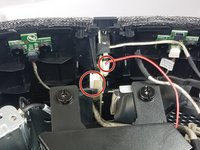
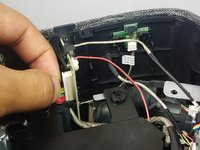
    • Remove the two cables connecting the motherboard to the front I/O panel.

    Vraag FixBot
  4. HP Pavilion Wave 600-a014 RAM Replacement: stap 4, afbeelding 1 van 2 HP Pavilion Wave 600-a014 RAM Replacement: stap 4, afbeelding 2 van 2
    • From the back I/O panel, pry open the cloth covering.

    Vraag FixBot
  5. HP Pavilion Wave 600-a014 RAM Replacement: stap 5, afbeelding 1 van 1
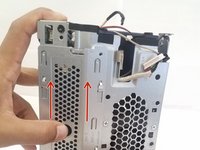
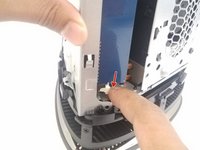
    • Remove the 2 black philips screws on the outside of the PC, to the left of the fan.

    • There is one on the top and one on the bottom.

    Vraag FixBot
  6. HP Pavilion Wave 600-a014 RAM Replacement: stap 6, afbeelding 1 van 3 HP Pavilion Wave 600-a014 RAM Replacement: stap 6, afbeelding 2 van 3 HP Pavilion Wave 600-a014 RAM Replacement: stap 6, afbeelding 3 van 3
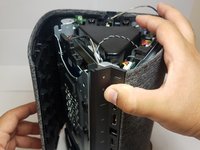
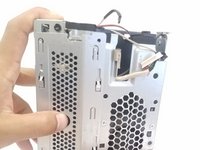
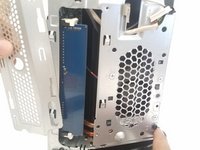
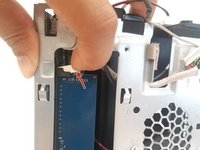
    • Put your thumb on the penny-sized hole, and slide the panel upwards.

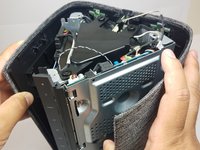
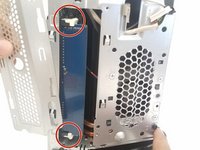
    • Remove the panel to reveal the stock blue RAM.

    Vraag FixBot
  7. HP Pavilion Wave 600-a014 RAM Replacement: stap 7, afbeelding 1 van 3 HP Pavilion Wave 600-a014 RAM Replacement: stap 7, afbeelding 2 van 3 HP Pavilion Wave 600-a014 RAM Replacement: stap 7, afbeelding 3 van 3
    • Push both of the white tabs away from the RAM stick to free the RAM.

    Vraag FixBot
  8. HP Pavilion Wave 600-a014 RAM Replacement: stap 8, afbeelding 1 van 1
    • You can now easily pull the RAM out of the socket, and replace up to two new ones!

    Vraag FixBot
Conclusie

To reassemble your device, follow these instructions in reverse order.

2 andere personen hebben deze handleiding voltooid.

Arthur Knatt

Lid sinds: 09/27/17

149 Reputatie

1 Handleiding geschreven

Team

Cal Poly, Team S8-G4, Banghart Fall 2017 Lid van Cal Poly, Team S8-G4, Banghart Fall 2017

CPSU-BANGHART-F17S8G4

4 Leden

5 handleidingen geschreven

1Gids Commentaar

Hello srs, i follow the link to the Amazon Ram, and it is So-DIMM, but we need UDIMM for this Wave, it is correct? Wich can we use? Thank you so much, and best regards.

Albert Garcia - Antwoord Deel

Voeg opmerking toe

Weergavestatistieken:

Afgelopen 24 uren: 1

Afgelopen 7 dagen: 1

Afgelopen 30 dagen: 23

Altijd: 3,351